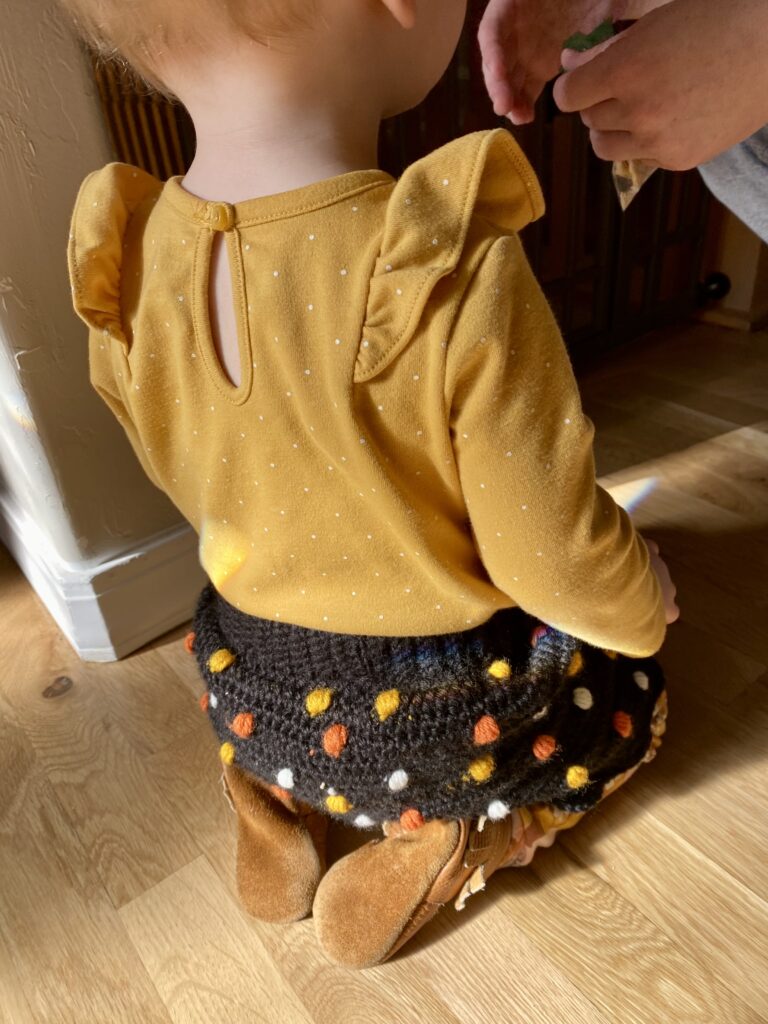
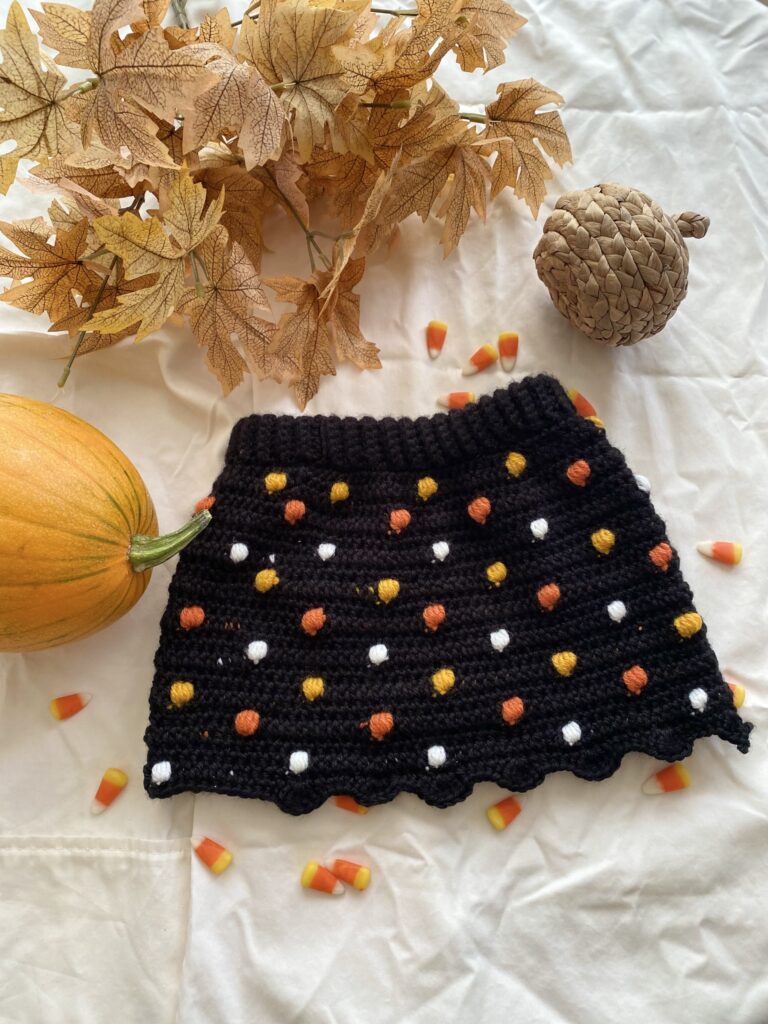
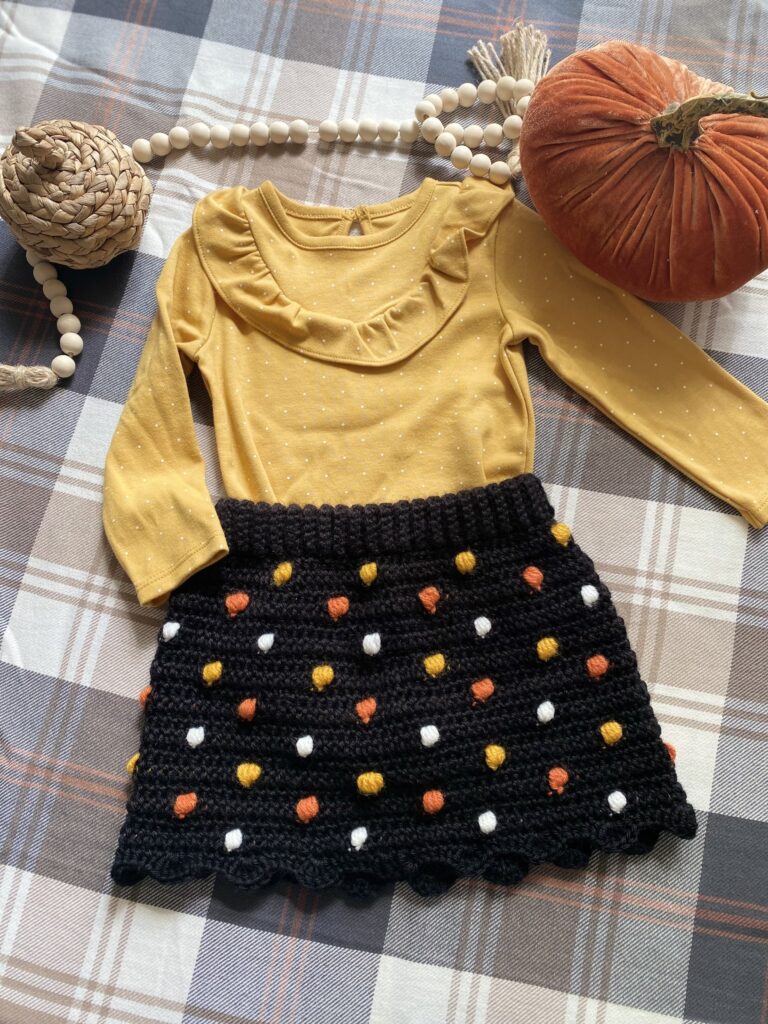
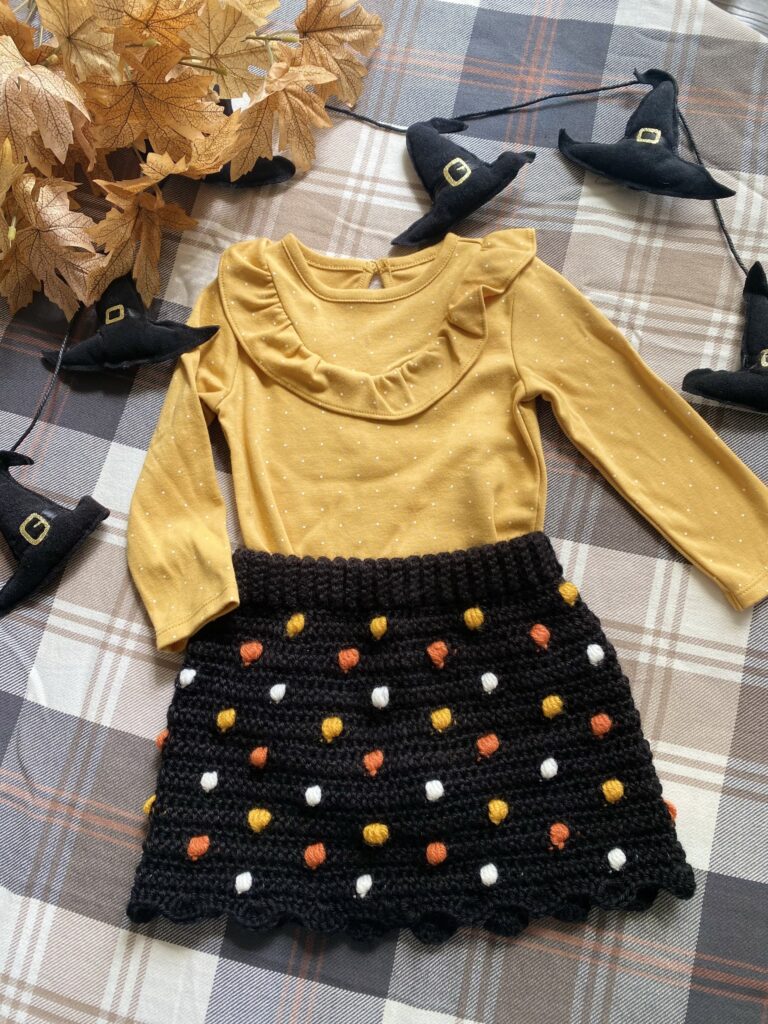
Pumpkin Patch Skirt
Intermediate advanced crochet pattern for size 18 months to 2T skirt
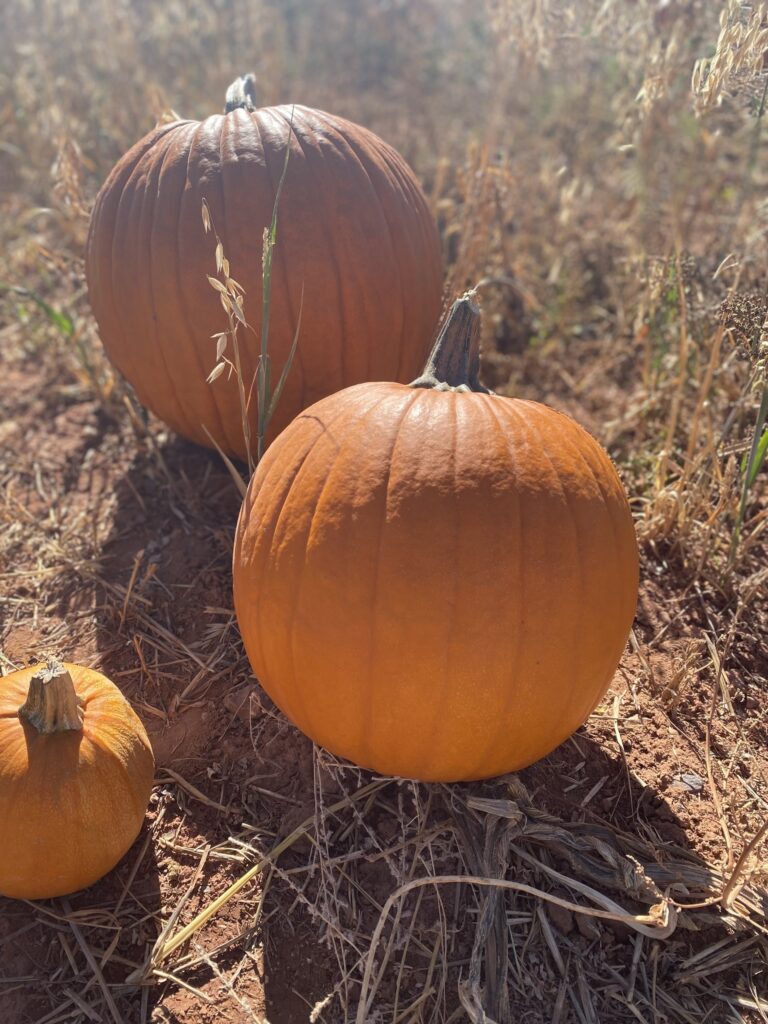
It’s a favorite tradition in our family to take the kids to the local pumpkin patch and turn them loose in the fields hunting for the perfect pumpkin to carve. I always love seeing the ones they pick and later, how they end up transforming them into scary visions of Halloween terror. While they are searching for their own version of the perfect one, I look for a Sugar Pie Pumpkin to make pies and cookies with and we buy honey and sugar cookies at the farm counter as we’re leaving. There’s something extra fun and exciting about introducing toddlers to family traditions and seeing them experience the excitement for the first time.
In making this skirt I thought of these special memories and how darling all the pumpkin patch babies are each year, some of them are smaller than the pumpkins. I hope you’ll enjoy crocheting this and find it to be a fun challenge with it’s colorwork practice and waistband ribbing. Happy creating!


Pattern Instructions
Materials:
- Red Heart Soft yarn in Black
- Red Heart Super Saver in Gold, Off White, and Carrot
- US size E4 3,5 mm Crochet Hook
- Elastic Waistband, 18-24 inches.
- Yarn needle
Gauge:
9 Stitches by 9 rows= 2″ X 2″ square.
Pattern used for gauge: Half double crochet
Sizes:
Baby sizing 18 months to 2T
Sizing: 9.25 inches length by 12 inches wide.
Abbreviations:
CH – Single Crochet
FSC – Foundation Single Crochet
HDC – Half-double Crochet
HDCBob- Half Double Crochet Bobble
DC – Double Crochet
SLST – Slip Stitch
ST(S) – Stitch(es)
SK – Skip
Notes:
Welcome the Autumn and Halloween seasons with this cute little pumpkin patch skirt. Beginning with a ribbed waistband casing we will then follow with crocheting the body of the skirt in one piece, finished off with a scalloped hem. This is an advanced intermediate pattern because we will be practicing color changes and carrying colors throughout the work.
Special Stitches
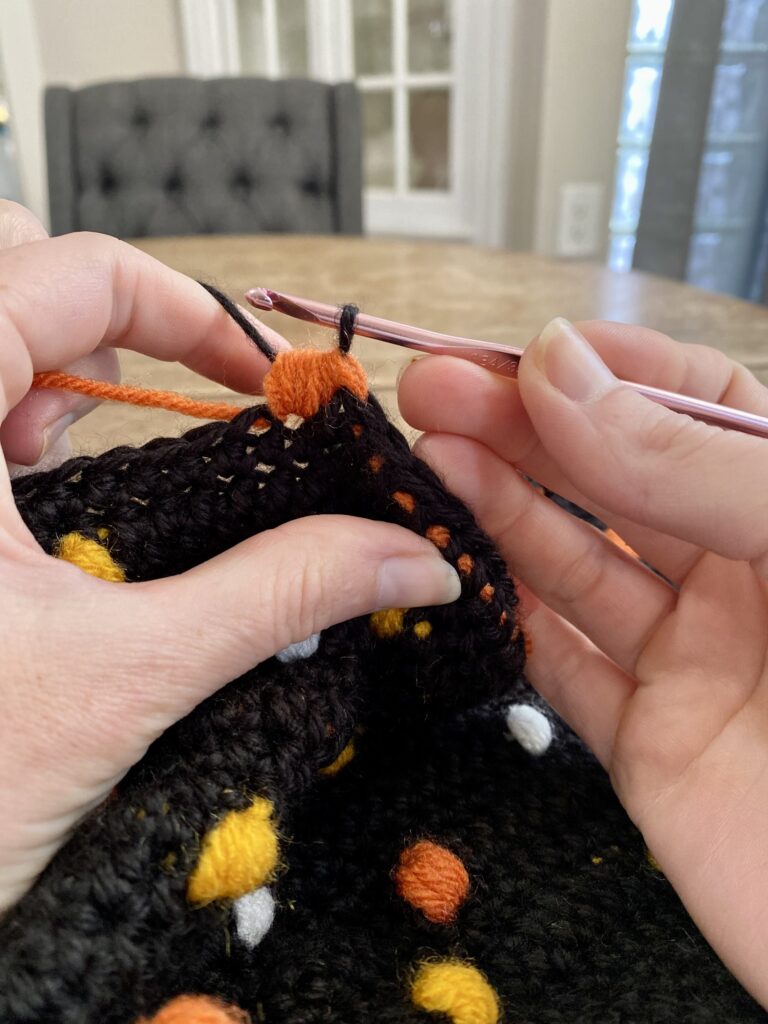
4 Half Double Crochet Bobble:
Step 1: Yarn over with contrasting color. Black yarn is positioned at the top of the work and will be crocheted over for this ST.
Step 2: Insert into next ST and pull up a loop.
Step 3: Notice how the stitch has looped around the carried black yarn in the stitch.
Step 4: Yarn over again and insert hook into the same stitch. Pull up a loop.
Step 5: Repeat yarn over and insert, pulling up a loop two more times. Now you should have 9 loops on the hook.
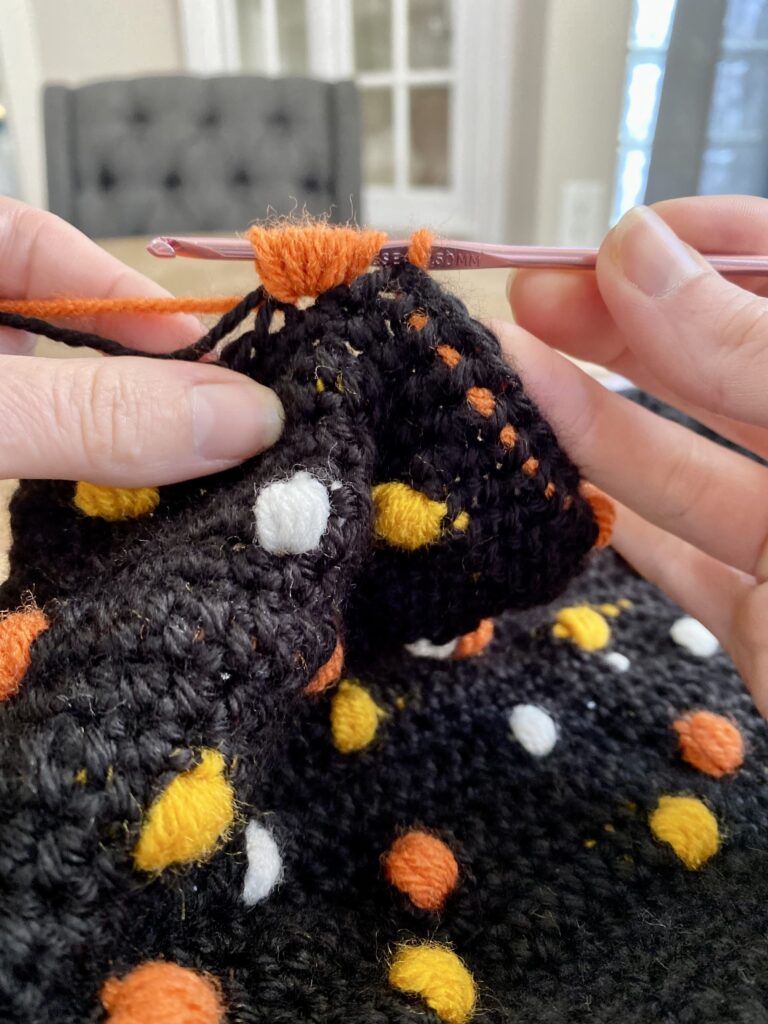
Step 6: Now yarn over with Black yarn.
Step 7: Pull the black yarn through all of the loops on the hook. 4 Half Double Crochet Bobble made.
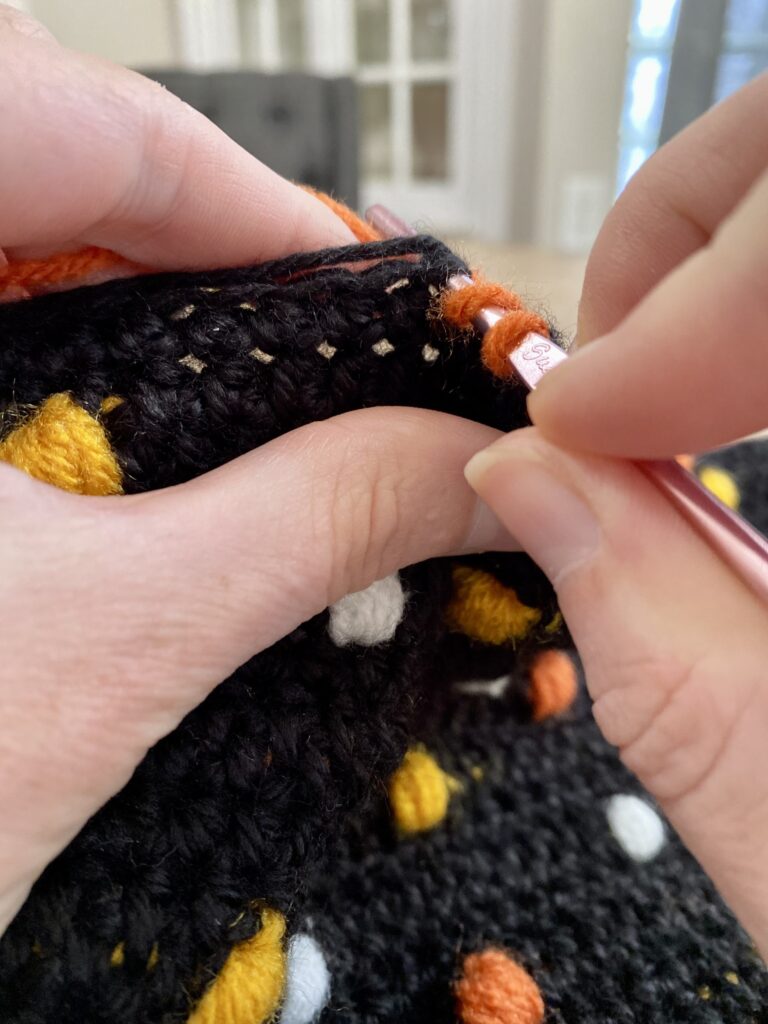
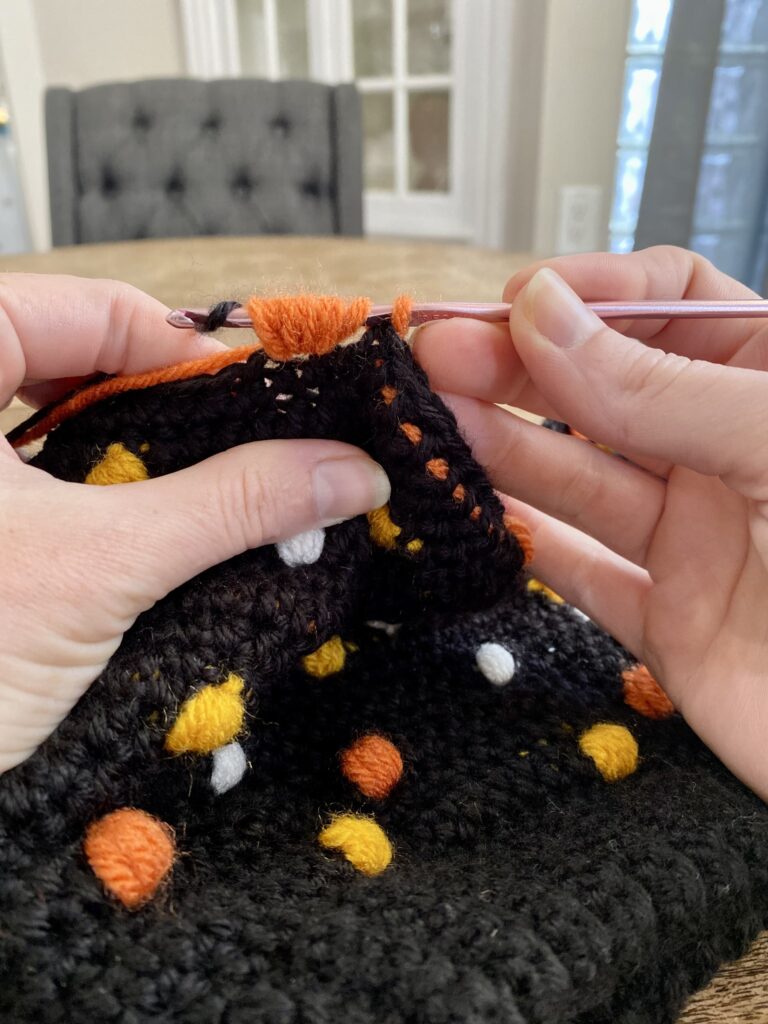
Tip for concealing the Carried yarn:
After you have carried the colored yarn throughout a row, you might notice with some yarn thicknesses that you are able to see the colored yarn between the rows. To conceal this colored strand, for the next row, when you insert the hook into the next stitch of each half double crochet around, insert your hook across the top of the colored yarn strand and just underneath the colored strand. Pull up a loop, yarn over and pull through all the loops on the hook. This lower insertion of the hook will wrap an additional strand of the black yarn around the colored yarn which will help to conceal and secure it better.
Pattern Instructions
Ribbed Waistband:
Rnd 1: With Red Heart Soft yarn in Black and size E4 hook, CH 13, turn.
Rnd 2:SC in the second chain from the hook and in each remaining stitch across. CH 1, turn. ( 12)
Rnd 3: SC in BLO in each ST across. CH 1, turn. (12)
Repeat Rnd 3 until the waistband casing reaches 19 inches or the length needed for your baby’s waist measurement. Mine has 85 rows of ribbing.
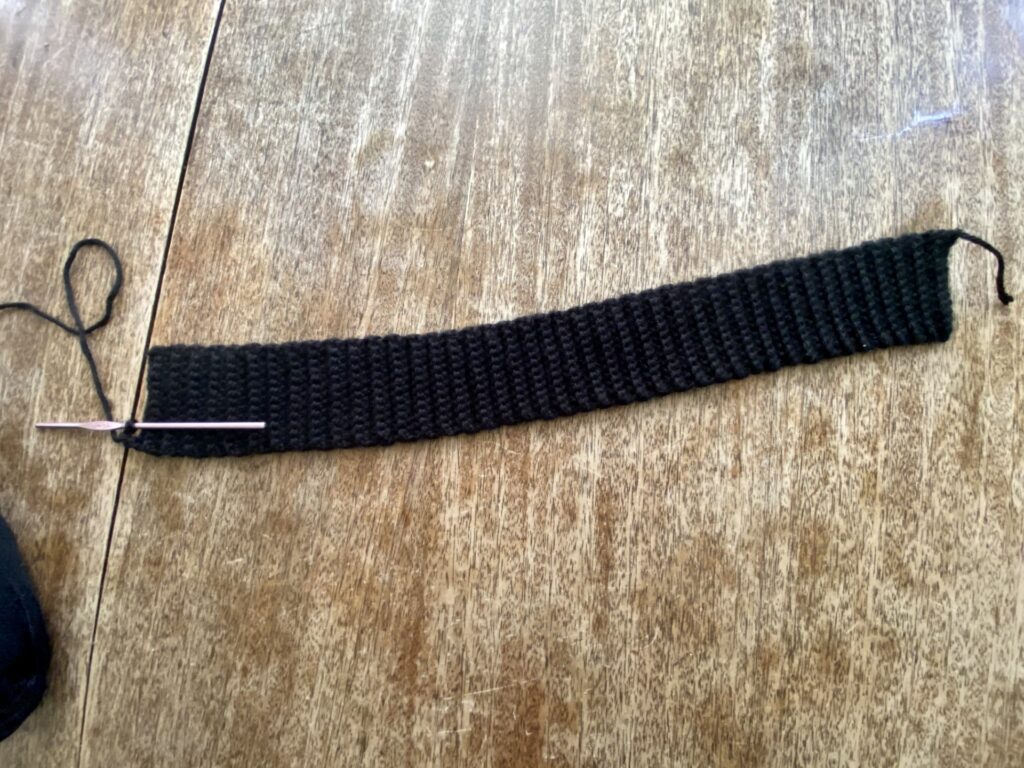
Making the Casing:
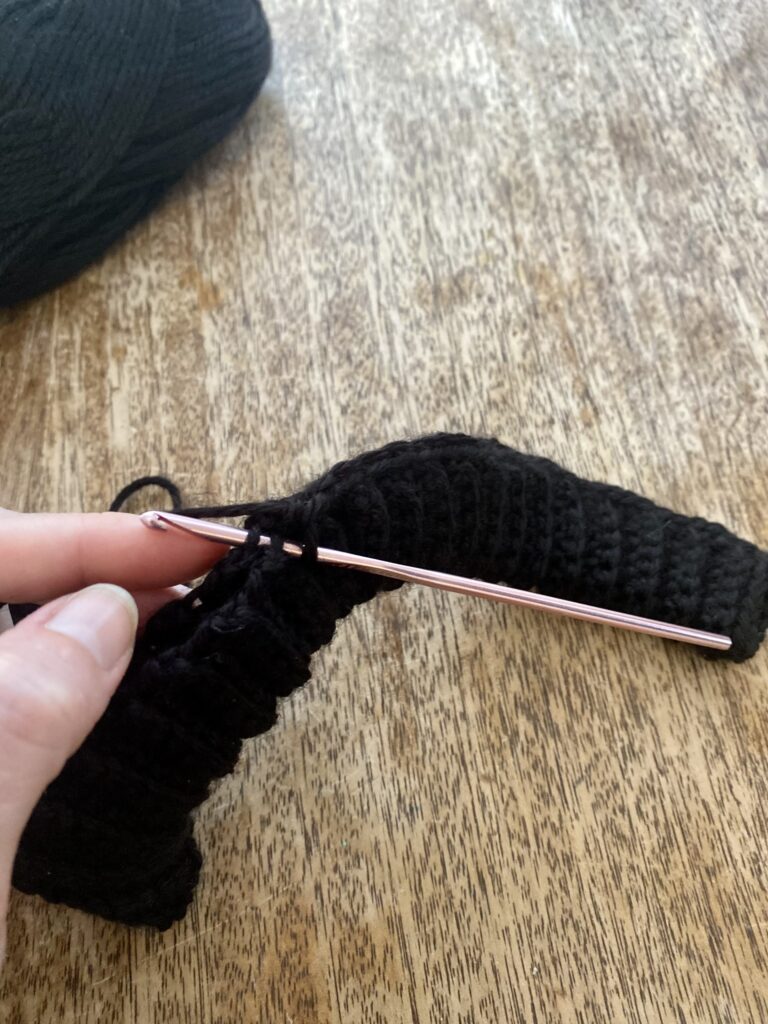
Now we will fold the waistband strip in half to create a casing for the Elastic waistband to be threaded into. (We will complete the elastic waistband at the end of the pattern.)
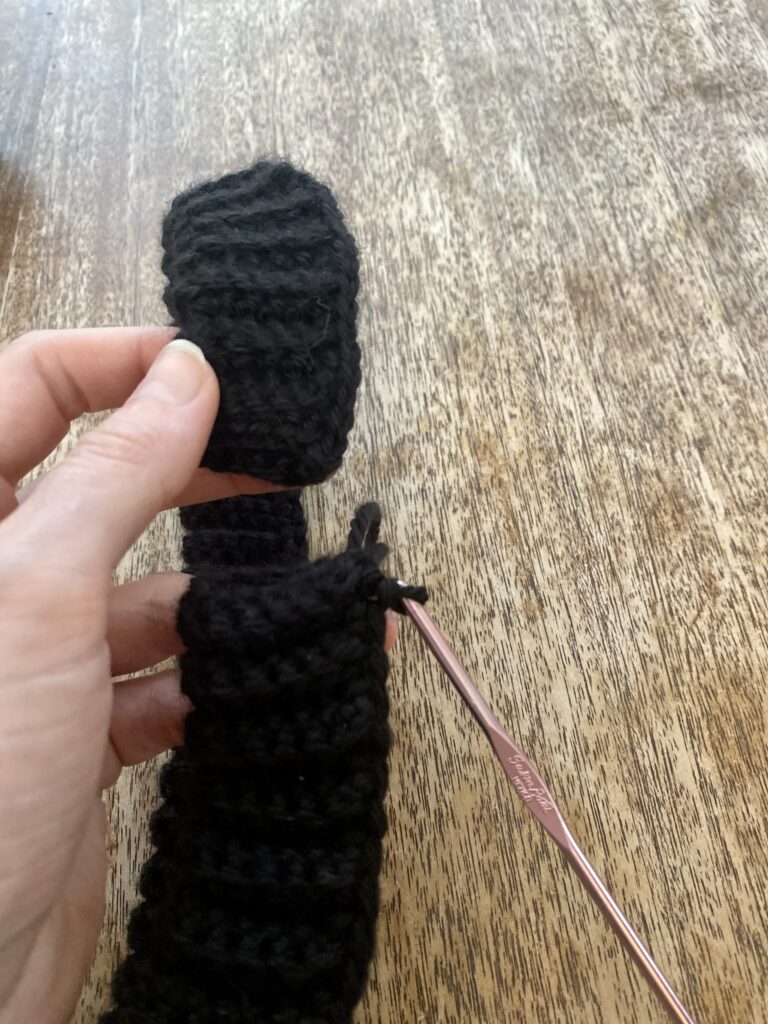
With the ribbed waistband folded in half to create a long strip, Begin to SC across the open long edge of the waistband. Be sure to crochet through both layers of the long edge. SC in the ends of each ribbed row across. When you reach the end of the row, connect the circle together in the round by making a SC in the beginning SC of the round. Leave the casing ends open for placement of the elastic band. Don’t fasten off. Continue on with the Skirt Body.
Join together in a Circle
Skirt Body:
Rnd 1: HDC in each SC around. (My Ribbed waistband has 85 rows of ribbing so I will crochet 85 SC around. If your sizing is larger or smaller this number of stitches may be different. Make this number a multiple of 5 to make the polka dot pattern easier,) (85)
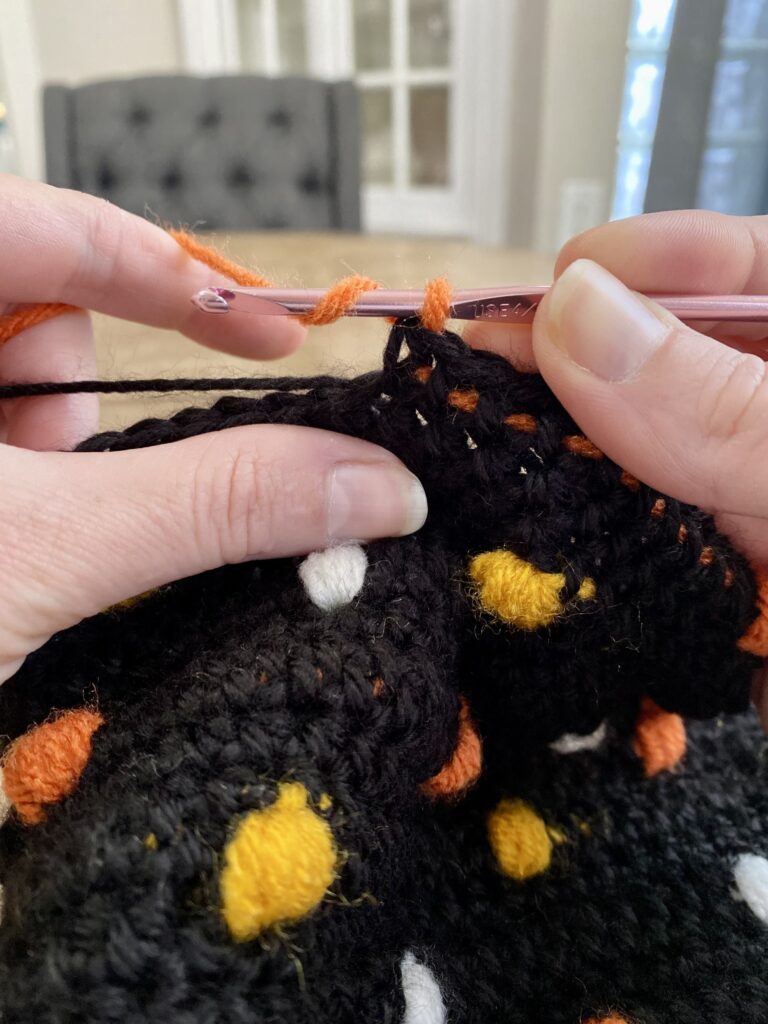
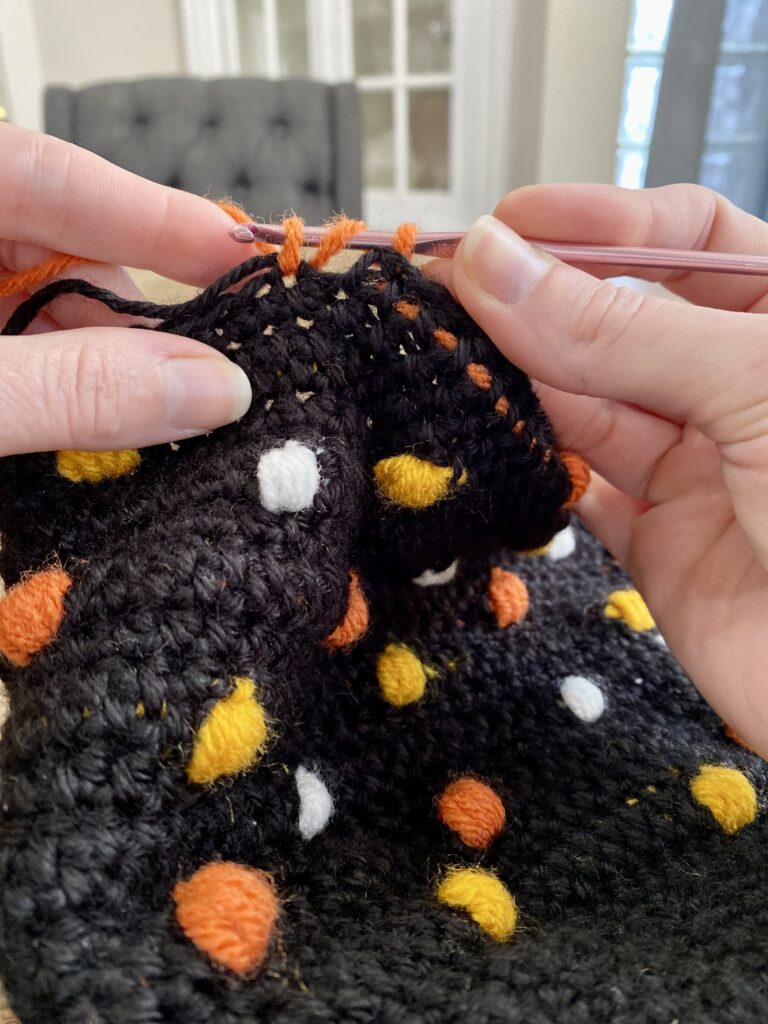
Rnd 2: We will carry a contrasting color in this row. HDC in the next 4 ST. Color change to the contrasting color (yellow) at the last pull through of the 4th ST. Using the Contrasting color while carrying the black yarn, make a 4 HDC bobble. Color change back to black at the last pull through of the bobble. CH 1. Continue carrying the yellow yarn. * HDC in the next 9 ST, 4HDC Bobble with contrasting color in the next ST, changing back to black at the last pull through. CH 1. ** Repeat from * to ** to the last 4 ST. HDC in the last 4 ST. Fasten off Yellow.
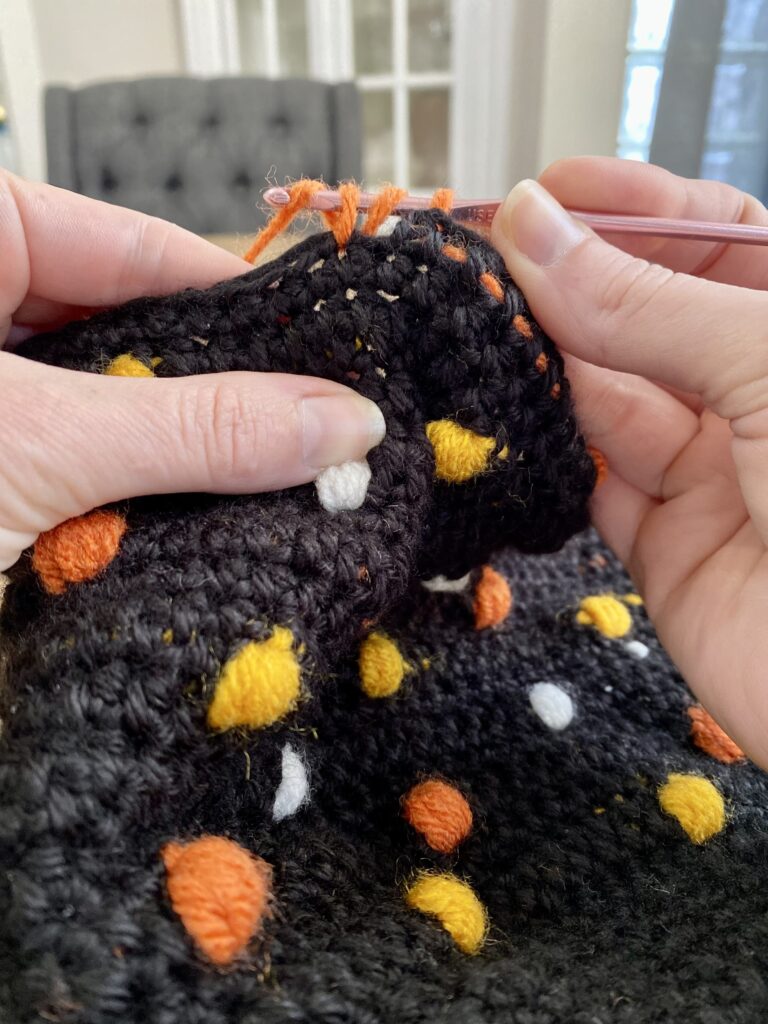
Rnd 3: HDC in each ST around, including the CH 1 ST at the top of each bobble. Hide the yellow carried yarn by inserting the hook below the yellow carried yarn for each HDC ST. See Note. (94)
Rnd 4: HDC in each ST around. (94)

Rnd 5: Color change to Carrot colored yarn. Make a 4 HDC bobble in the first ST of the round, changing back to black yarn at the last pull through of the bobble. CH 1. Carry orange through this row. * HDC in the next 10 ST, 4 HDC bobble, Ch 1, ** Repeat from * to ** around. Fasten off orange. (100)
Rnd 6: HDC in each ST around EXCEPT for the CH 1 at the top of each bobble ST. Hide the Orange carried yarn by inserting the hook below the orange yarn for each ST. (100)
Rnd 7: HDC in each ST around. (100)
Rnd 8: HDC in the next 5 ST, color change to White yarn on the last pull through of the 5th ST. 4HDC bobble in the next ST. Color change back to black at the last pull through of the bobble. CH 1. Carry white throughout this row. * HDC in the next 10 ST, color change to white, 4 HDC bobble in the next ST, color change back to black at the last pull through of the bobble. CH 1.** repeat from * to ** to the last 5 ST. HDC in the last 5 St. Fasten off white. (100)
Rnd 9: Repeat Rnd 6. (100) Inserting the hook below the carried yarn for each HDC to hide and secure the carried yarn.
Rnd 10: Repeat Rnd 7. (100)
Rnd 11: Repeat Rnd 5 with yellow as the carried color for the bobbles. (100) Fasten off Yellow.
Rnd 12: Repeat Rnd 6 inserting the hook below the carried yarn to secure and hide it. (100)
Rnd 13: Repeat round 7. (100)
Rnd 14: Repeat Rnd 8 with Carrot colored yarn for the carried yarn and bobbles. (100) Fasten off Carrot.
Rnd 15: Repeat Rnd 6, inserting the hook below the carried yarn to secure and hide it. (100)
Rnd 16: Repeat Rnd 7 (100).
Rnd 17: Repeat Rnd 5 with White as the carried color and bobbles. (100) Fasten off white.
Rnd 18: Repeat Rnd 6, inserting the hook below the carried yarn to secure and hide it. (100)
Rnd 19: Repeat Rnd 7 (100).
Rnd 20: Repeat Rnd 8 with yellow yarn as the carried color and bobbles. (100) Fasten off yellow.
Rnd 21: Repeat Rnd 6, inserting hook below the carried yarn to secure and hide it. (100)
Rnd 22: Repeat Rnd 7. (100)
Rnd 23: Repeat Rnd 5 with Carrot yarn for the carried color and bobbles. (100) Fasten off Carrot.
Rnd 24: Repeat Rnd 6, inserting the hook below the carried yarn to secure and hide it. (100)
Rnd 25: Repeat Rnd 7. (100)
Rnd 26: Repeat Rnd 8 with white yarn for the carried color and bobbles. (100) Fasten off White.
Rnd 27: Repeat Rnd 6, inserting the hook below the carried yarn to secure and hide it. (100)
Rnd 28: Repeat Rnd 7. (100)
Rnd 29: HDC in each ST around. (100)
Scalloped hem edging:
Rnd 30: HDC in the next 5 ST. * 5 Treble Crochets in the next ST. HDC in the next 5 ST.** Repeat from * to ** around. Fasten off and weave in ends.
Waistband Completion:
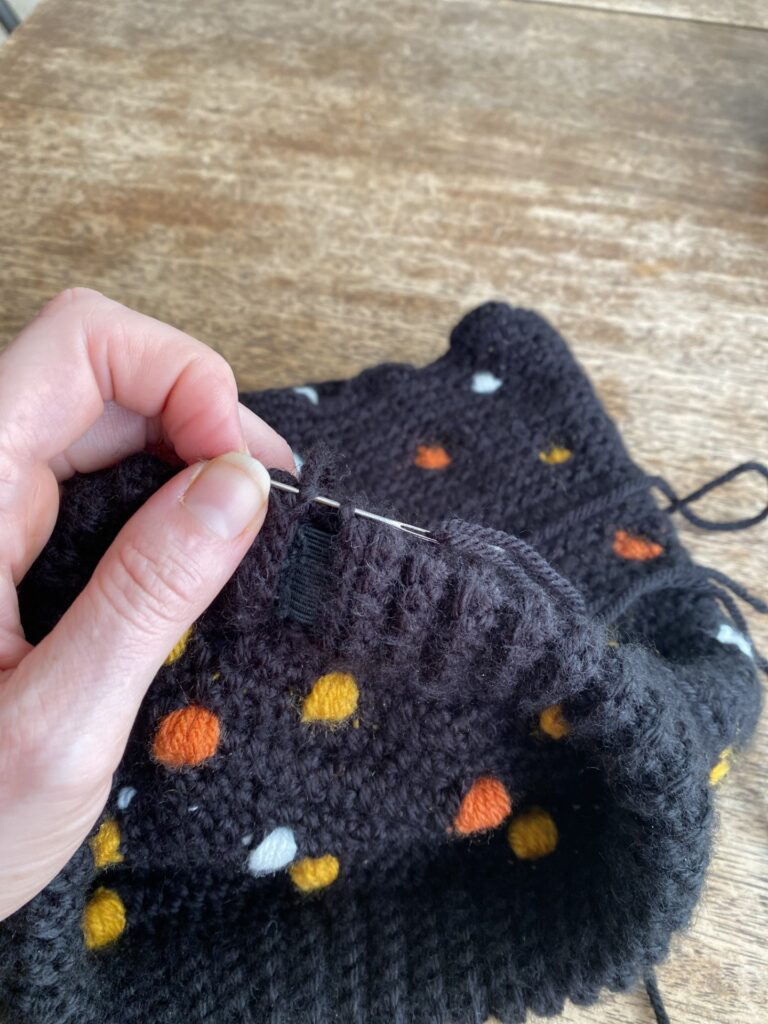
To complete the waistband, trim the elastic waistband to be 1 inch shorter than the waist measurement of your baby. (For 2T size I cut the waistband to 18″.) Thread the waistband through the ribbed casing using a safety pin secured to one end and pulling the waistband through.
After waistband has been pulled through, ensure it is not twisted. Stitch the ends together using a needle and thread or a sewing machine. Finish the waistband seam by using a yarn needle and matching black yarn to stitch the opening of the ribbed waistband closed.
Way to go! You did it!
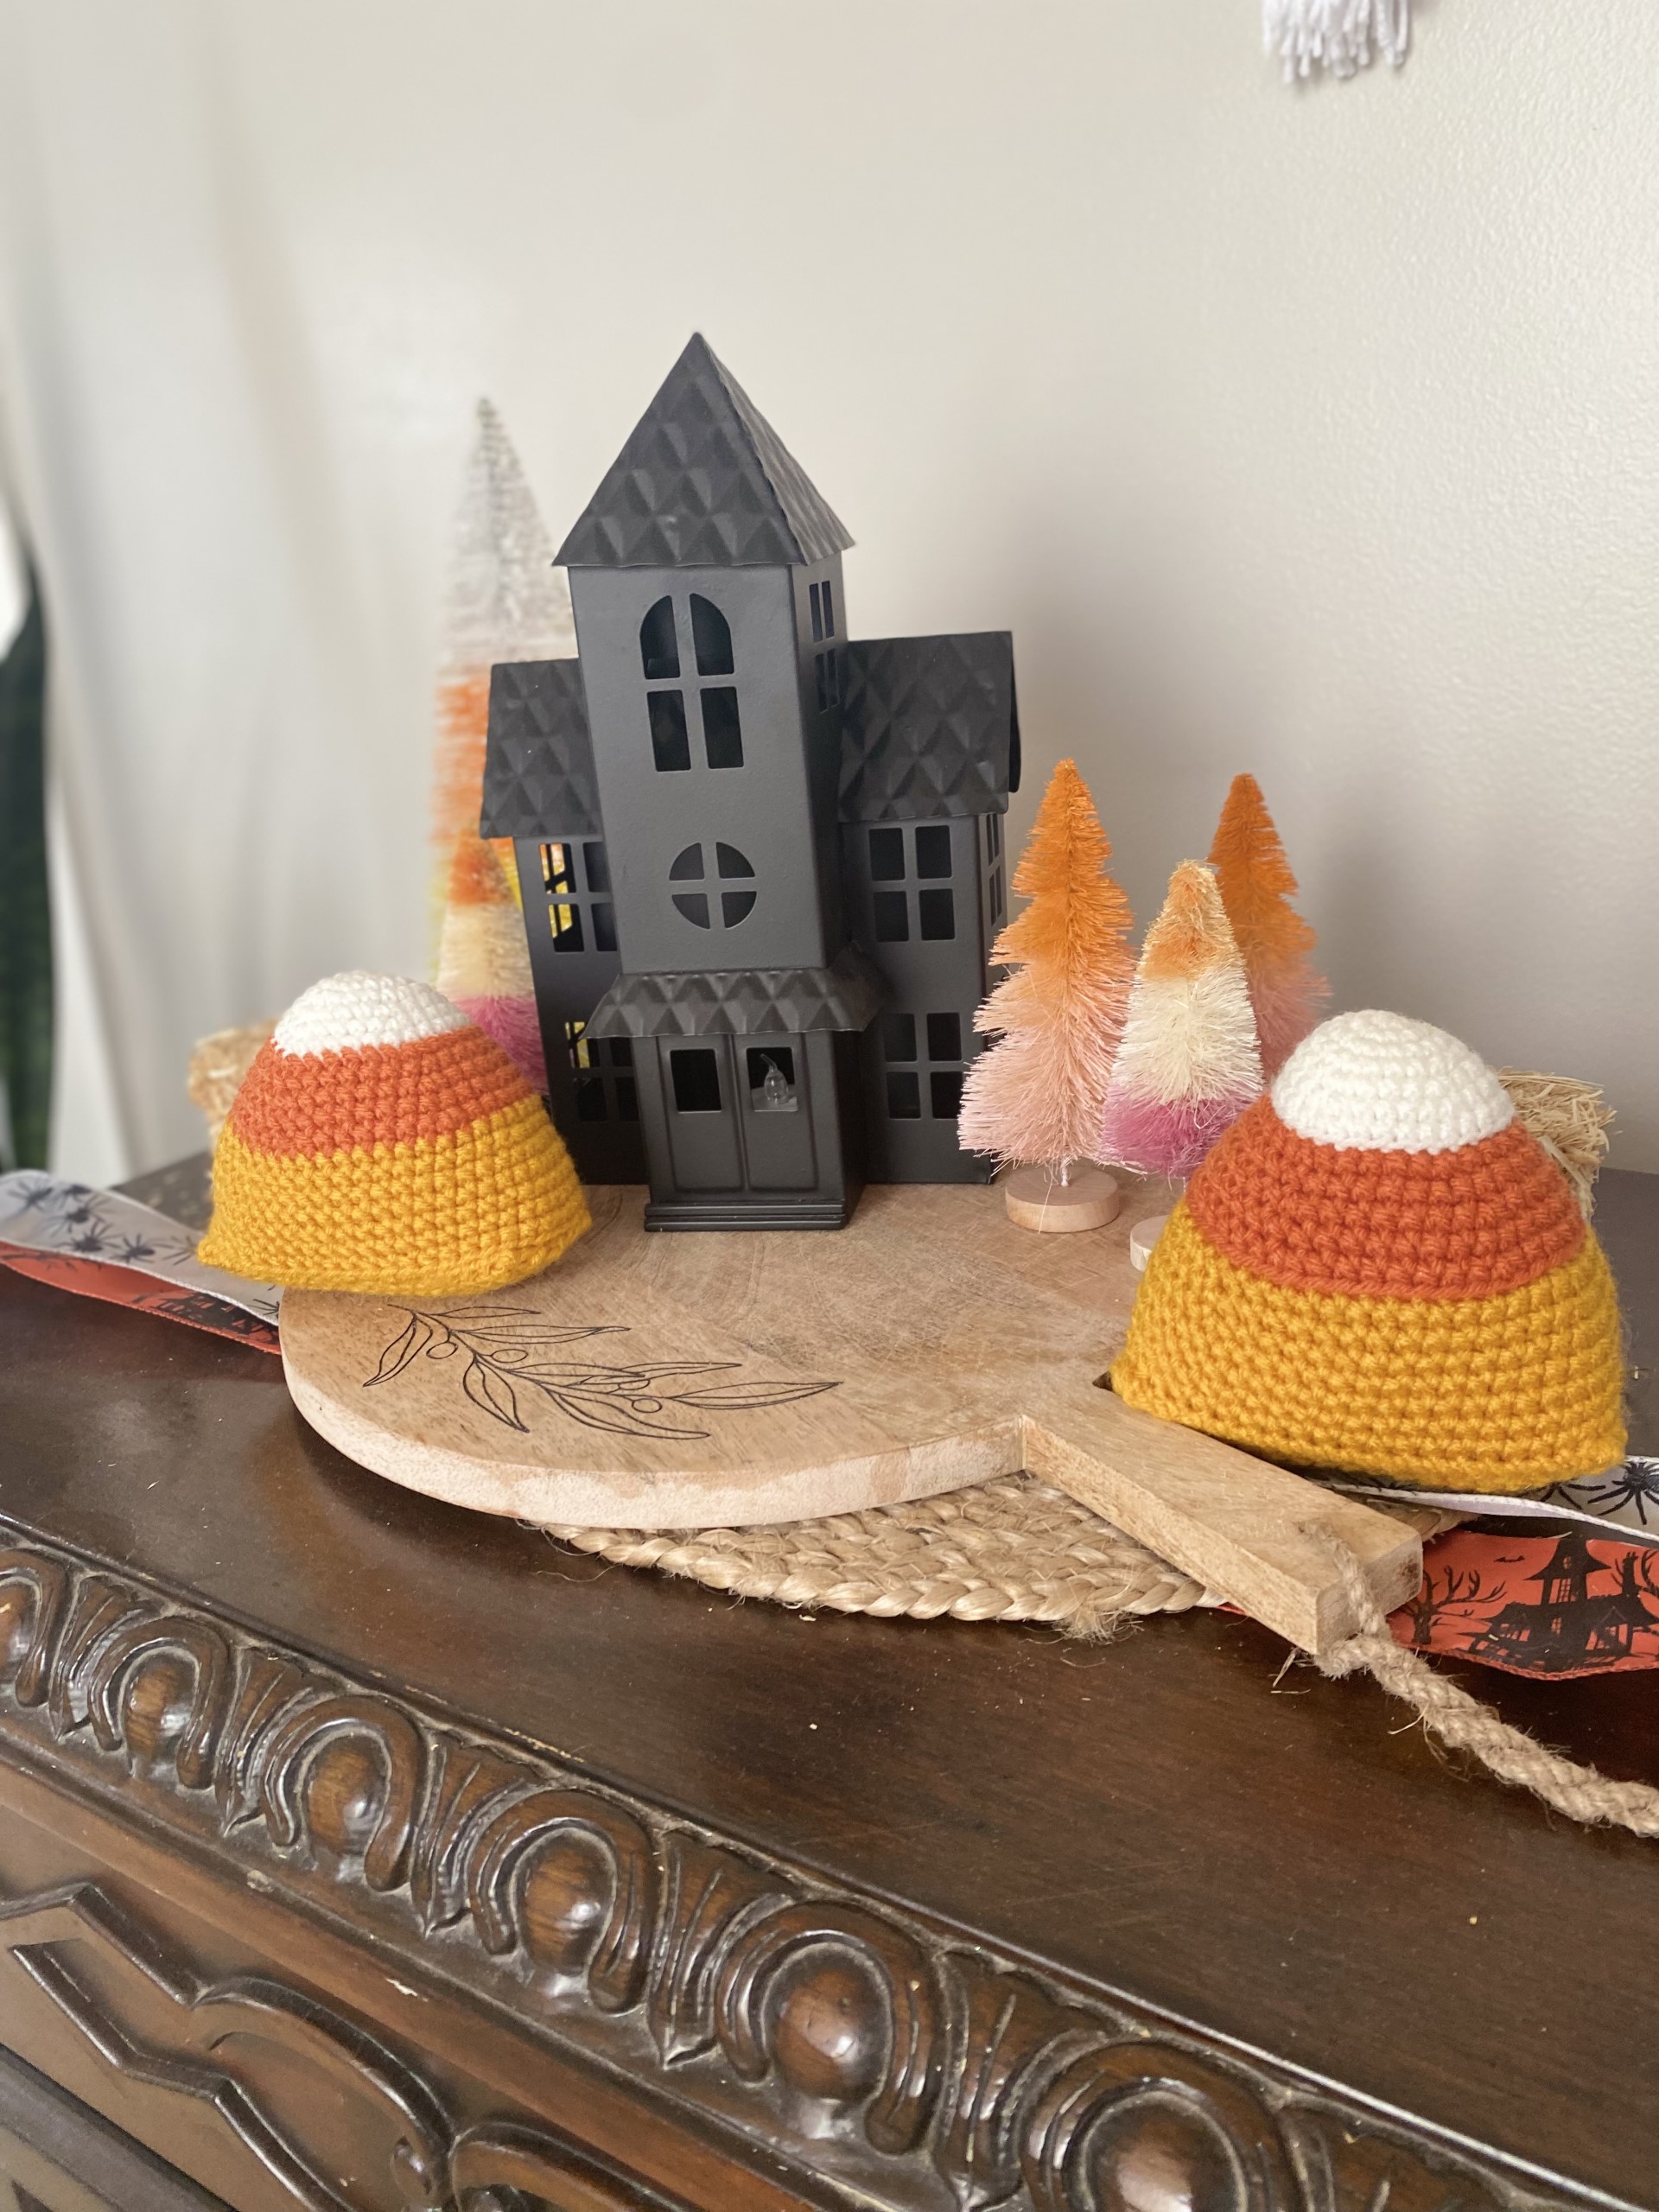
Now get your baby all dressed up and take her to the pumpkin patch!
This pattern and its images are copyright protected and the sole property of Briarberry Farmhouse.
Please do not redistribute, transfer, or sell the pattern, or alter it to claim as your own. You may sell any products you create from this pattern. Please credit the designer by linking online listings to Briarberryfarmhouse.com or tagging @Briarberryfarmhouse.
Briarberry
My name is Abby Holmgren and I love to create and share ideas through crochet, sewing, fashion, cooking, and visual arts. Briarberry Farmhouse is where I share inspiration.

You May Also Like