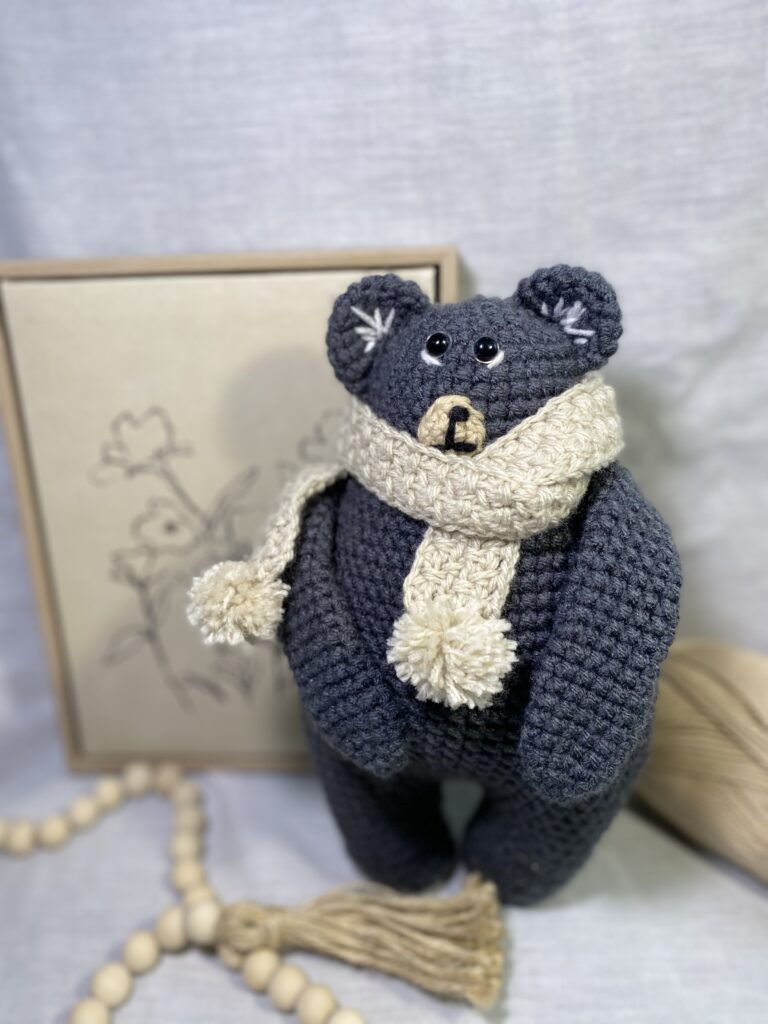
Summer Camp: Momma Bear
Is there anything quite as powerful and fierce as a mothers love for her babies? It’s difficult to say. For me, I saw the world with new eyes from the moment I knew one of my little cubs was coming. I was excited to introduce each of them to the beauty, joy, excitement, and wonders of this world that were brand new discoveries for them each day. The fierce and protective Momma bear in me roars to life at any sign of distress or threat to my little ones and I know that just like Mothers everywhere, I will do everything in my power to teach my cubs important life lessons, while showing them how to enjoy beautiful vistas, sunrises and sunsets, blessings, and surprises around every turn as I hand them, one piece at a time, their glowing future.
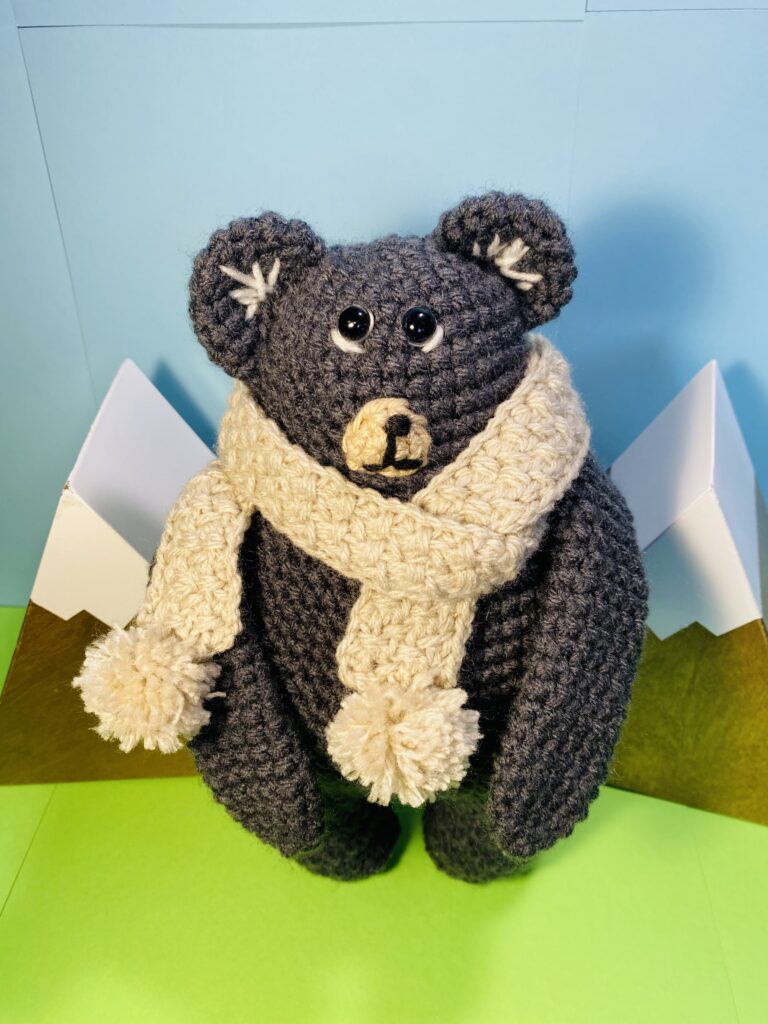
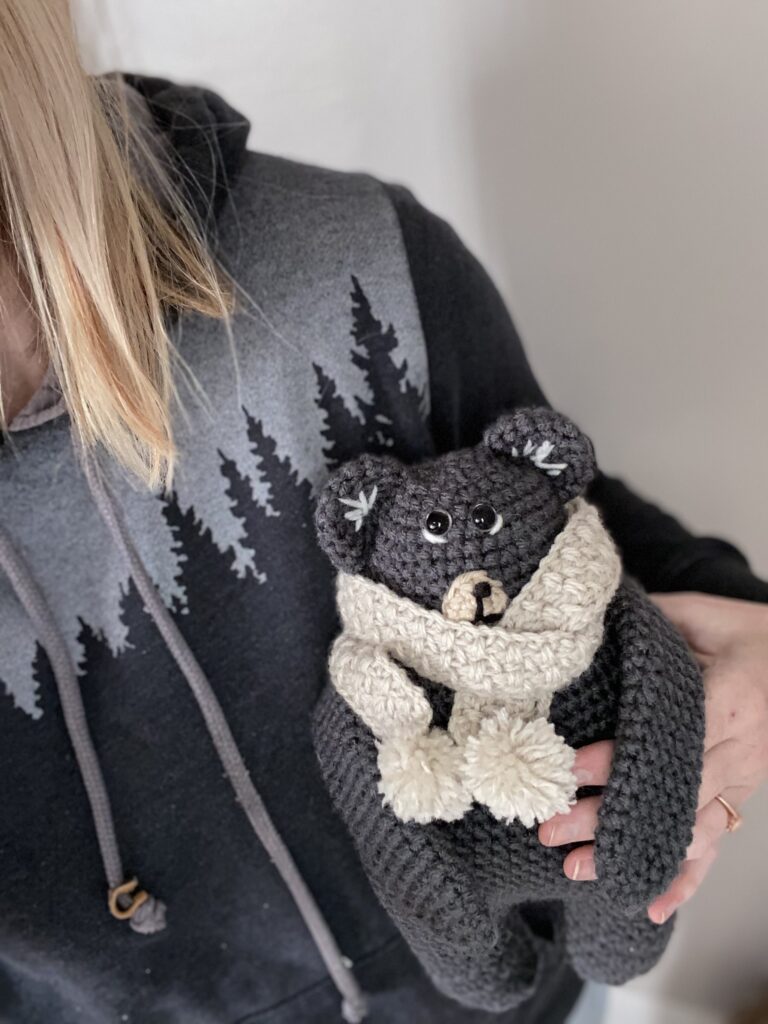
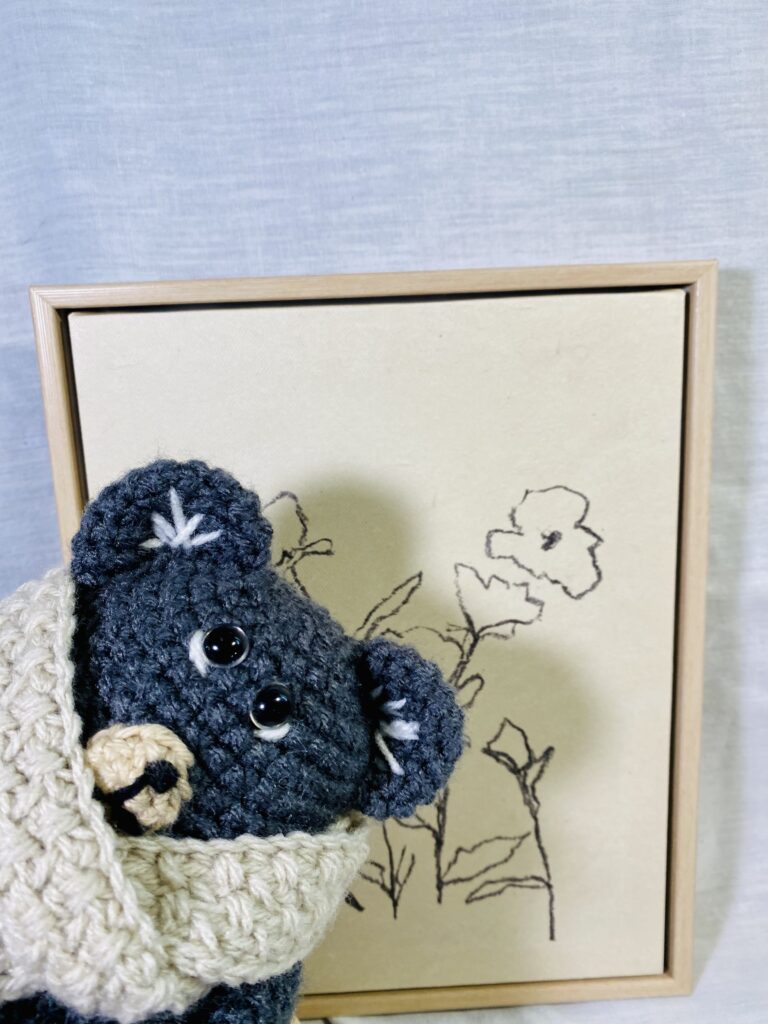
Momma Bear is an advanced beginner pattern that uses mostly single crochet with some embroidery details. She might be the perfect gift to share with a new Momma Bear at her baby shower, as a special toy to watch over the nursery, or to romp and play with toddlers. Whatever you find her useful for, I hope you will enjoy creating her and that you weave your own Momma Bear spirit into her stitches.
This Momma Bear is a new addition to my collection, Summer Camp for Kids, which is a focus on imaginative toys and basic crochet projects to bring interest to the art of crochet for young crocheters and those just starting out. My hope is that you might follow along with the patterns in this set or consider them for young people who are learning. If you would prefer a printable pattern version of this pattern, please visit my Etsy shop here. The small fee goes towards supporting my work. Thank you!
Materials Needed:
- Red Heart Super Saver yarn in Black or Charcoal
- KC 100% Cotton yarn in Oatmeal
- Small amount of black yarn or embroidery floss for embroidering
- Small amount of white yarn or embroider floss for embroidering
- Bernat Baby Sport yarn in Baby Taupe for the scarf
- Crochet hooks size E4 (3.5 mm)
Abbreviations:
CH- Chain Stitch
HDC-Half Double Crochet
EX Moss- Extended Moss Double Crochet
SC- Single Crochet
SK-Skip
Gauge:
9 stitches X 9 rows = 2X2 inch square
Pattern used for gauge: SC
Special Stitches:
Before starting the pattern, let’s practice making a Magic Loop, Single Crochet Stitch, and Decrease Stitch.
We will also be learning the Extended Moss Half Double Crochet Stitch for the Scarf. You can find a quick tutorial for each of these stitches on my Helpful Tutorials page, here.
Sizing:
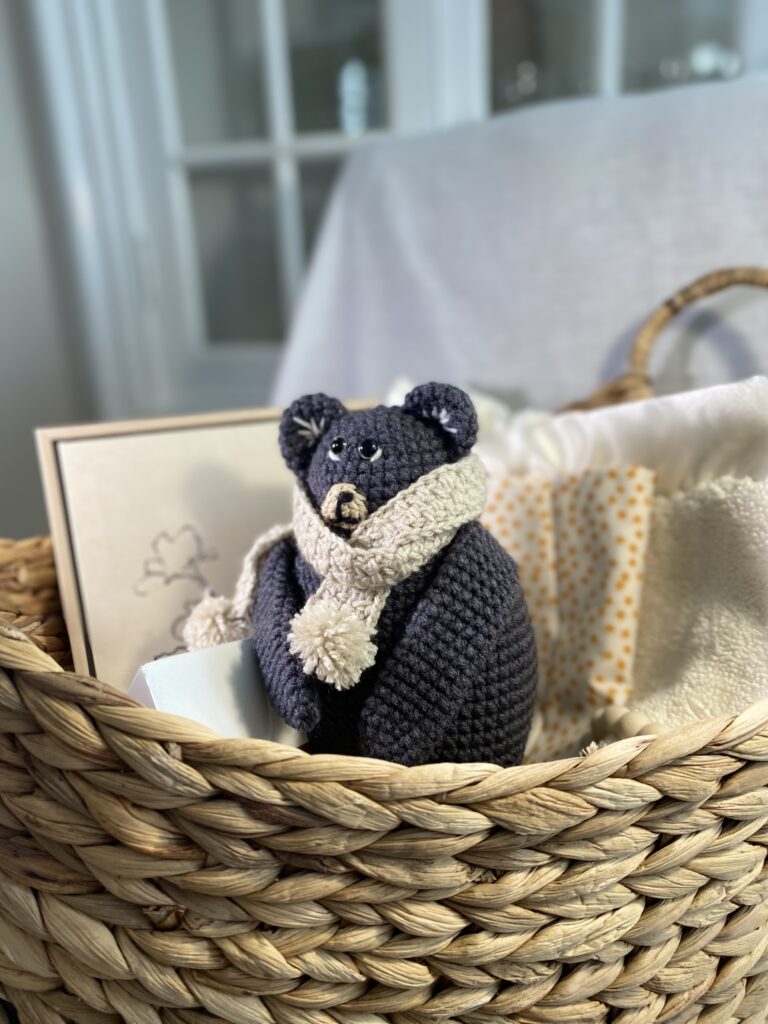
Completed Size of the Momma Bear is 10 inches tall X 6 inches wide.
Pattern Notes:
This pattern for a Momma Bear works up from the Bears head down to the feet in one piece. After main body is crocheted, Arms, Bottom of feet, Muzzle, ears, and tail are crocheted as separate pieces and stitched to the body of the bear. Safety eyes, embroidery and a scarf add personality to the bear.
Pattern Instructions: Momma Bear
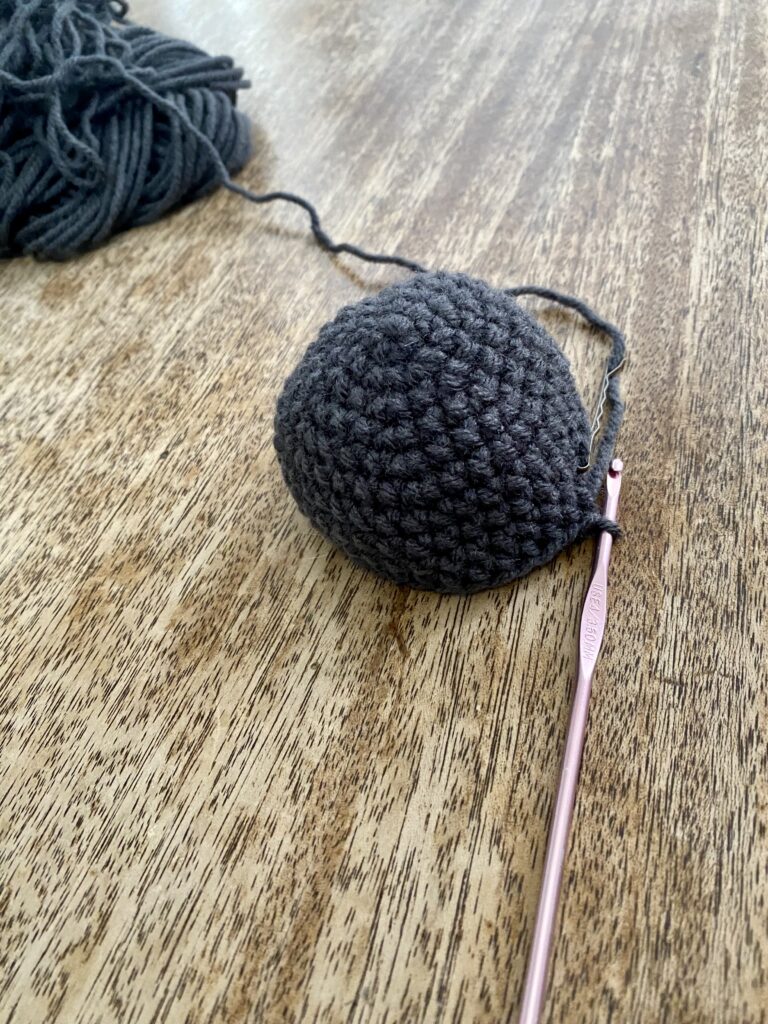
Rnd 1: 6 SC in a Magic Loop. Pull the loose end snugly to close the loop. (Remember that SC is an abbreviated way to say Single Crochet. If you forget the abbreviations they are listed at the top of the pattern.) (6)
Rnd 2: 2 SC in each ST around. (So for this round we will single crochet 2 single crochet stitches in each of the 6 stitches in the circle. This is how we increase the number of stitches in the row to make our circle bigger. We will be increasing our stitches a little bit at a time in each of the next few rounds.) (12)
Use a stitch marker to mark the first stitch of each round. This will help you to see when you have worked all the way around the round. Once you meet your stitch marker again at the end of your round, remember to count your stitches for the round. The correct number of stitches will be listed in parentheses at the end of each row.
Rnd 3: *SC in the next ST, 2 SC in the next ST** Repeat from * to ** around (this should be 5 more times for this Rnd.) (18)
Rnd 4: *SC in the next 2 ST, 2 SC in the next ST** repeat from * to ** around. (24)
Rnd 5: * SC in the next 3 ST, 2 SC in the next ST.** Repeat from * to ** around. (30)
Rnd 6: * SC in the next 4 ST, 2 SC in the next ST.** Repeat from * to ** around. (36)
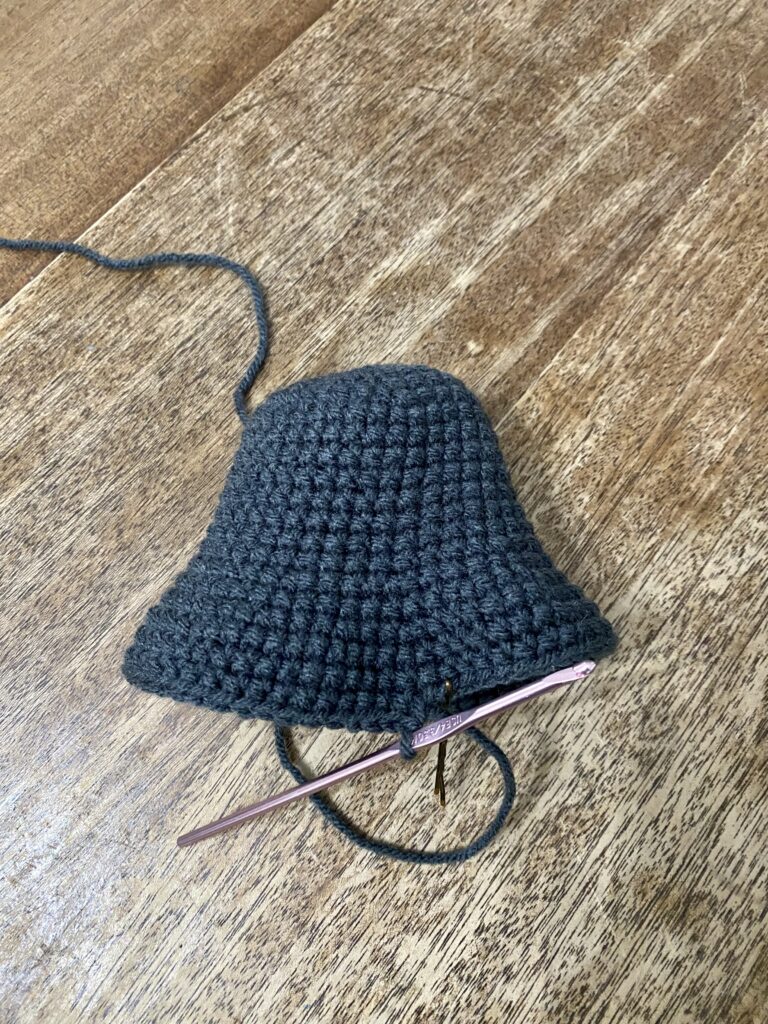
Rnd 7- 14: SC in each ST around. (36)
Rnd 15: *SC in the next 3 ST, 2 SC in the next ST.** Repeat from * to ** around. (45)
Rnd 16: SC in each ST around. (45)
Rnd 17: *SC in the next 2 ST, 2 SC in the next ST.** Repeat from * to ** around. (60)
Rnd 18-25: SC in each ST around. (60)
Rnd 26: *SC in the next 4 ST, decrease.** Repeat from * to ** around. (50)
Rnd 27-32: SC in each ST around. (50)
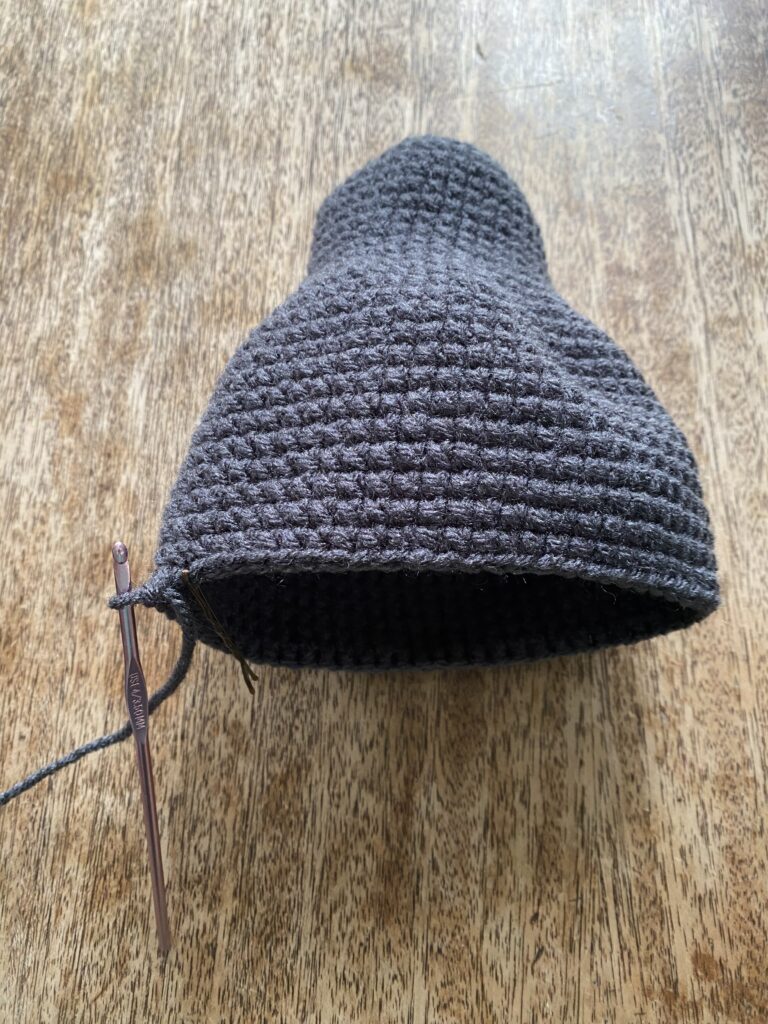
Now we will begin to crochet one of the bears legs. To crochet the other leg we will need to fasten off and reattach our yarn but we’ll talk more about that when we get to that step.
Rnd 33: SC in the next 22 ST. CH 1 and turn, leaving the remainder of the stitches for this round unworked. (22)
Rnd 34: Now working back across the 22 ST you just crocheted, SC in the next 20 ST leaving the last 2 ST unworked. (20) CH 1, turn.
Rnd 35: SC in the next 20 ST, CH 1, turn.(20)
Rnd 36: SC in the next 3 ST, decrease, SC in the next 10 ST, Decrease, SC in the next 3 ST. CH 1, turn. (18)
Rnd 37: SC in each ST across. (18)
Rnd 38: SC in the next 8 ST, Decrease, SC in the next 8 ST. CH 1, turn. (17)
Rnd 39: SC in each ST across. (17)Fasten off, leaving a long tail for stitching.
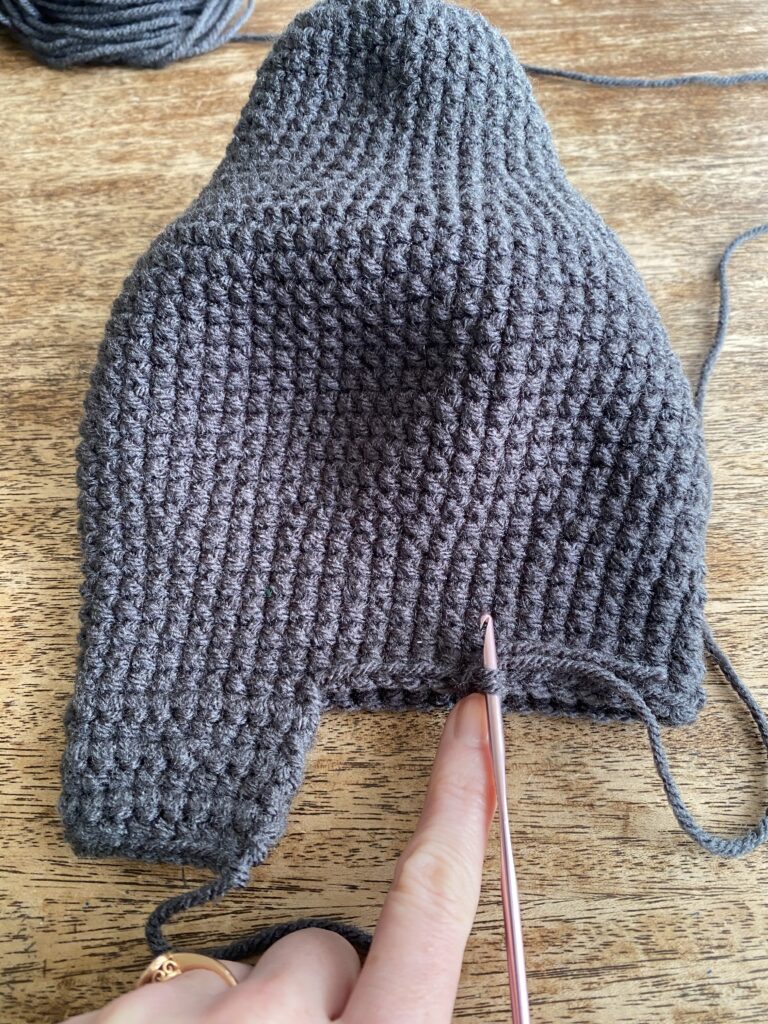
Now let’s figure out where to reattach our yarn to crochet the other leg.Lay the work flat so that the edges of the leg panel are aligned together. Now count 5 stitches over from the point where the inner leg joints the bottom of the body. These 5 stitches will be stitched together, forming the crotch later. Attach the yarn with a SL ST to the 6th ST. See Picture below.
Rnd 40: SL ST counts as the first ST in this row. SC in the next 19 ST. CH 1, turn, leaving the remainder of the stitches in the round unworked. (20)
Rnd 41: SC in the next 20 ST. CH 1, turn. (20)
Rnd 42: SC in the next 3 ST, Decrease, SC in the next 10 ST, Decrease, SC in the next 3 ST. CH 1, turn. (18)
Rnd 43: SC in each ST across. (18) CH 1, turn.
Rnd 44: SC in the next 8 ST, Decrease, SC in the next 8 ST. (17) CH 1, turn.
Rnd 45: SC in each ST across. (17) Fasten off, leaving a long tail for Stitching.
Muzzle:
Rnd 1: Using the Oatmeal colored yarn, make 6 SC in a Magic Loop. Pull the loose end snugly to close the loop. (6)
Rnd 2: *SC in the next ST, 2 SC in the next ST.** Repeat from * to ** around. (9) Fasten off, leaving a long tail for Stitching.
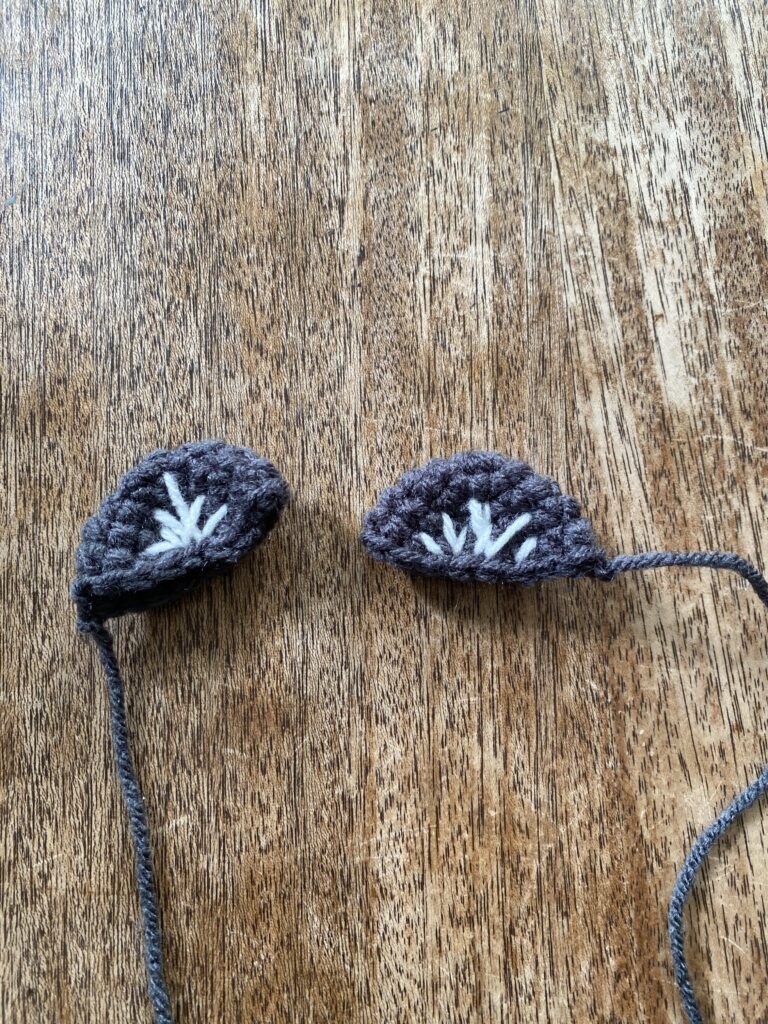
Ears: (Make 2)
Rnd 1: With Charcoal yarn, make 6 SC in a Magic Loop. Pull the free end snugly to close the loop. (6)
Rnd 2: 2 SC in each ST around. (12)
Rnd 3: *SC in the next ST, 2 SC in the next ST.** Repeat from * to ** around. (18)
Rnd 4-5: SC in each ST around.(18) Fasten off, leaving a long tail for stitching.
Arm: (Make 2)
Rnd 1: Make 6 SC in a Magic Loop. Pull free end snugly to close the loop. (6)
Rnd 2: *SC in the next ST, 2 SC in the next ST.** Repeat from * to ** around. (9)
Rnd 3: *SC in the next 2 ST, 2 SC in the next ST. ** Repeat from * to ** around. (12)
Rnd 4- 20: SC in each ST around. (12)
Fasten off, leaving a long tail for stitching the arm to the body of the bear.
Bottom of Feet: (Make 2)
Rnd 1: Make 6 SC in a Magic Loop. Pull the free end snugly to close the loop. (6)
Rnd 2: 2 SC in each ST around. (12)
Rnd 3: *SC in the next ST, 2 ST in the next ST.** Repeat from * to ** around. (18)
Fasten off, leaving a long tail for stitching tithe foot bottoms to the body.
Tail:
Rnd 1: Make 6 SC in a Magic Loop. Pull free end snugly to close loop. (6)
Rnd 2: 2 SC in each ST around. (12)
Rnd 3: * SC in next ST, 2 SC in next ST. ** Repeat from * to ** around. (18)
Rnd 4-5: SC in each ST around. (18)
Fasten off, leaving a long tail for stitching.
Assembly:
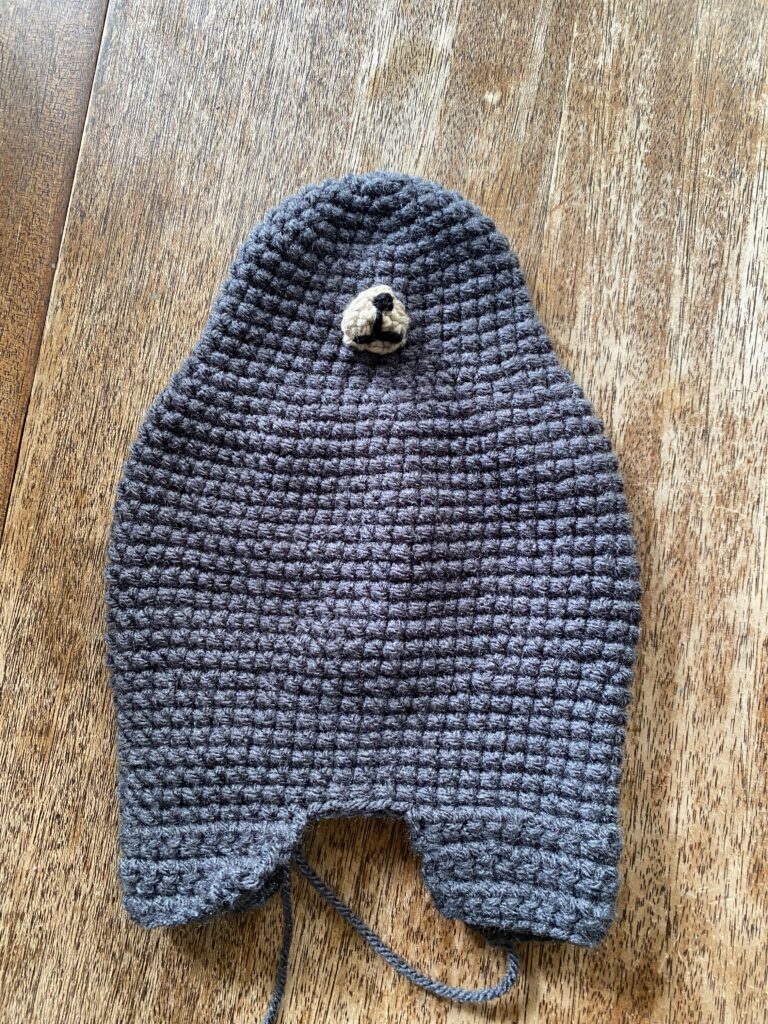
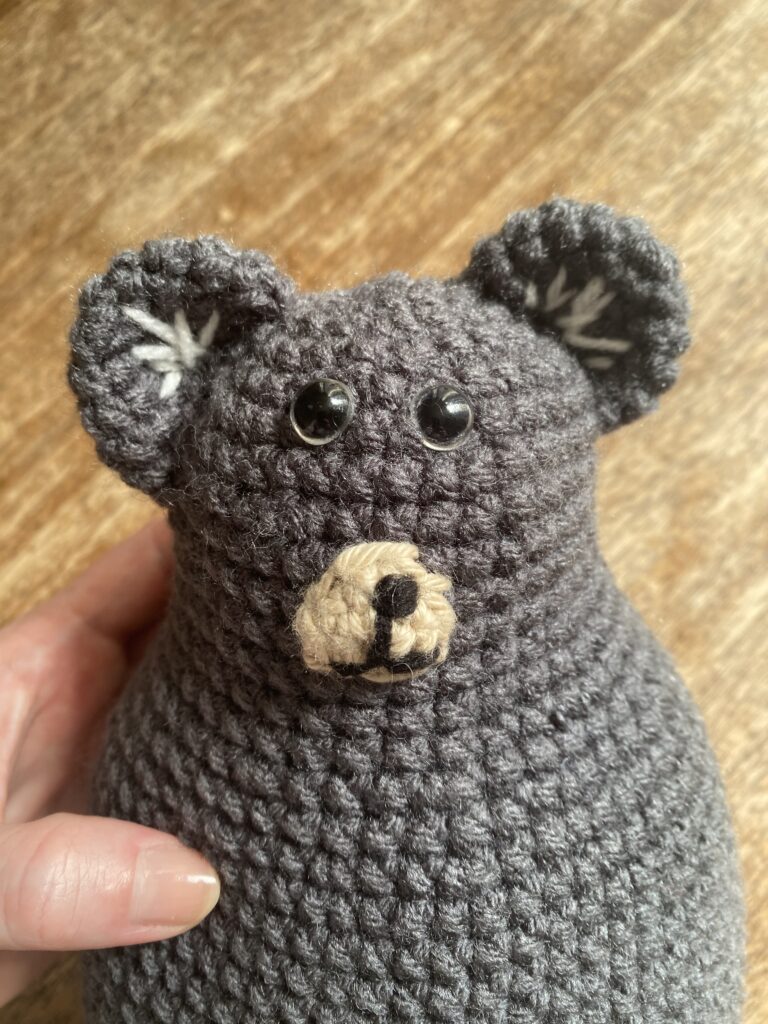
Lay the body flat with the edges of the legs aligned. Set the Muzzle piece in the center of the head ensuring that it is centered in comparison to the legs. Using the long tail from the muzzle, stitch the muzzle in place. Using black yarn or embroidery floss, embroider the nose and mouth lines.
Position the safety eyes as desired and secure in place.
Embroider around the outside edges of the eyes if desired with white yarn and a yarn needle.
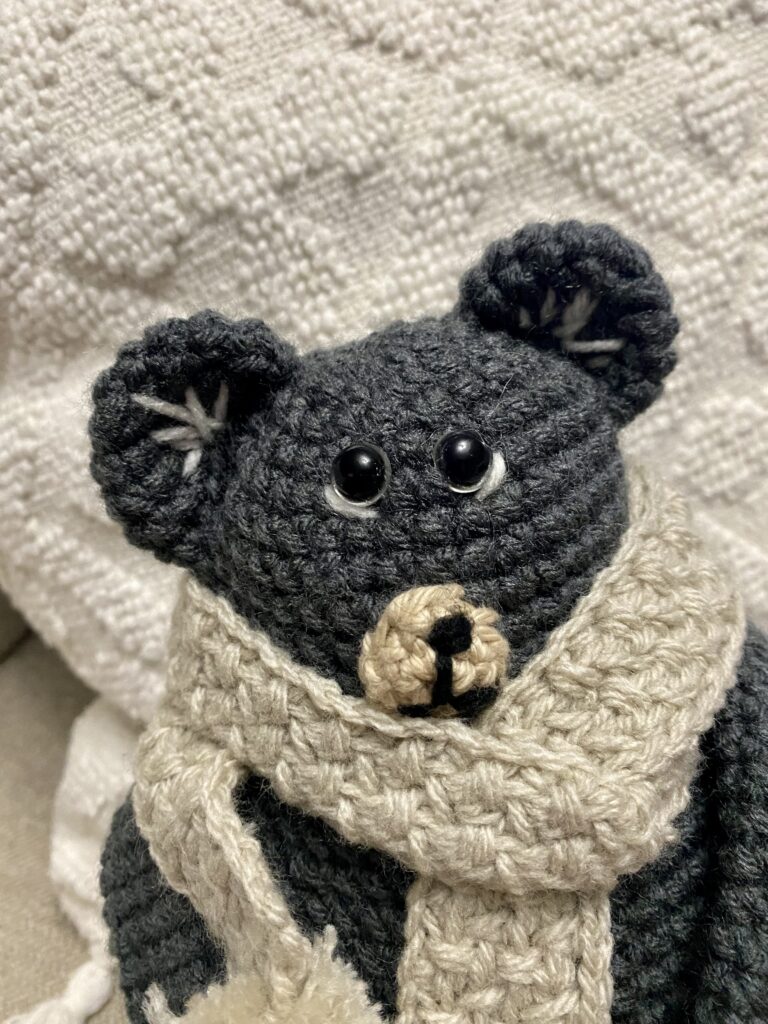
Embroider the inside of the ears with white yarn or embroidery floss by folding the ear in half and embroidering a few V shapes. Next, using the long tail from the ear piece, stitch the ears into place on the head.
Using the long tails at the base of the legs, stitch the inner seam of the legs and crotch seams closed, leaving the bottom of the legs open.
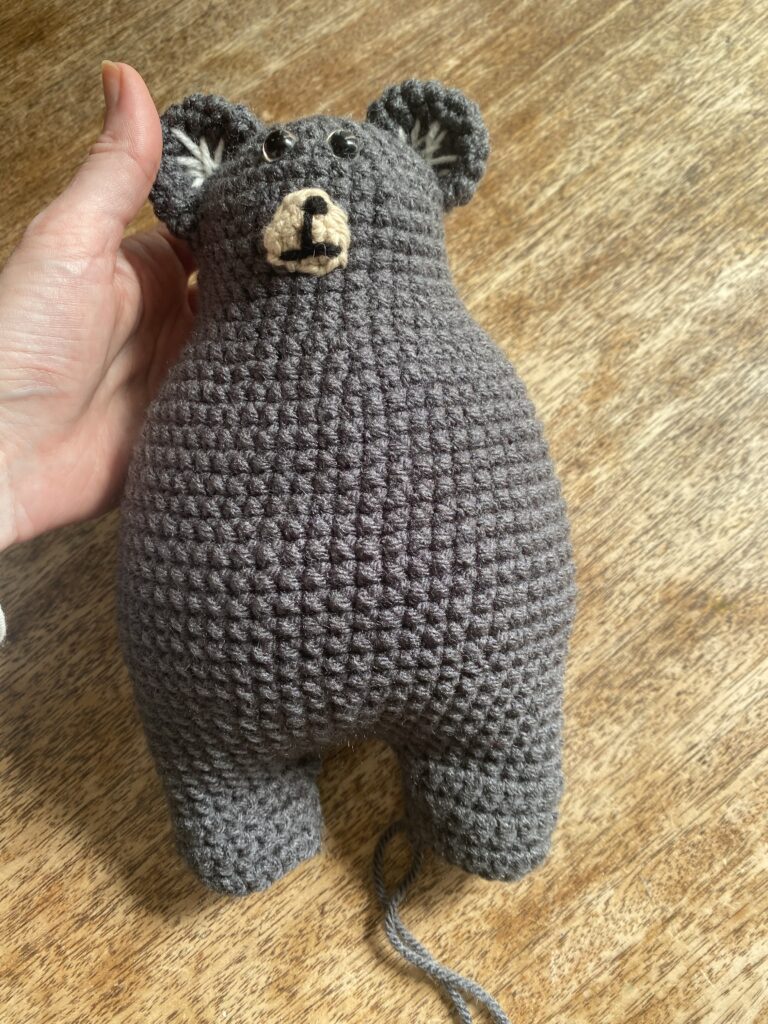
Stitch the arms in place using the long tails from the arm pieces.
Stitch the bottom of the feet in place. Once you have stitched halfway around each of the foot bottoms, stuff the legs of the body firmly with a bit more fiberfill before finishing the stitching to complete the seam around the bottom of the feet. Fasten off and weave in ends.
Stitch tail to back center of the bear. Weave in ends.
Scarf:
Special Stitch: For this pattern we will be using the extended Moss Half Double Crochet Stitch. If you’re new to this stitch or if you’d like a quick refresher, visit my Helpful tutorials page, here.
Row 1: Using Bernat Baby Sport yarn in Baby taupe CH 100, turn. (100)
Row 2-6: * Extended Moss Half Double Crochet St, CH 1.** Repeat from * to ** across. CH 2, turn. (98)
Fasten off and weave in ends.
Make 2 Pom poms by wrapping yarn around two fingers 40 times. Cut the free yarn end. Remove the yarn bundle from around fingers and lay on a table or flat surface. Cut an 4 inch length of yarn and use it to pull tight and tie securely around the center of the yarn bundle. Clip the loop ends of the yarn pieces and trim the Pom in a rounded shape. Attach both poms to both ends of the scarf.
Wrap Scarf around Momma Bears shoulders and she’s ready to be your new friend! You did it!
Copyright
This pattern and its images are copyright protected and the sole property of Briarberry Farmhouse.com
Please do not redistribute, transfer, or sell the pattern, or alter it to claim as your own. You may sell any products you create from this pattern. Please credit the designer by linking online listings to Briarberryfarmhouse.com or tagging @Briarberryfarmhouse #Momma Bear
Stay tuned! This Momma Bear is about to have her hands full. Her baby cubs are in pattern development and will be on the way soon along with some other fun surprises for the Summer Camp Collection. I can’t wait!
Briarberry
My name is Abby Holmgren and I love to create and share ideas through crochet, sewing, fashion, cooking, and visual arts. Briarberry Farmhouse is where I share inspiration.