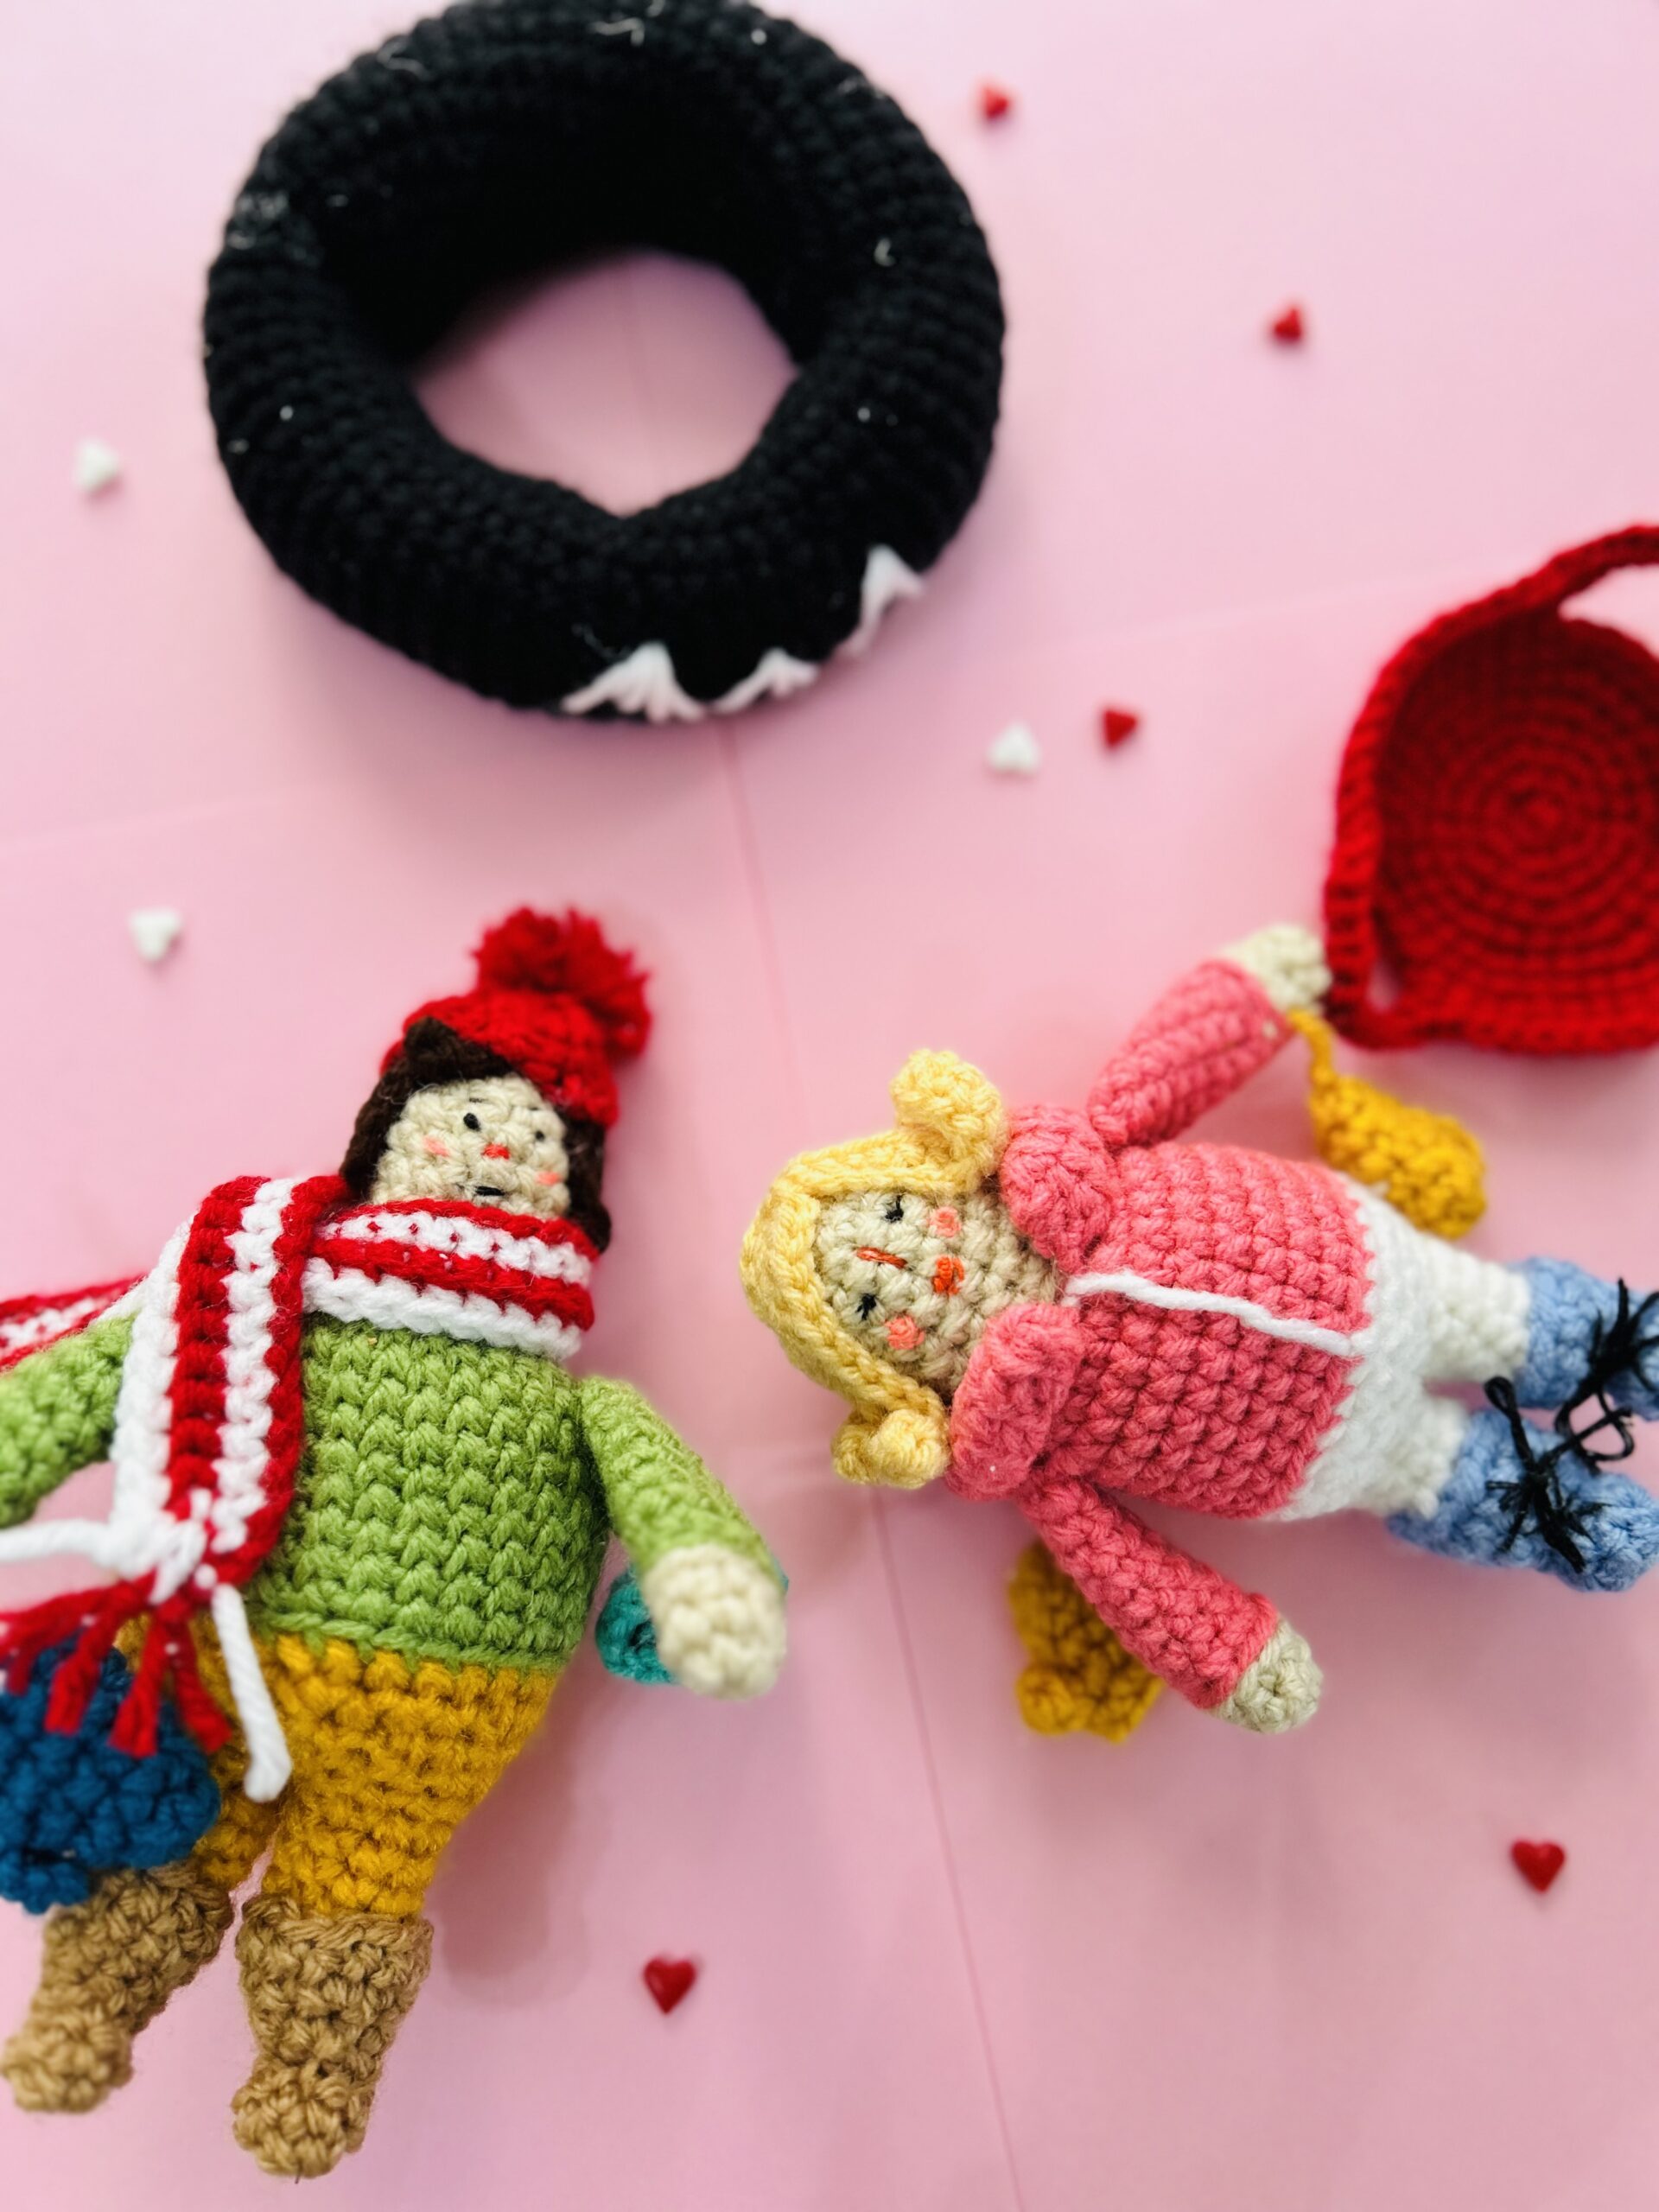
Klondike Village Collection: Sled Kids
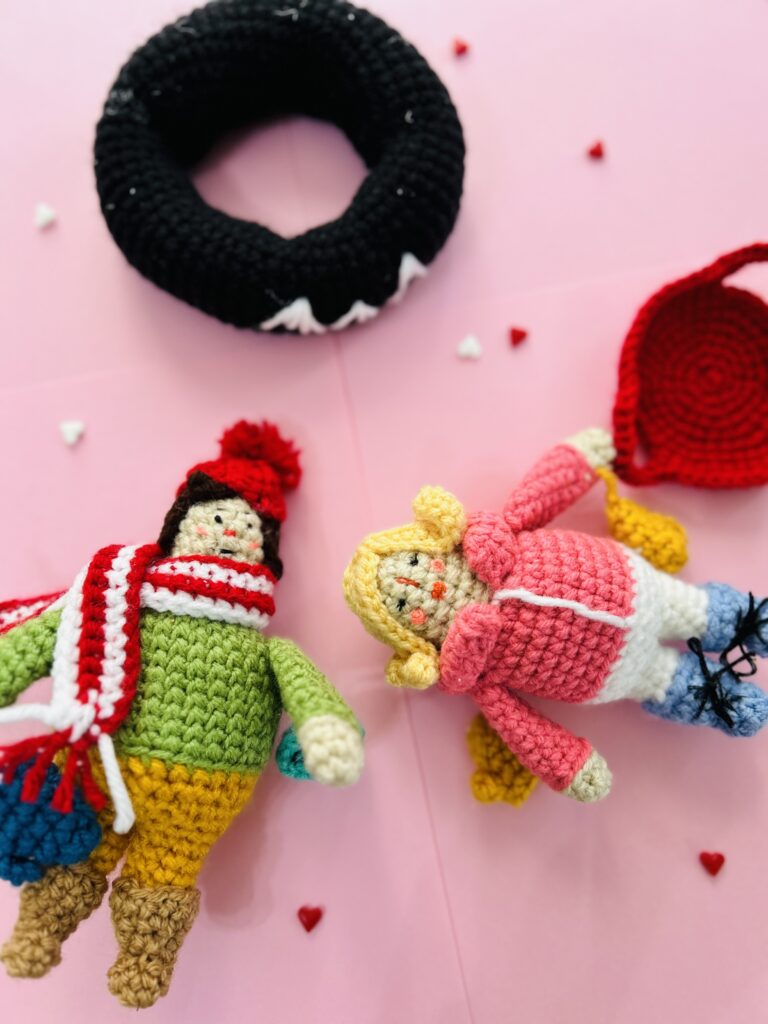
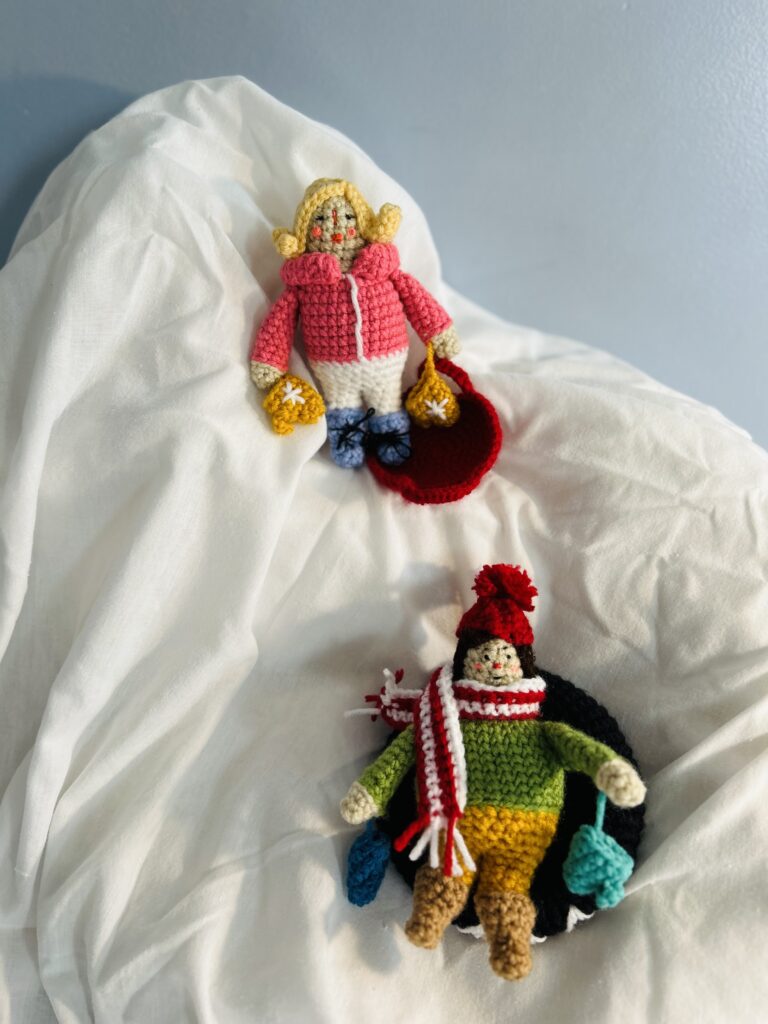
I love the Holiday season and the way it makes me remember the nostalgia and magic of the holidays as a child. Counting down the days until Thanksgiving and Christmas, enjoying every day of the holiday break to the fullest and curiously watching everyone around me do the same. This collection, I hope, will be a lot of fun for holiday lovers and anyone who loves to recall the memories of the good old days of their own childhood holidays. It’s a big project but I’ll attempt to bring together a few of the many personalities of the season of magic and you might just recognize a few of them from your own Christmas village. Happy Crocheting! I hope you’ll enjoy!
Klondike Sled Kids
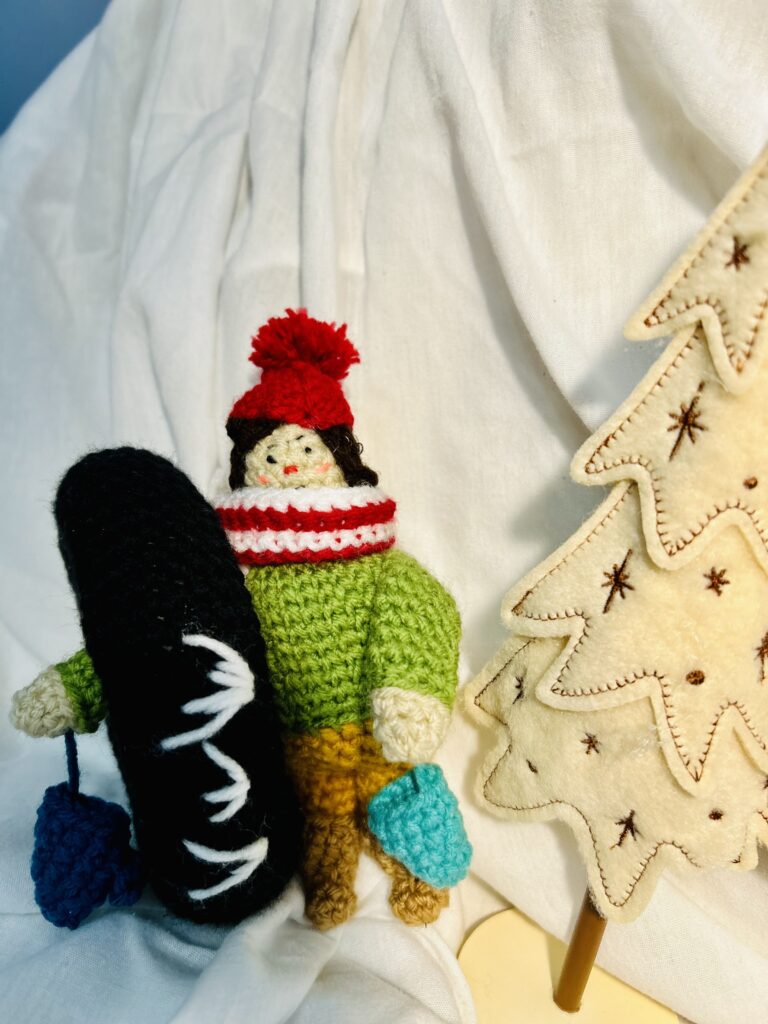
It’s the last day of school before Holiday recess. The kids sit in their desks with their eyes on the windows, watching as giant, puffy snowflakes float down outside. Can this day get any longer? As soon as the bell rings and it’s time to go, the kids give a warm hug to their friends and make a wild dash to get outside because the fun is just about to begin.
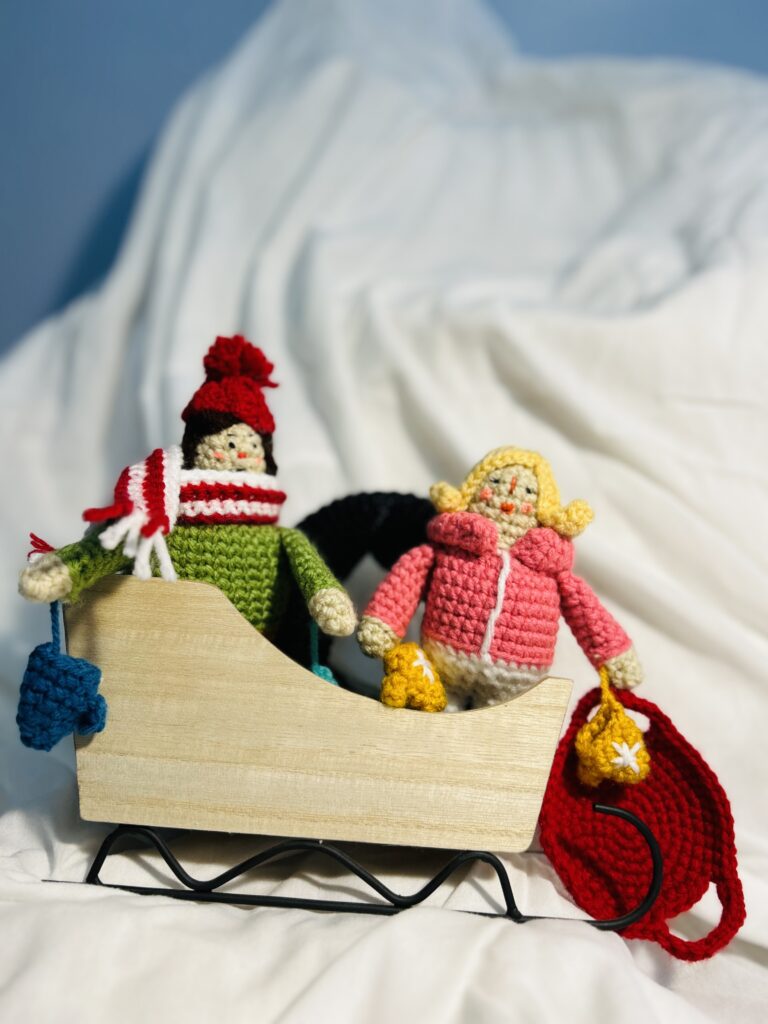
Here we have the daredevils of Christmas, the adrenalin junkies who wait all year for the first snowfall, and everyone after that. These are the kids who grab their trusty sled and an assortment of mismatched gloves, scarves, hats and mittens, anything they can find in the attic, before rushing to meet their friends at the tippety top of their favorite sugar coated hill to try to get the first wild ride down.
The exciting first pull of gravity as the sled picks up speed. The bouncing and careening, catching big air, creatively building the jumps and slide paths, the tumbles and yard sale wipe outs, the glory of “landing it.” The sled kids just can’t get enough.
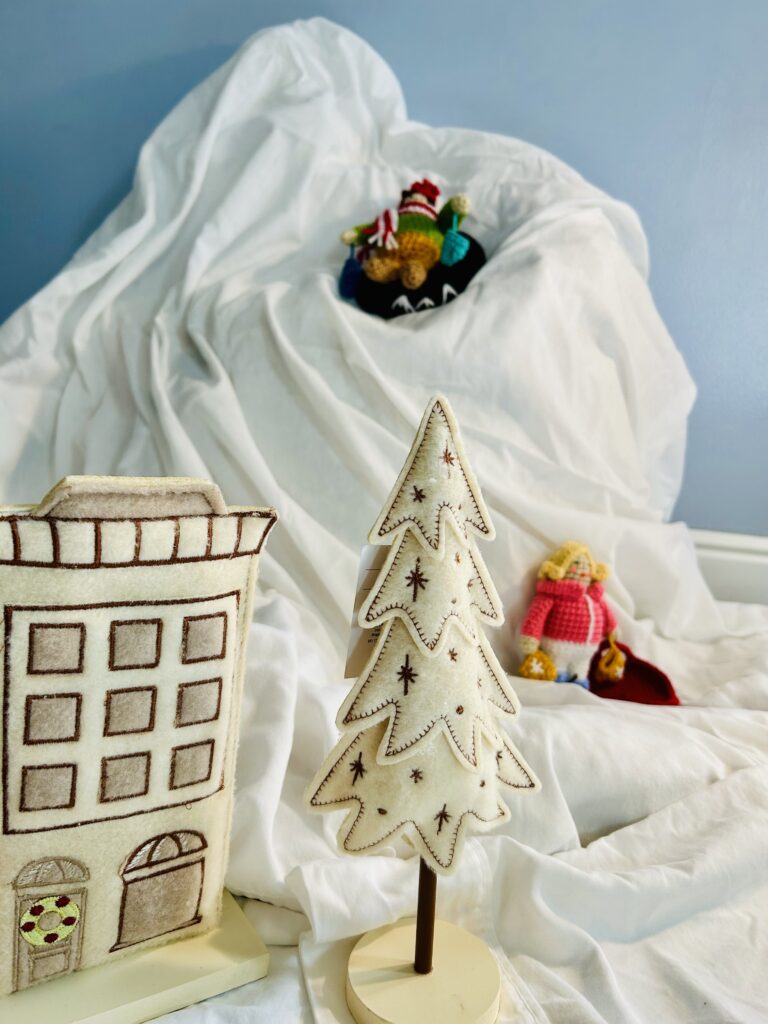
When the sun begins to set and nightfall is on the horizon, the sled kids have taken their last icy run down the hill, with their toes and noses pink and frozen, they dig in their pockets for allowance and chore money, combining everyone’s coins and dollar bills together to stop at the cocoa shop to share some of the steaming rich chocolatey goodness as they warm up with giggles and twinkling eyes, reliving the joys of the day and
hoping they can do it all again tomorrow. Stay tuned for the Cocoa Shop! It’s next on the list!
Instructions:
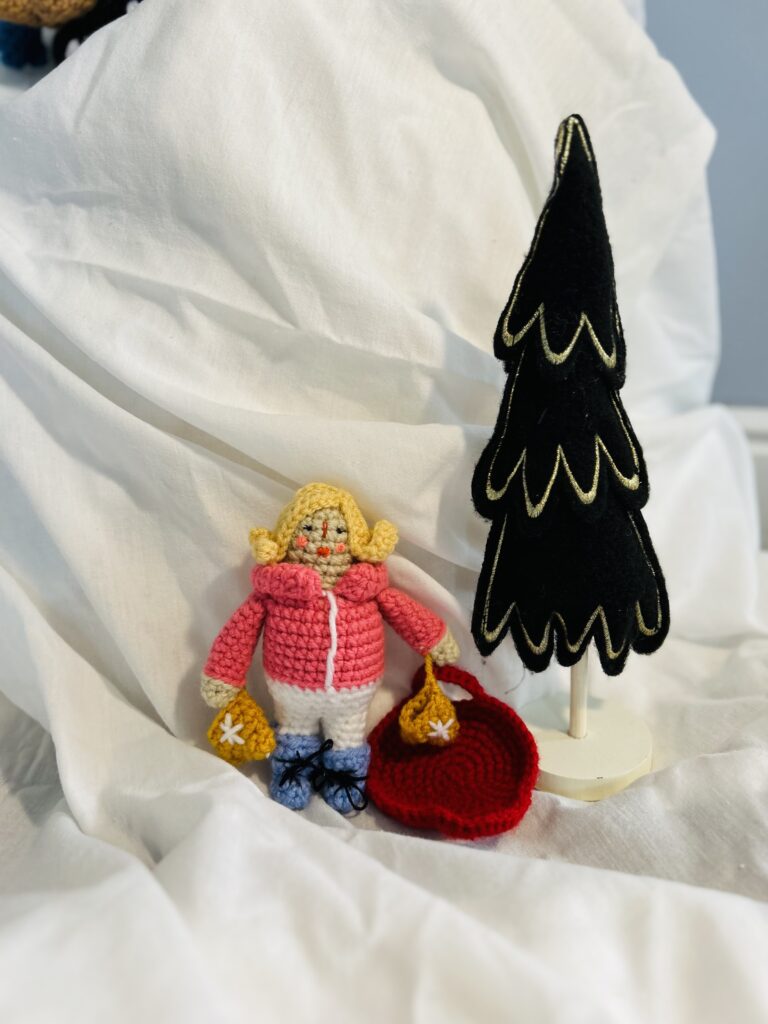
Materials: This project is a great stash buster because the pattern uses small amounts of a variety of yarn colors. Use what you have on hand for a unique look for the dolls.
Red Heart Super Saver yarn in Tan
Size E4 (3.5 mm) crochet hook
Big Twist yarn in Cerulean Blue
Big Twist yarn in Watermelon
Big Twist yarn in Light Green
Red Heart Super Saver yarn in Gold
Red Heart Super Saver in Cornmeal
Big Twist Yarn in Deep Red
Big Twist yarn in Black
Big Twist yarn in white
Needle and thread
Embroidery Floss in colors: Black, pink, Red and Brown.
Measurements:
Dolls: 6.5” tall x 3.5” wide.
Intertube: 5.5″X 1.5″
Sled Saucer: 3.5″ round
Gauge: 8 Stitches X 9 rows= 2″ X 2″ Square.
Pattern used for gauge= Single Crochet
Abbreviations:
CH – Chain Stitch
FSC – Foundation Single Crochet
HDC – Half-double Crochet
DC – Double Crochet
SC-Single Crochet
SLST – Slip Stitch
ST(S) – Stitch(es)
SK – Skip
Pattern Note: The head and body of the doll are the same for both the boy and the girl. You can change to look by adding different hair, hats, scarves and coat collars, mittens and boots with the mini patterns for each below.
If you would prefer a PDF printable version of this pattern, please visit my Etsy shop here. The small fee goes towards supporting my work but the same pattern is shared with you below for free.
Head and Body:
Rnd 1: With Tan yarn, 6 SC in a Magic loop. Pull the free end snugly to close the loop.(6) If you are unfamiliar with Magic Loop or if you’d like a quick refresher visit my helpful tutorials page here.
Rnd 2: *SC in the next ST, 2 SC in the next ST.** Repeat from * to ** around. (9)
Rnd 3: *SC in the next 2 ST, 2 SC in the next ST.** Repeat from * to ** around. (12)
Rnd 4: *SC in the next 3 ST, 2 SC in the next ST.** Repeat from * to ** around. (15)
Rnd 5-9: SC in each ST around. (15) Color Change to Watermelon yarn (or your color of choice for the coat) at the last pull through of the last ST of the round. Fasten off Tan and weave in end.
Rnd 10: 2 SC in BLO of each ST around. (30)
Rnd 11-17: SC in each ST around. (30)
Color change to white (or color of choice for pants) at the last pull through of the last stitch of round 17.
Rnd 18: With white yarn, SC in BLO of each ST around. (30)
Rnd 19: *SC in the next 3 ST, SC 2tog to make one Decrease ST. ** Repeat from * to ** around. (25)
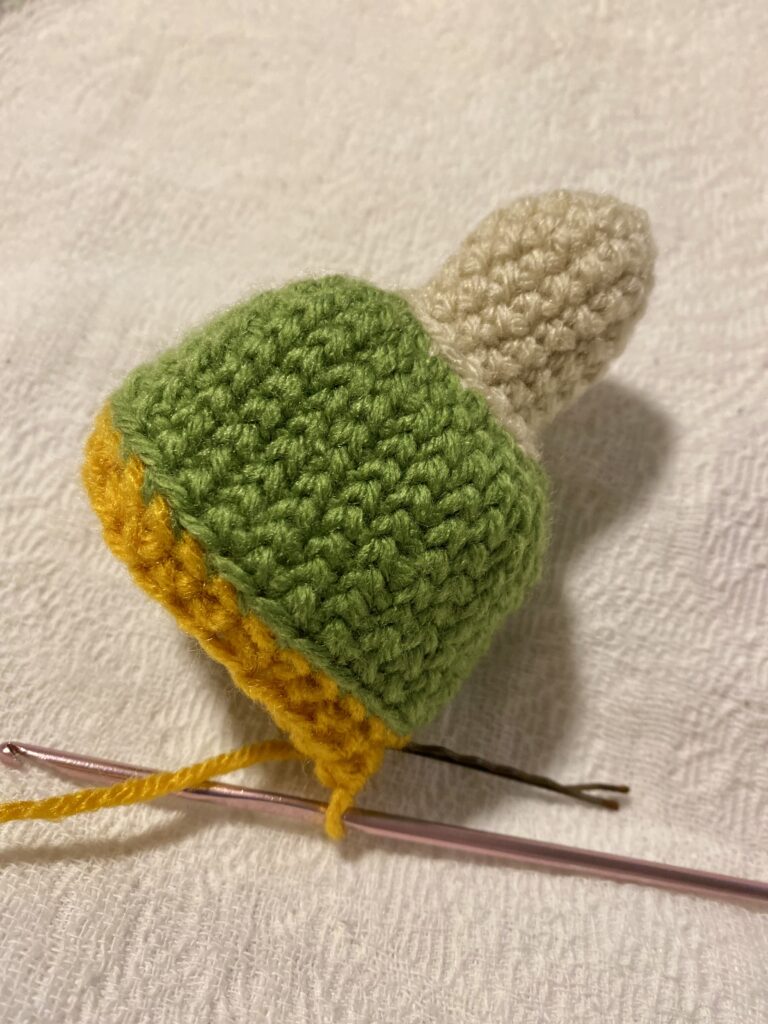
Rnd 20: *SC in the next 3 St, SC2tog to make one Decrease ST.** Repeat from * to ** around. (20)
Rnd 21: *SC in the next 3 ST, SC2tog to make one Decrease ST.** Repeat from * to ** around. (16)
Continue on to make the first leg.
Rnd 22a: Skip (SK) the first 7 ST of the Rnd. SC in the 8th ST of the round. (See picture) SC in the remaining 8 ST of the Rnd. (9)
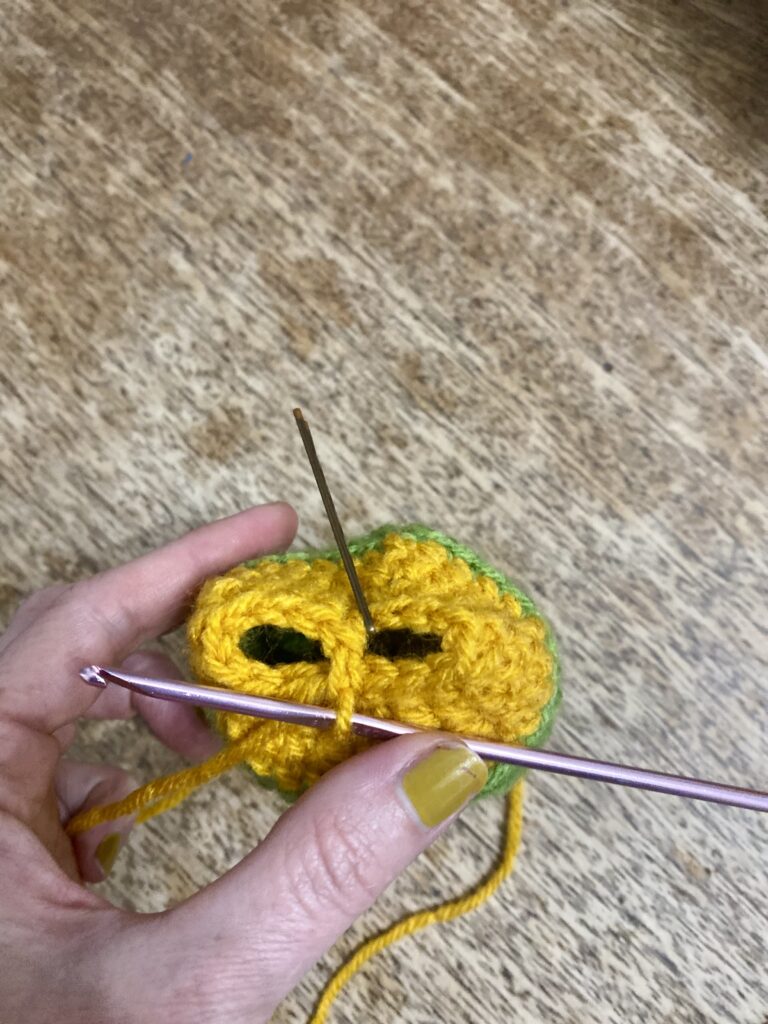
Rnd 23a-26a: SC in each ST around. (9)
Fasten off white.
Stuff the body and the first leg firmly with fiberfill.
Rnd 22b: Attach white yarn to the first unworked ST of Rnd 22. SC in each ST around. (9)
Rnd 23b- 26b: SC in each ST around. (9)
Stuff second leg firmly with fiberfill.
Snow Boots: (Make 2)
Rnd 1: With cerulean Blue yarn, 6 SC in a magic loop. Pull the free end snugly to close the loop. (4)
Rnd 2-4: SC in each ST around. (6)
Rnd 5: * SC in the next ST, 2 SC in next ST.* Repeat from * to ** around. (9)
Rnd 6: * SC in the next 2 ST, 2 SC in next ST.** Repeat from * to ** around. (12)
Rnd 7: SC in each ST around. (12) Fasten off, leaving a long tail for stitching.
Using a yarn needle and the long tail for stitching, stitch the boot onto the leg of the body. Repeat with the other boot on the other leg.
Arms with Mittens (Make 2)
Rnd 1: With tan yarn, 6SC in a magic loop, pull free end snugly to close the loop.(6)
Rnd 2: SC in each ST around. (6)
Rnd 3: *SC in the next ST, 2 SC in the next ST.** Repeat from * to ** around. (9) Color change to Watermelon yarn, (or color of choice for the sweater) at the last pull through of the last ST of the rnd.
Rnd 4: SLST in BLO of each ST around. (9)
Rnd 5-12: SC in each ST around. (9)Fasten off, leaving a long tail for stitching.
Mitten:
Rnd 1: With Gold yarn, (or color of choice for mittens) 6 SC in a magic loop. Pull free end of the yarn snuggly to close the loop.(6)
Rnd 2: SC in each ST around. (6)
Rnd 3: *SC in the next ST, 2 SC in the next ST.** Repeat from * to ** around. (9)
Rnd 4: CH 4, SC in the second CH from the hoop and in the next 2 CH. (This is the thumb part of the mitten.) SC in each of the remaining ST around. (9)
Rnd 5: Fold the thumb section of the mitten down Against the outside of the mitten. SC in the base stitch of the thumb section and then continue to SC in each ST around. (9)
Rnd 6: SC in the next 6 ST. Fasten off leaving a long tail.
I don’t stuff the arms with fiberfill but you can if you’d like to.
Using a yarn needle and the long tail for the mitten, attach the mitten to the bottom sleeve of the coat allowing the mitten to dangle from a 1/2 inch string below the hand.
Now, using a yarn needle and the long tail from the arm, attach the arms to the sides of the body.
Jacket Collar:
Rnd 1: With Watermelon yarn, (or the color chosen for the jacket) CH 6, SLST in the first ST to make a loop.
Rnd 2-23: SC in each ST around. (6)
Fasten off, leaving a long tail for stitching. Using a yarn needle and the long tail, stitch the collar to the neckline of the jacket around the neck of the doll.
Hair:
Girls Hair:
Row 1: With Cornmeal colored yarn CH 12, turn.
Row2: SC in the second CH from the hook and in each remaining ST across.(11)
Repeat row 1 and 2 four more times. Fasten off, leaving a tail for stitching.
You should now have a row of 10 columns hooked together at the top of the row. Now fold the top of the row in half and stitch the tops of the row together. The end result should look spidery, like this.
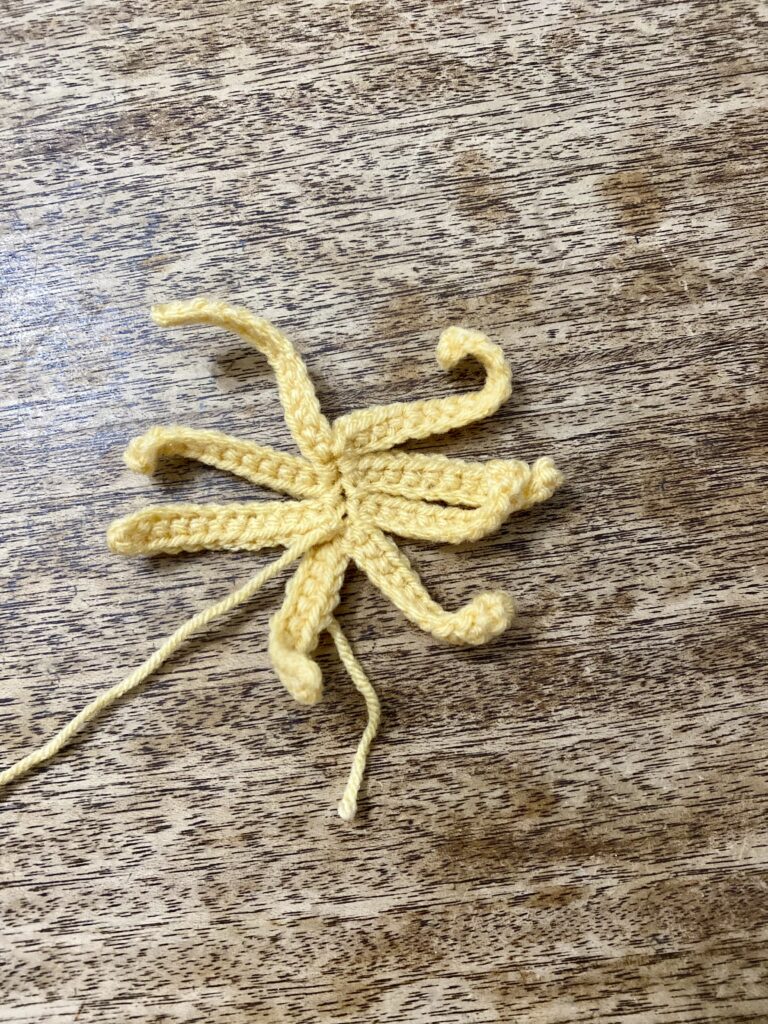
Now place the hair on top of the head of the doll and using a needle and matching thread, stitch the hair in place, arranging it how you’d like.
Boys Hair:
Row 1: With Dark Brown yarn (or desired color for hair) CH 6, turn. SC in second CH from the hook and in each remaining ST across. (5)
Row 2: CH 7, turn. SC in the second CH from the hook and in each remaining CH across. (6)
Repeat rows 1 and 2 twice more.
Row 7: CH 4, turn. SC in the second CH from the hook and in each remaining ST across. (3)Fasten off, leaving a tail for stitching.
You should now have a row of 7 columns hooked together at the top of the row. Now fold the top of the row in half and stitch the tops of the row together.
Using a needle and matching thread, stitch the hair to the dolls head, tacking it down with stitches to hold it in place how you would like.
Embroidery and Finishing:
The facial embroidery will give your doll his or her unique personality. Using embroidery floss, add eyes, eyebrows, rosy cheeks, lips, and a nose. I also added to laces to the boots.
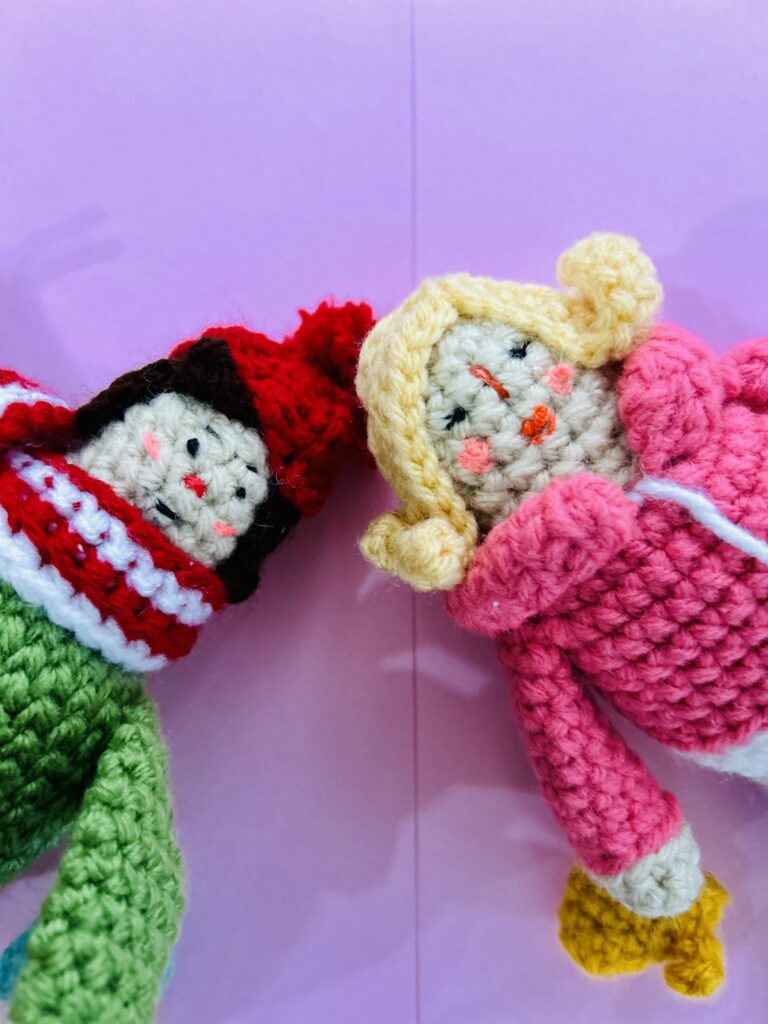
Scarf:
Row 1: with red yarn, or color of choice, CH 45. Color Change to White on the last Pull through of the the last ST of the row.
Row 2: SC in the second ST from the hook and in each ST across. (44) Color change to Red at last pull through of the last ST of the row. CH 1, turn.
Row 3: SC in each ST across, color change to white at the last pull through of the last ST of the row. CH 1, turn. (44)
Row 4: SC in each ST across. Fasten off.
You can add a bit of fringe to the scarf by tying strands of yarn to the ends and clipping them to make the edges even.
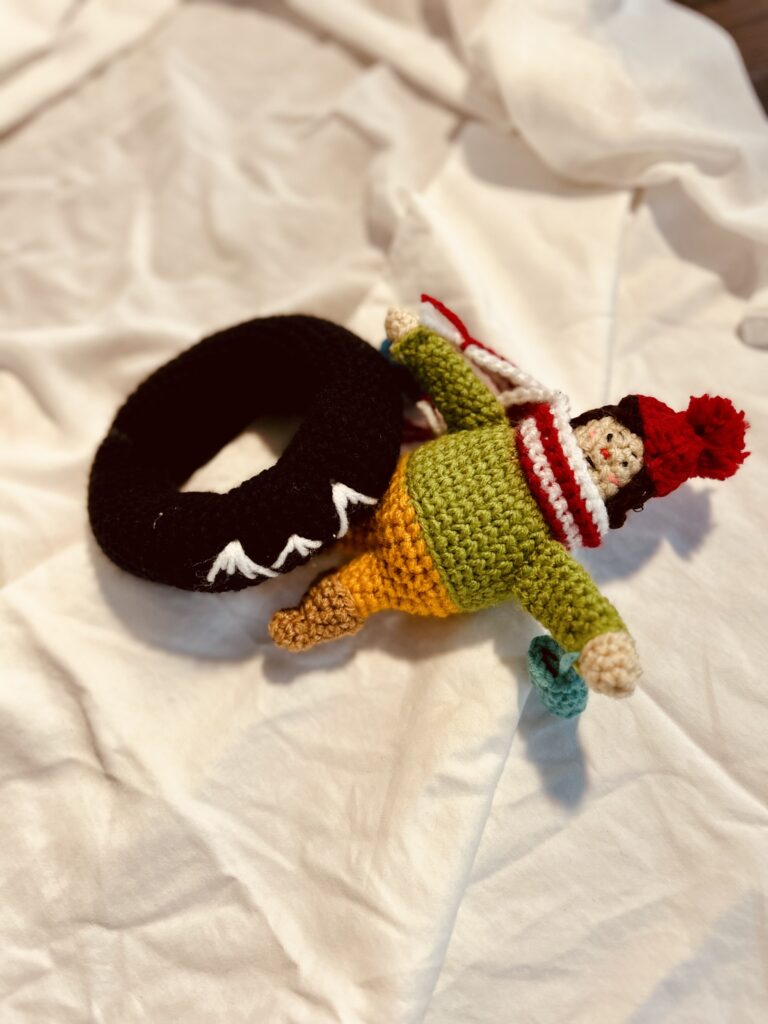
Epic Racer Intertube
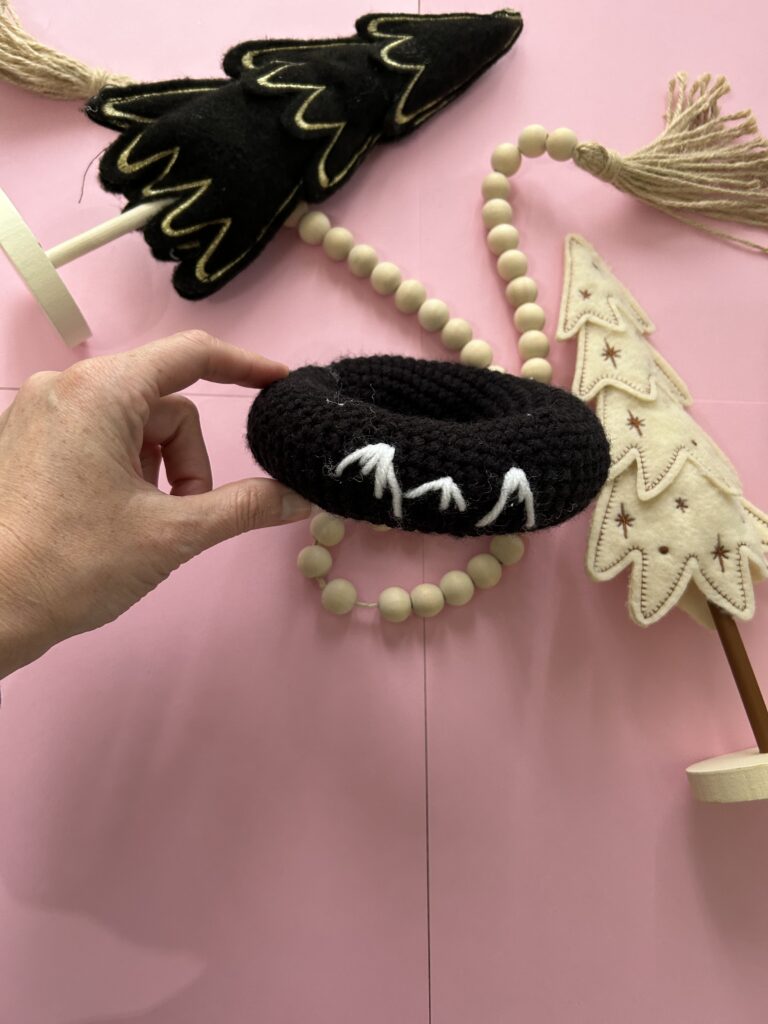
Bouncy and carefree, where it stops, nobody knows!
Row 1: CH 20. SL ST into the first CH to form a loop. (20)
Row 2- 60: SC in each ST around. (20) Fasten off, leaving a long tail for stitching.
You should now have a cylindrical tube that is 13 inches in length. Stuff the tube firmly with fiberfill.
Using a yarn needle and the tail for stitching, align the open edges of the tube and stitch the openings together to make a circular tube.
Tube Handle:
Row 1: CH 15, turn.
Row 2: SC in second CH from the hook and in remaining 13 ST across. Fasten off, leaving a long tail for stitching.
Using a yarn needle and the tail for stitching, stitch the handle to the tube on both ends of the strip, leaving the middle of the strip unattached.
The Incredible Rocket Snow Saucer
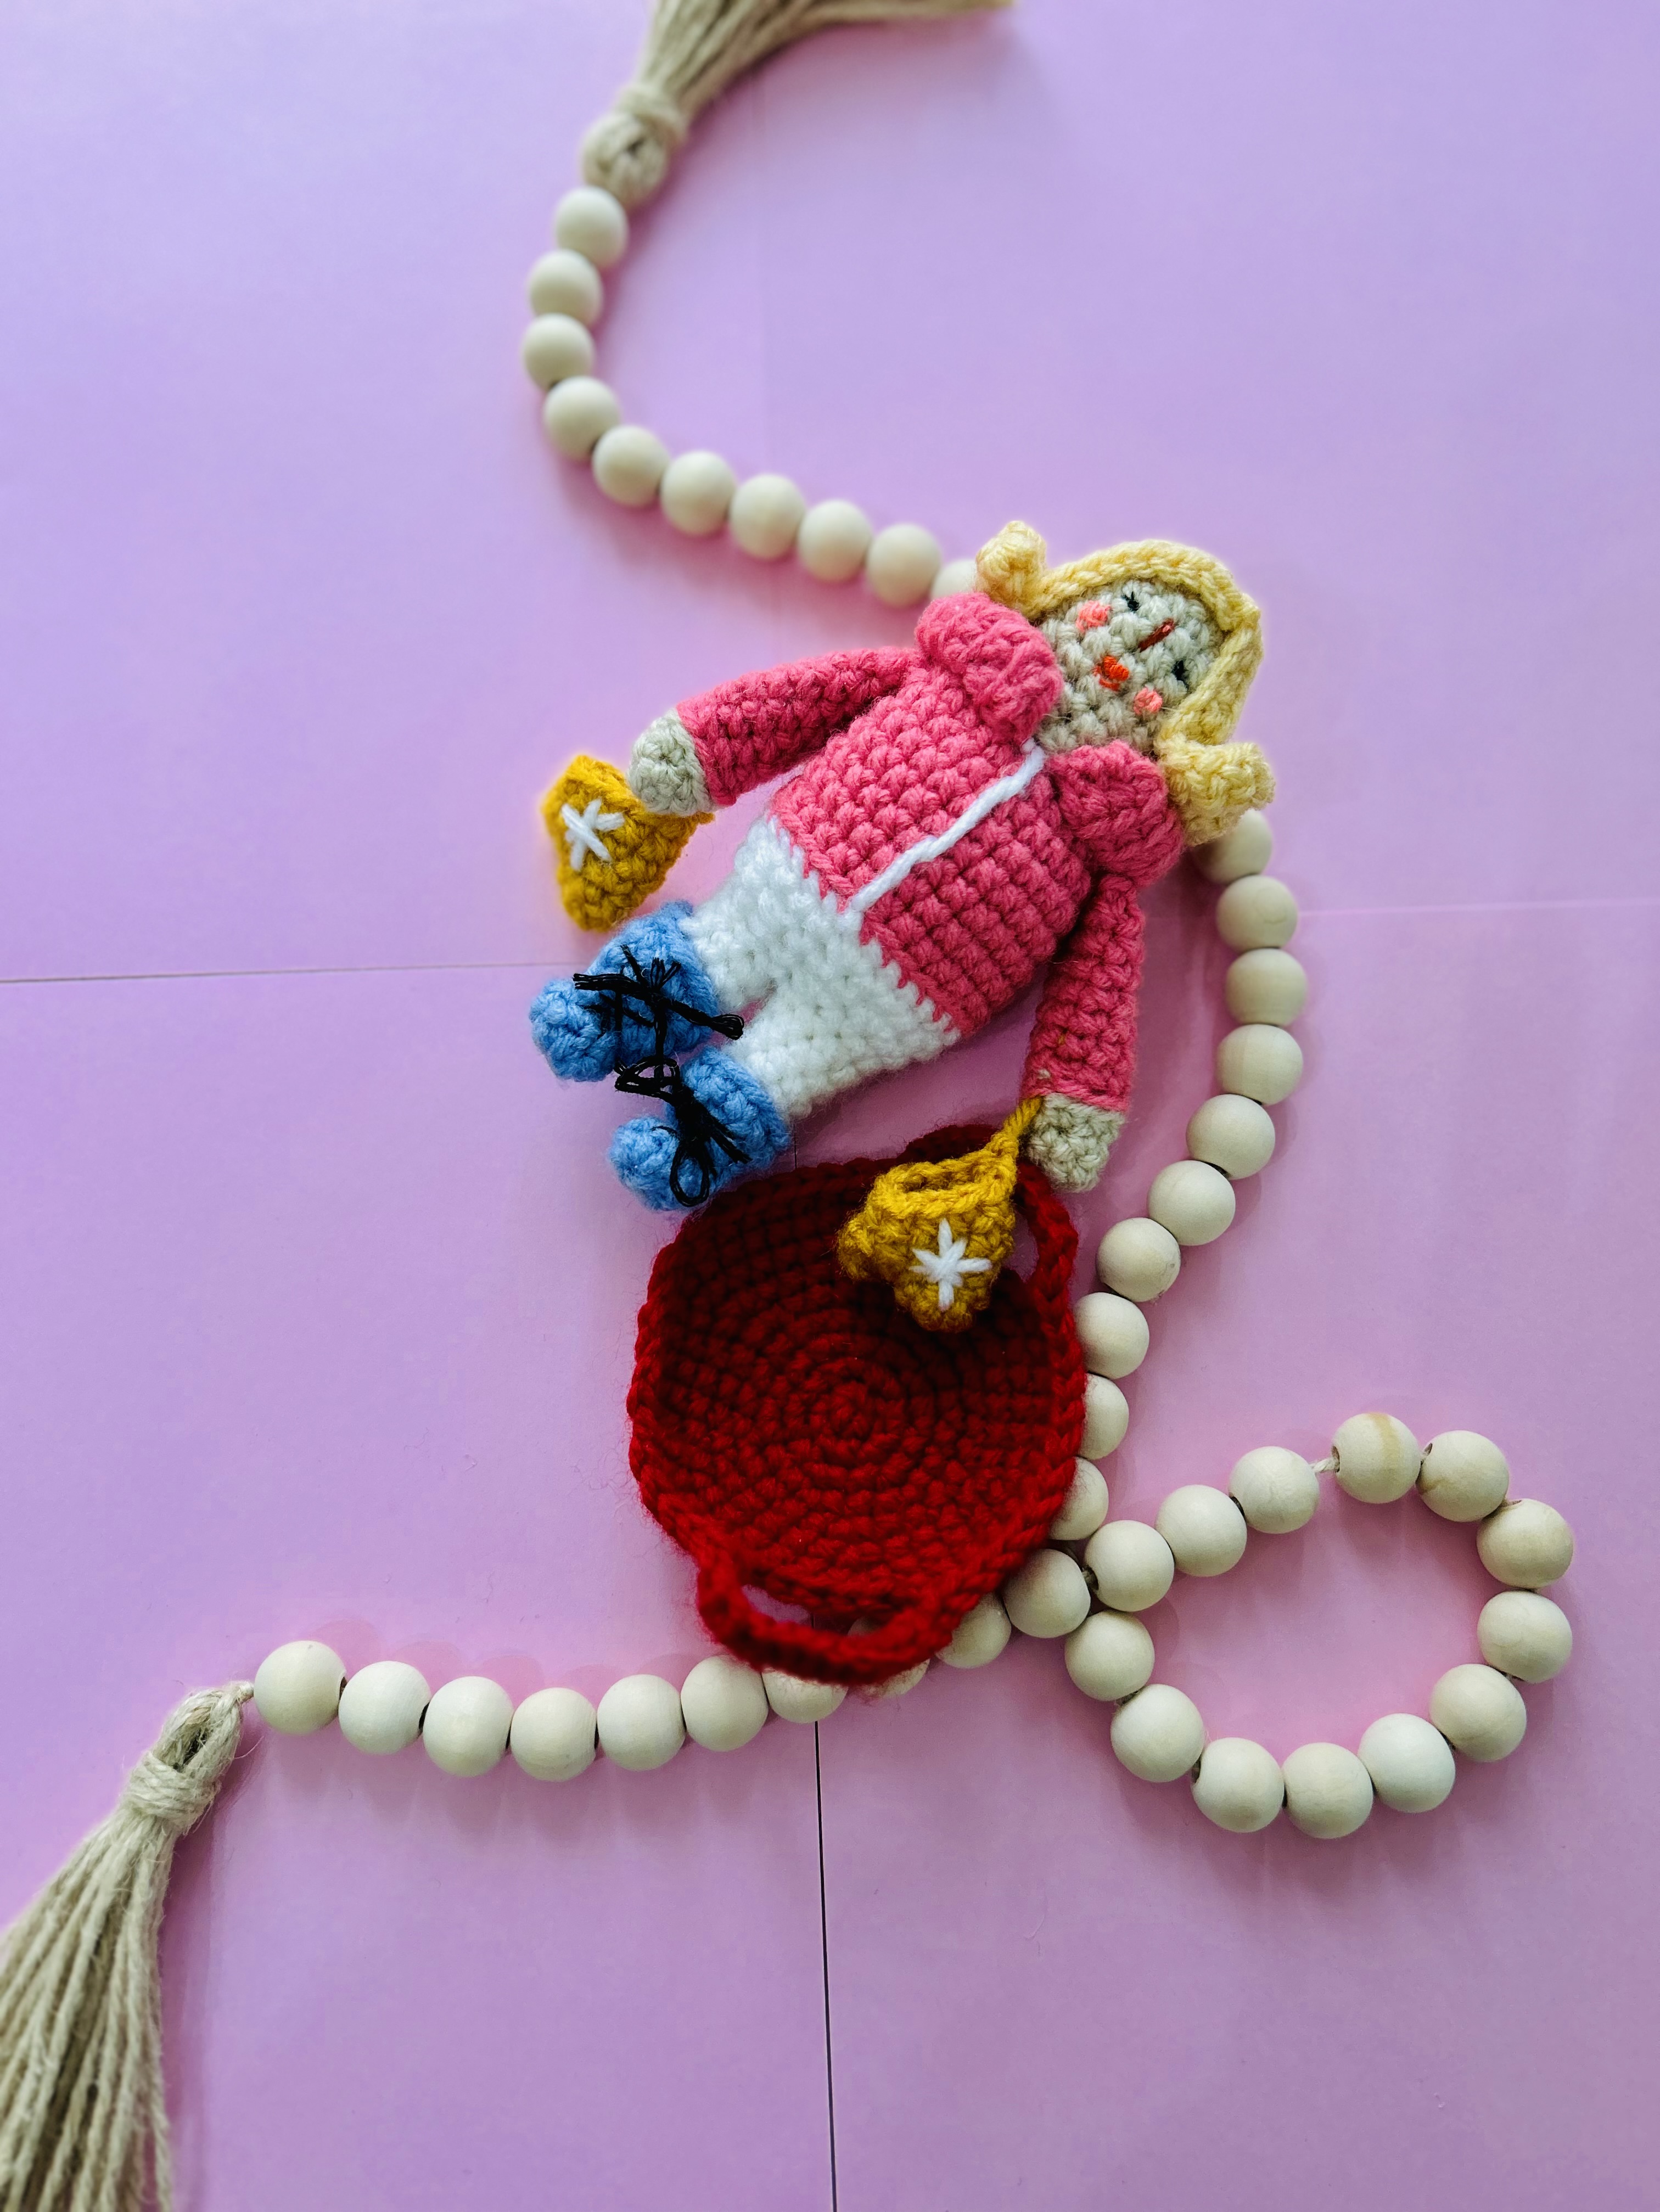
A little bit terror, a bit of Nostalgia, and a lot of fun. You haven’t lived until you’ve found yourself sliding full speed down a hill backwards on one of these.
Rnd 1: With Deep Red Yarn, 6 SC in a magic loop. Pull the free end of the loop snugly to close the loop. (6)
Rnd 2: 2 SC in each ST around. (12)
Rnd 3: *SC in the next ST, 2 SC in the next ST.** Repeat from * to ** around. (18)
Rnd 4: *SC in the next 2 ST, 2 SC in the next ST.** Repeat from * to ** around. (24)
Rnd 5: *SC in the next 3 ST, 2 SC in the next ST.** Repeat from * to ** around. (30)
Rnd 6: * SC in the next 4 ST, 2 SC in the next ST.** Repeat from *to ** around. (36)
Rnd 7: *SC in the next 5 ST, 2 SC in the next ST.** Repeat from * to ** around. (42)
Rnd 8: SC in the next 10 ST, CH 10, SK the next 4 ST, SC in the next 14 ST, CH 10, SK the next 4 ST, SC in the next 10 ST. (34 SC, 2 CH 10 Spaces.)
Rnd 9: SC in the next 10 ST, 12 SC in the CH 10 space, SC in the next 14 ST, 12 SC in the CH 10 space, SC in the next 10 ST. Fasten off and weave in ends.
Snow Hat:
Row 1: With red yarn, (or your color of choice) CH 6, turn.
Row 2: SC in the second CH from the hook and in each ST across. CH 1, turn. (5)
Row 3- 14: SC in BLO of each ST across. CH 1, turn. (5)
Fasten off, leaving a long tail for stitching.
Fold the strip in half with the short edges aligned together. Using a yarn needle and the long tail, stitch the seam of the hat to make the strip into a circle, like a headband. Weave the yarn through the ends of the rows and then pull the yarn snuggly to close the top of the hat. Secure with a knot and weave in ends.
Copyright:
The patterns and images found here are the property of Briarberryfarmhouse.com. Please do not sell the pattern or alter it to claim as your own. You may, however sell items made from this pattern. Please credit the designer by tagging Briarberryfarmhouse.com.
Get Excited!
Get ready for the next addition to Klondike Village Collection, the cocoa shack! Coming Soon!
You might also enjoy:
Pine Tree Views Vest: Beautiful, timeless and Cozy! I made this for my daughter and the pattern has become a hit!
Baby Briarbears: If you love Amigurumi toy sets, don’t miss the baby Briarbears!
