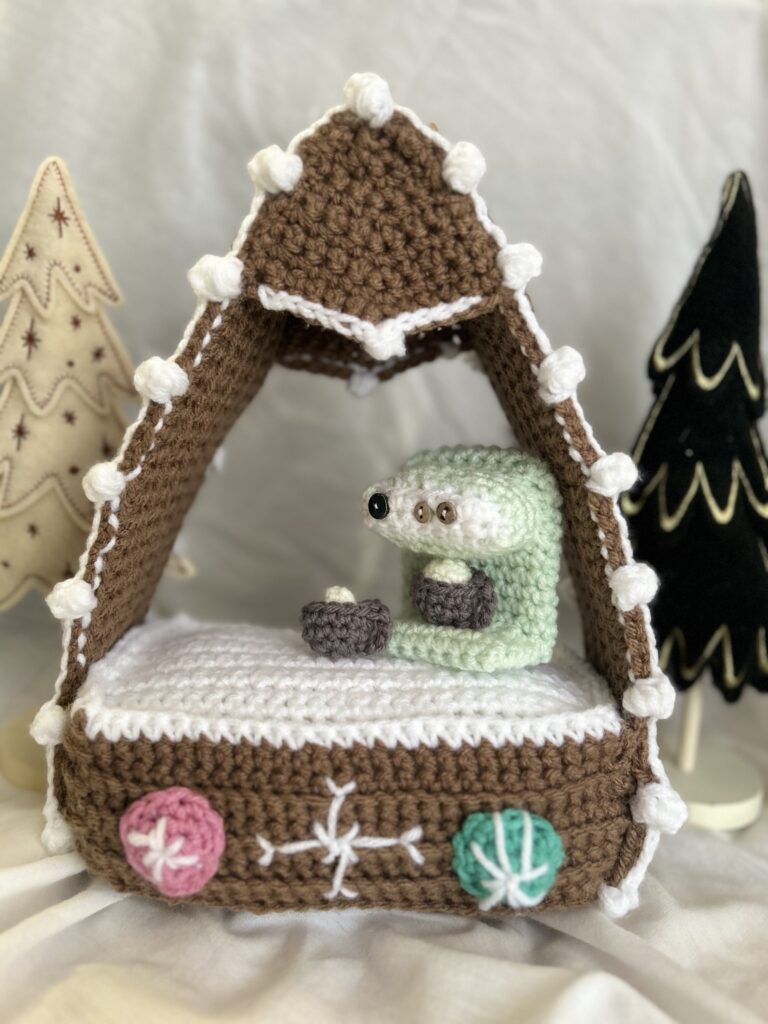
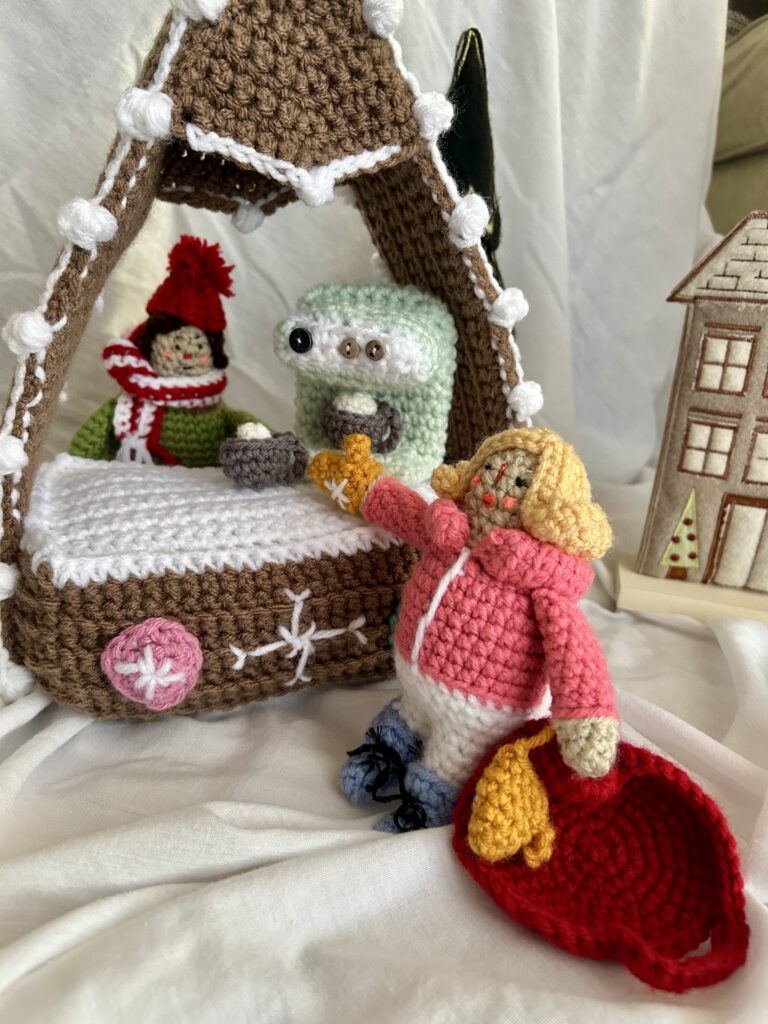
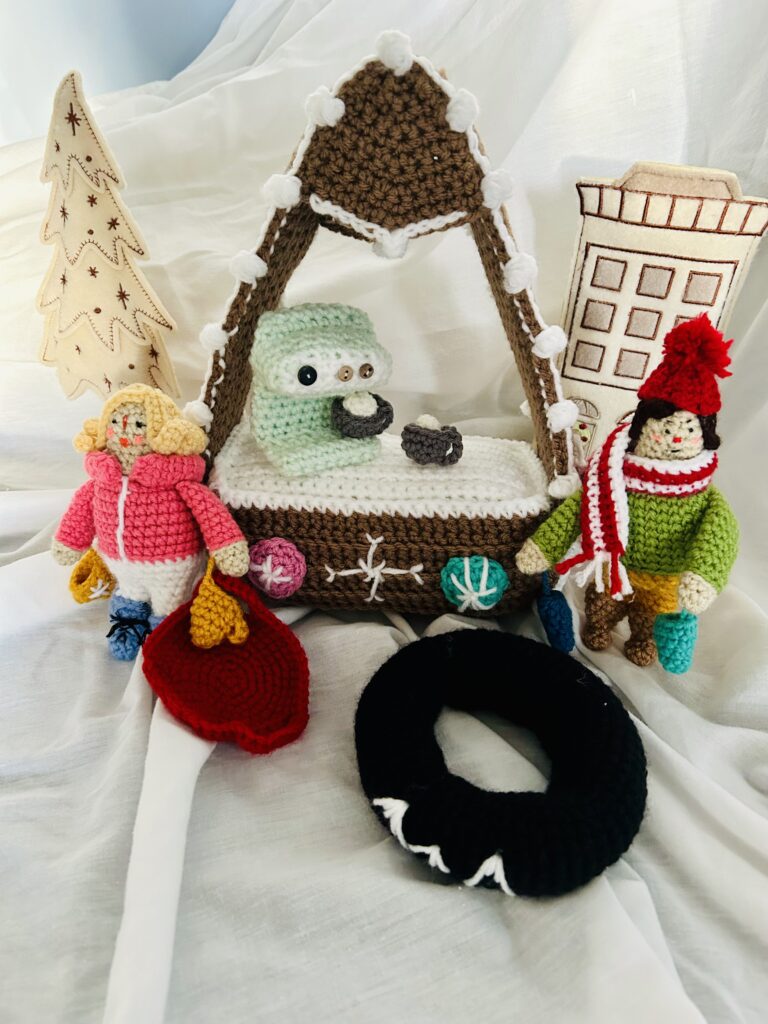
Klondike Village Collection: Comfy Cocoa Shack
Klondike Village runs on steaming cups of Cocoa. Whether the villagers are getting pepped to get their holiday shopping done, meeting with coworkers for party planning, Caroling their way through the village, or grabbing a cup with friends after conquering the sledding hill, cocoa is a hot item on the agenda.

Make your cocoa shack as you assemble the people in your Klondike Village.
Materials:
Pell on ultra firm Interfacing for stabilizing.
Red Heart Super Saver Yarn in Cafe au Lait
Red Heart Super Saver Yarn in White
Big twist yarn in Aqua
Red Heart Super Saver yarn in Dark pink
Fiberfill
Yarn Needle
Size H8 (5.00 mm) crochet hook and Size E4 (3.5 mm) hook.
Big Twist yarn in Mint
Mainstays yarn in Gray
Bernat Baby yarn in Off White
Gauge:
Stitches X 8 Rows = 2″ X 2″ square
Pattern used for gauge: SC
Measurements:
Finished measurements are 12 inches tall x 8.5 inches wide and 4 inches deep.
Abbreviations:
CH – Chain Stitch
FSC – Foundation Single Crochet
HDC – Half-double Crochet
DC – Double Crochet
SLST – Slip Stitch
ST(S) – Stitch(es)
SK – Skip
SC- Single Crochet
BLO- Back Loop Only
FLO- Front Loop Only
Pattern instructions:
If you would prefer a printable PDF version of this pattern, please visit my Etsy shop here. The small fee helps to support my work, but the same pattern is available for free here.
Bottom of the Counter:
Row 1: CH 26, turn.
Row 2: SC in the second CH from the hook and in each remaining ST across. CH 1, turn. (25)
Row 3-15: SC in each ST across. CH 1, turn. (25)
Rnd 16: In back loop only, (BLO) SC in each ST across, continue working all the way around the base of the rectangular piece by working 15 SC down the side of the panel, then 25 SC across the other long edge, and finally 15 SC along the last side. Finish the row by working a SLST in the first ST of the round. (80)
Rnd 17: In Front loop only, SC in each ST around. (80)
Rnd 18: In BLO, SC in each ST around. (80)
Rnd 19-24: Alternate repeating rows of 17 and 18 to create a ribbed look for the counter. (80)
After completing Rnd 24, fasten off and weave in end.
Counter Top:
Row 1: With White yarn, CH 26, turn.
Row 2: SC in the second CH from the hook and in each remaining ST across, Ch 1, turn. (25)
Row 3-15: SC in each ST across. CH 1, turn. (25)
Align the white countertop panel over the open edges of the brown countertop matching each of the corners with a safety pin to hold them in place. Now, begin to SC around the edges, pausing when you have 10 ST left to stuff the counter firmly with fiberfill. After you have stuffed the counter, continue to SC the last remaining 10 ST to close the seam. Fasten off and weave in end.
Medallions: (Make 2)
Rnd 1: In color of your choice, 6 SC in a magic loop, pull the free end snugly to close the loop. SLST in the first ST. (6)
Rnd 2: *SC in the next ST, 2 SC in the next ST.** Repeat from * to ** around. (9)
Rnd 3: *SC in the next 2 ST, 2 SC in the next ST.** Repeat from * to ** around. (12)
Fasten off, leaving a long tail for stitching.
Using white yarn, embroider a snowflake onto the medallion. Now, using the long tail from the medallion for stitching, stitch the medallion to the front of the counter.
Using White yarn, embroider a large snowflake in the center on the front of the counter between the two medallions.
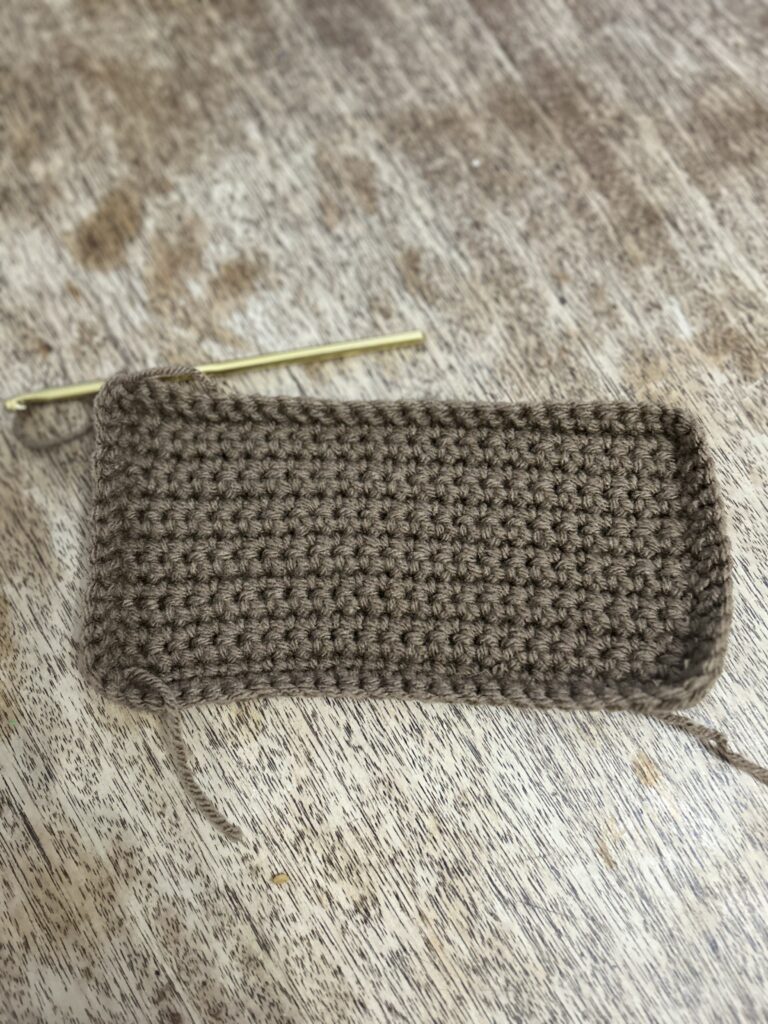
Roof and Side piece panel: (Make 1)
Row 1: With Cafe au Lait yarn, CH 76, turn.(76)
Row 2: SC in the second CH from the hook and in each remaining ST across. CH 1, turn.(75)
Row 3: SC in FLO in each ST across. CH 1, turn. (75)
Row 4: SC in each ST across. CH 1, turn. (75)
Row 5: Repeat Row 3.
Row 6: Repeat Row 4.
Row 7: Repeat Row 3.
Row 8: Repeat Row 4.
Row 9: Repeat Row 3.
Row 10: Repeat Row 4.
Row 11: Repeat Row 3.
Row 12: Repeat Row 4.
Row 13: Repeat Row 3.
Row 14: Repeat Row 4.
Row 15: Repeat Row 3.
Row 16: Repeat Row 4.
Row 17: Repeat Row 3.
Row 18: Repeat Row 4.
Row 19: Repeat Row 3.
Fasten off, leaving a long tail for stitching.
Fold the panel in half to form a long strip. Lay the strip flat on the Ultra firm Pellon and using a pencil or marking chalk, trace the outline of the strip.
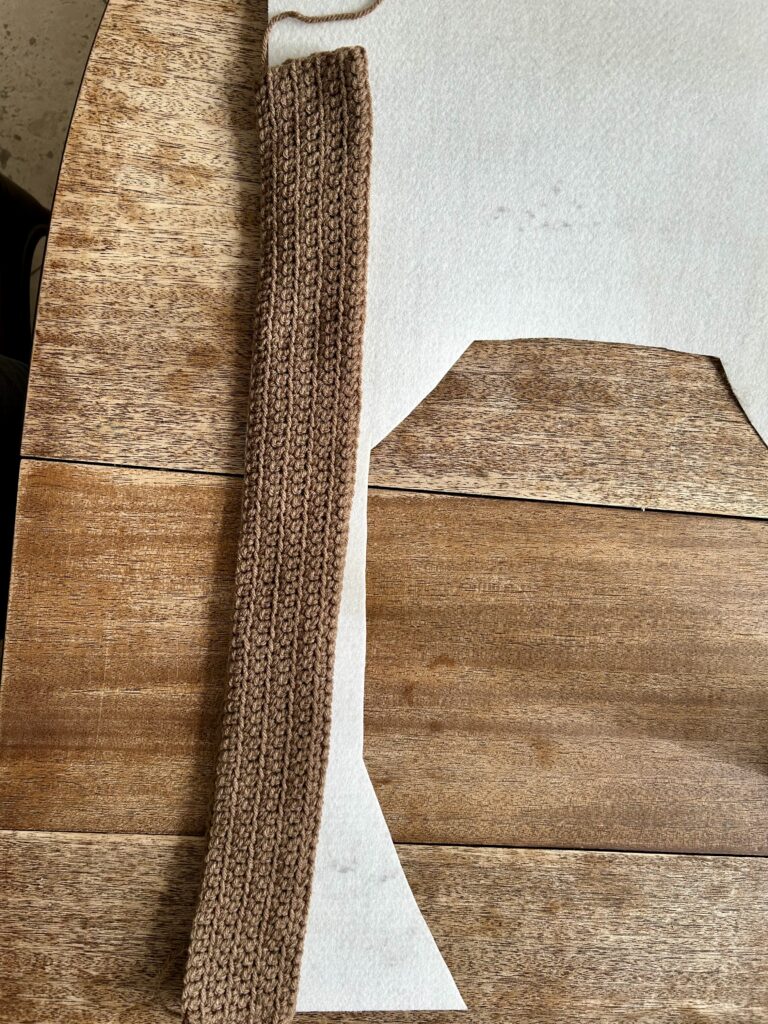
Cut out the strip of Pellon and sandwich it inside the crocheted strip making sure that the decorative side of the crocheted strip is facing out. Using the long tail for stitching and a yarn needle, stitch the open seams around the edges of the strip.
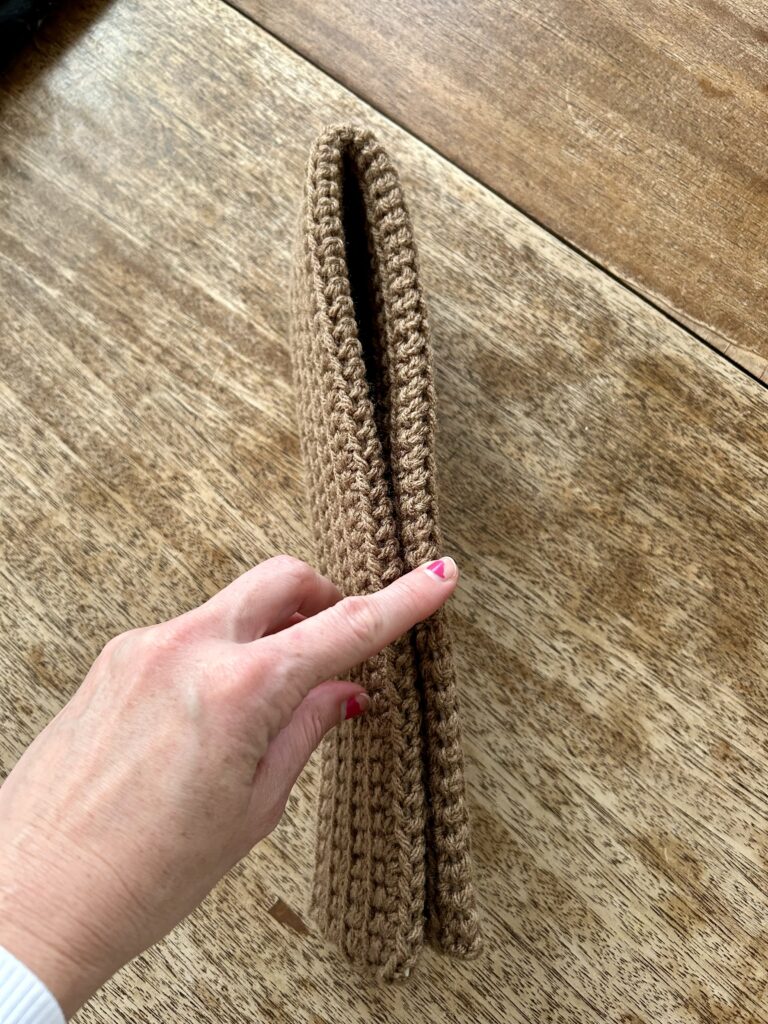
Once you have stitched the seams of the panel closed, fasten off and weave in the loose end. Now fold the panel in half to make a crease that will become the peak of the roof for the cocoa shack.
Marshmallow edging:
Attach white yarn with a SLST to the corner edge of one of the long edges of the panel roof panel. Now make a bobble ST by ( CH 2, YO, insert into same ST, pull up a loop, YO insert into same ST, pull up a loop, YO insert into same ST, pull up a loop. You should now have 7 loops on the hook. YO once more and pull through all loops on the hook. ) *SLST in the next 5 ST, Bobble ST.** Repeat from * to ** across the edge of the roof panel. Fasten off and weave in end.
Repeat the Marshmallow edging on the other long edge of the panel.
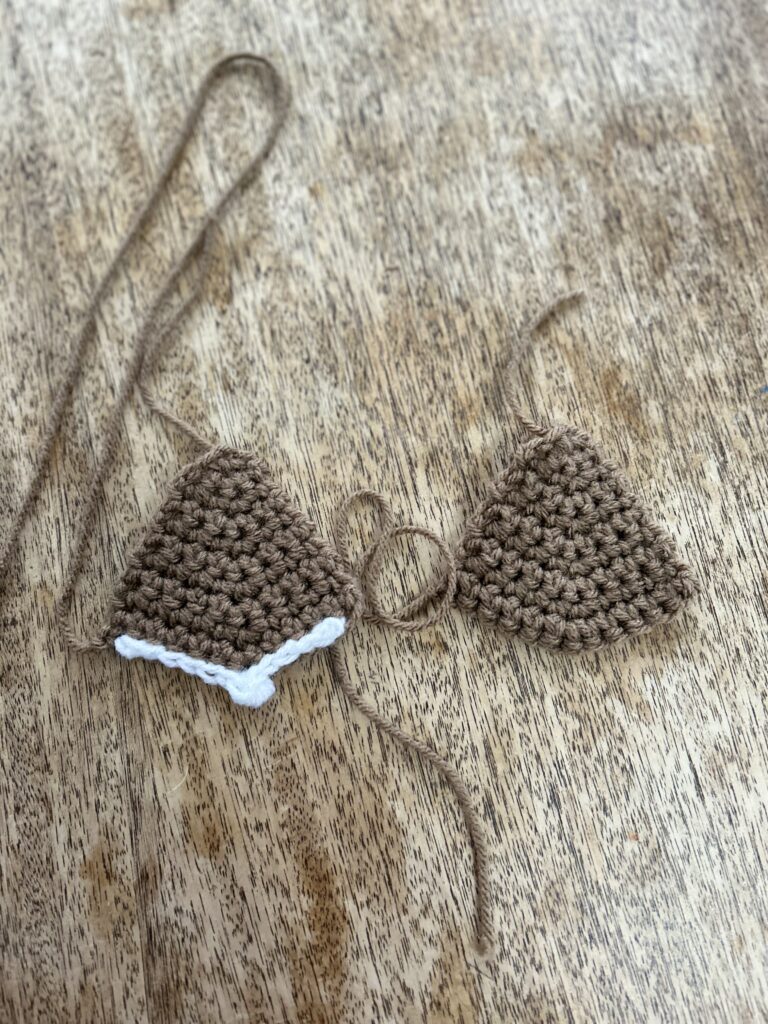
Front and Back Roof:
Row 1: With Brown yarn, CH 1. Turn.
Row 2: 3 SC in the CH. CH 1, turn. (3)
Row 3: SC in the next ST, 2 SC in the next ST, SC in the next ST. CH 1, turn. (4)
Row 4: SC in the next 2 ST, 2 SC in the next ST, SC in the next ST. CH 1, turn. (5)
Row 5: SC in the next 2 ST, 2 SC in the next ST, SC in the next 2 ST. CH 1, turn. (6)
Row 6: SC in the next 3 ST, 2 SC in the next ST, SC in the next 2 ST, CH 1, turn. (7)
Row 7: SC in the next 3 ST, 2 SC in the next ST, SC in the next 3 ST, CH 1, turn. (8)
Row 8: SC in the next 4 ST, 2 SC in the next ST, SC in the next 3 ST, CH 1, turn. (9)
Row 9: SC in the next 4 ST, 2 SC in the next ST, SC in the next 4 ST, CH 1, turn. (10)
Row 10: SC in the next 5 ST, 2 SC in the next ST, SC in the next 4 ST, CH 1, turn. (11)
Row 11: SC in the next 5 ST, 2 SC in the next ST, SC in the next 5 ST, CH 1, turn. (12)
Fasten off, leaving a long tail for Stitching.
Marshmallow edging:
Attach White yarn with a SLST to the last ST of Row 11 of the Front or Back Roof Panel. SLST in the next 6 ST, Make a Bobble ST in the 6th ST, SLST in the next 5 ST. Fasten off and weave in end. Repeat with the other Front or back Roof Panel.
Now, fold the long roof panel in half and set one of the front roof panels in place in the peak of the bend. Using a yarn needle and the long tail for stitching, stitch the front roof panel in place. Repeat with the back roof panel.
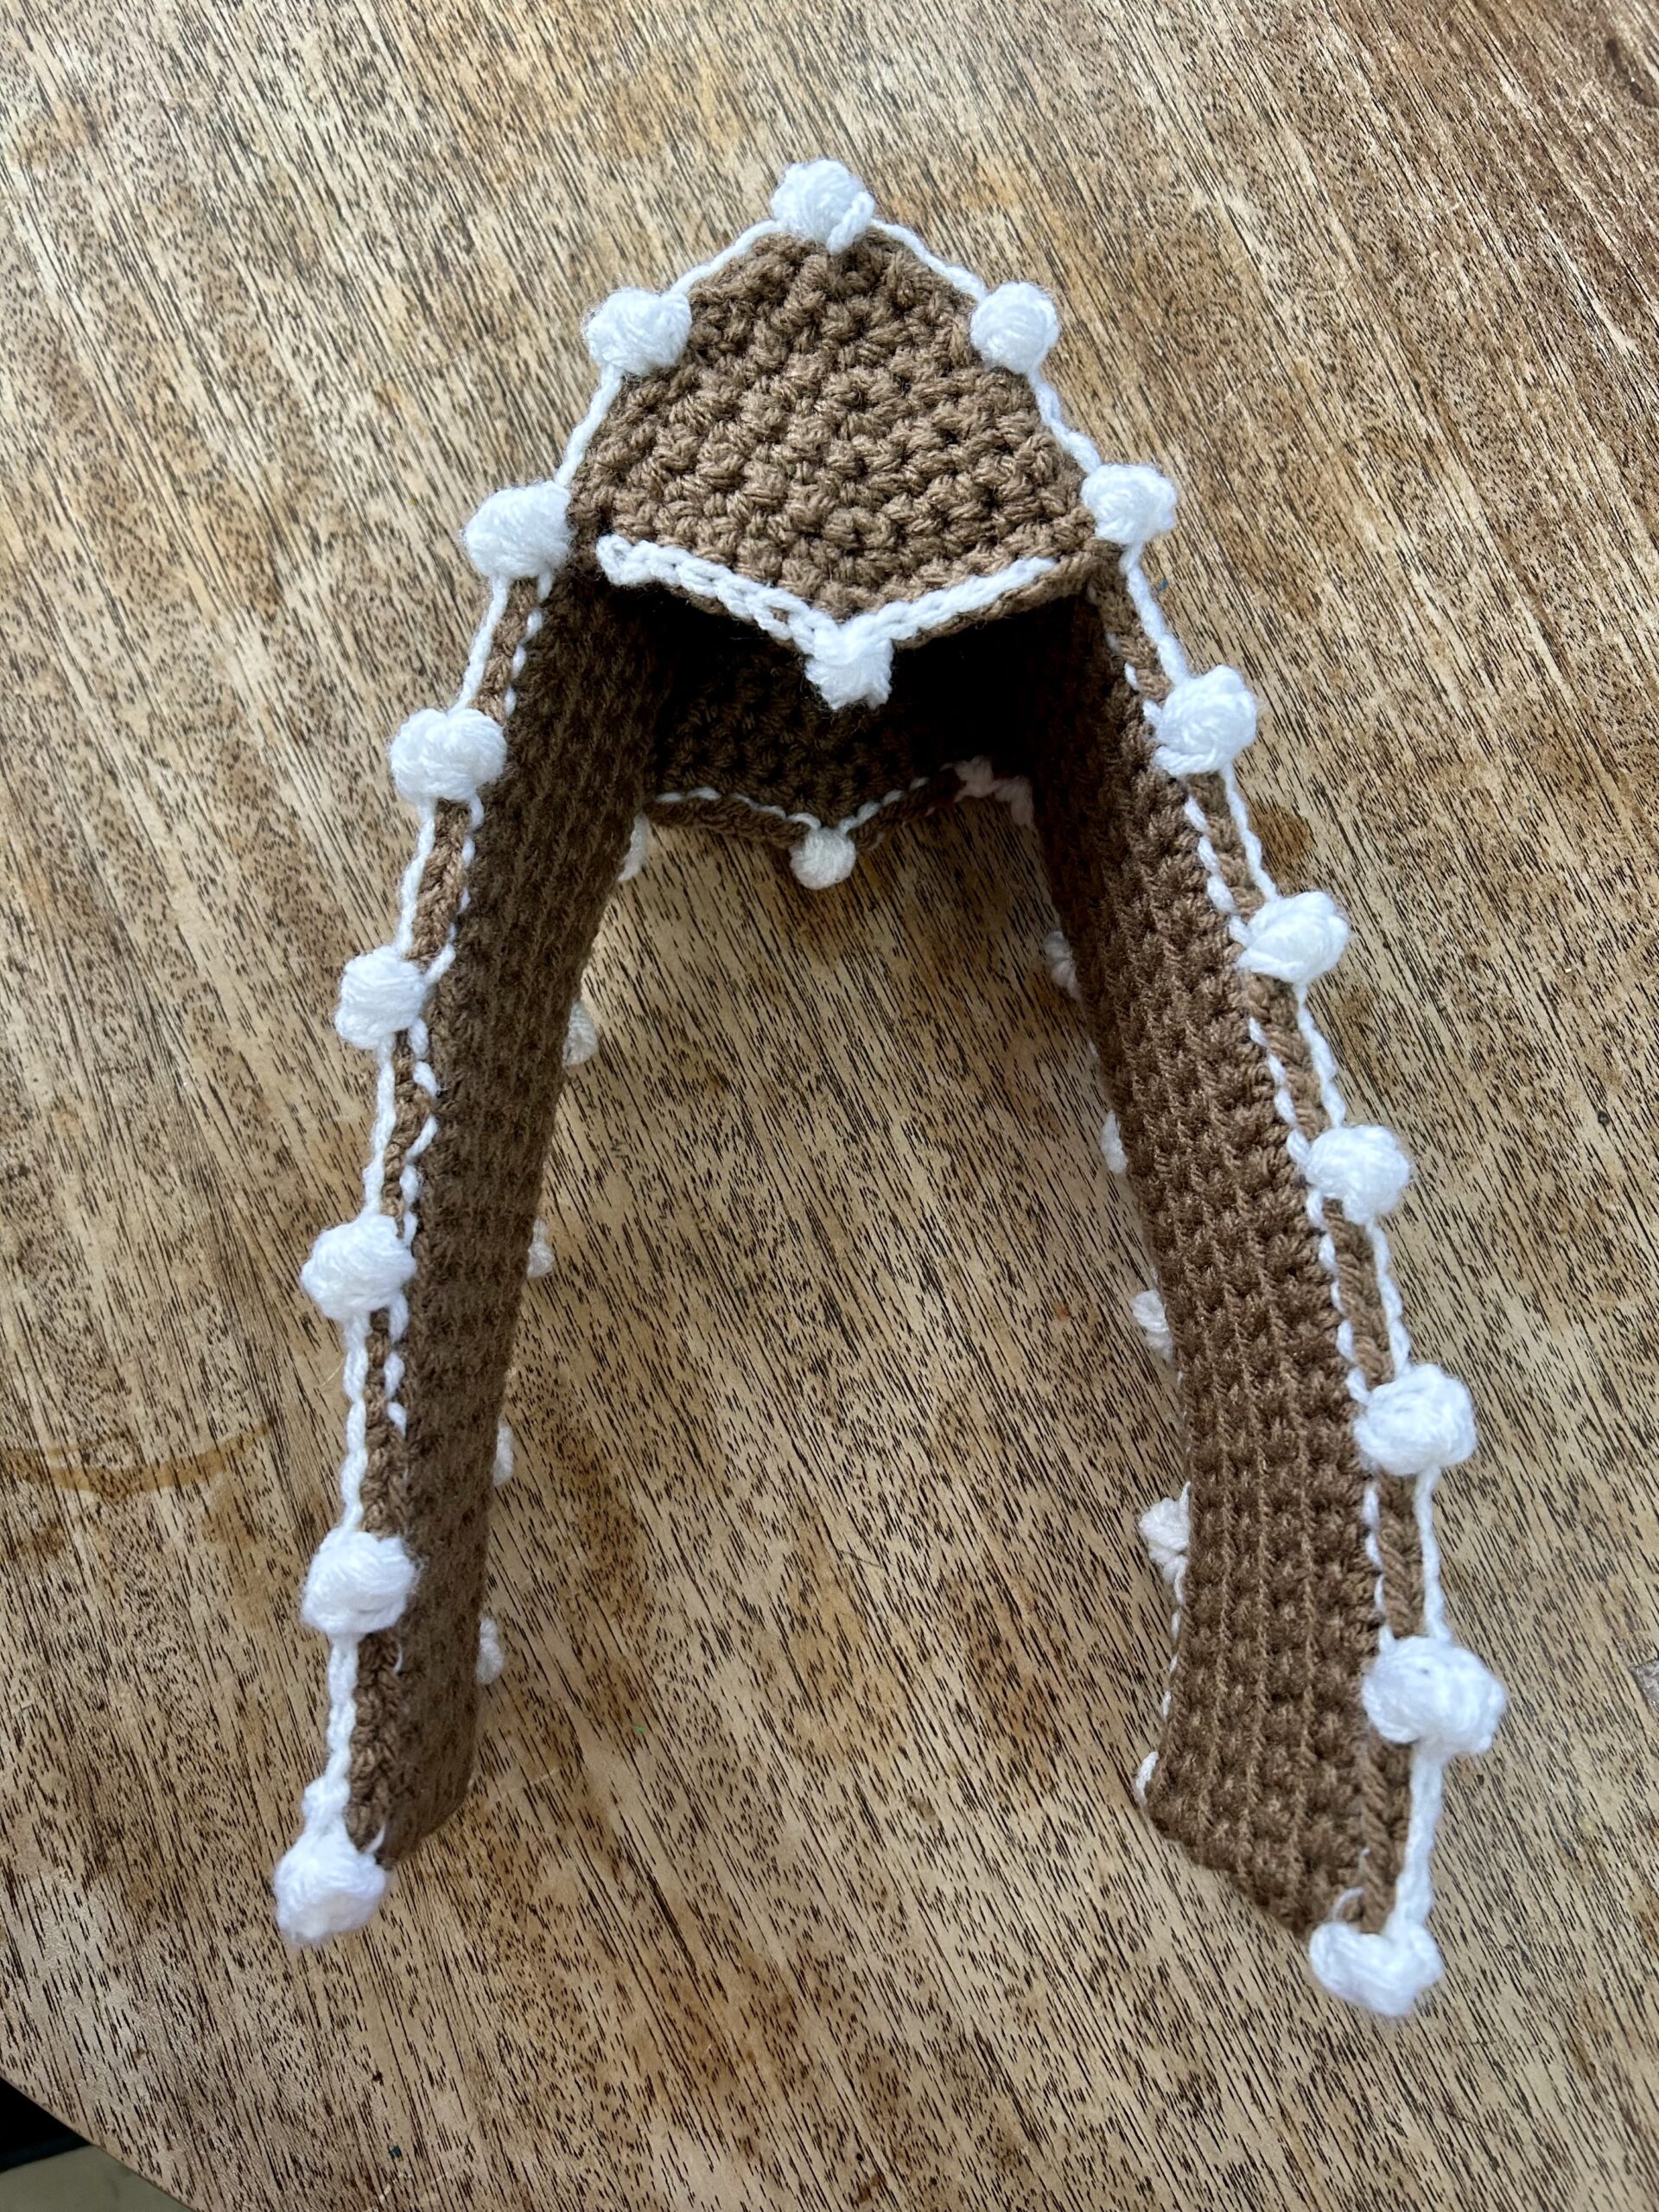
Next, Stitch the roof to the sides of the counter. I set the counter so that it protrudes a bit forward from the roofline.
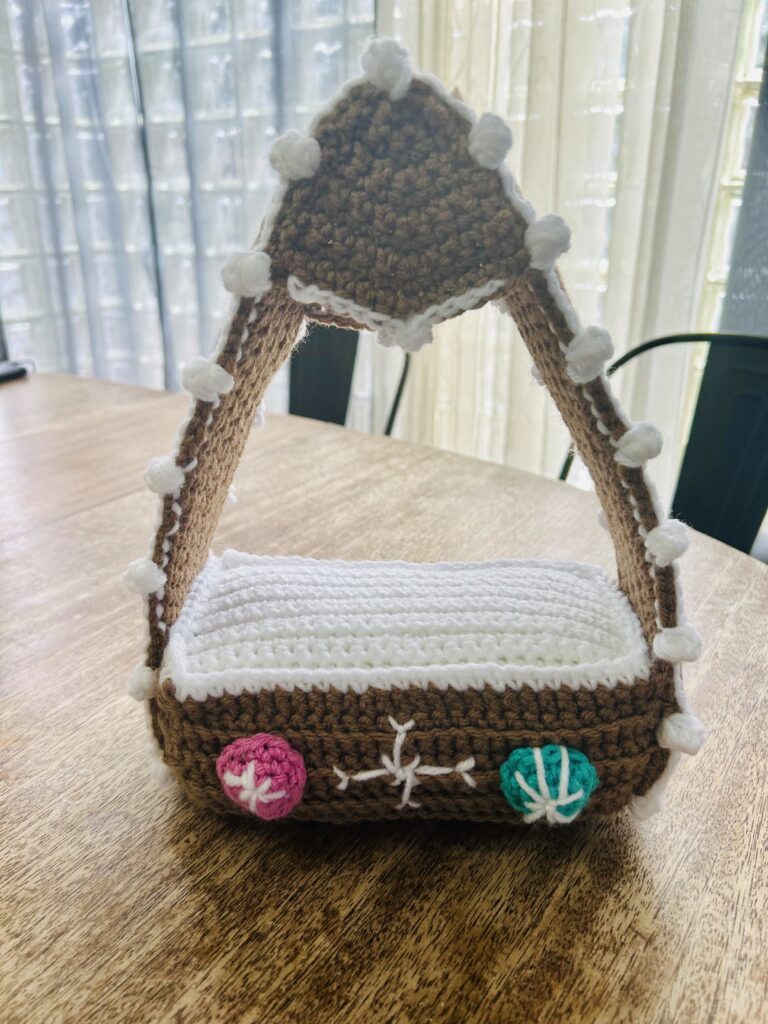
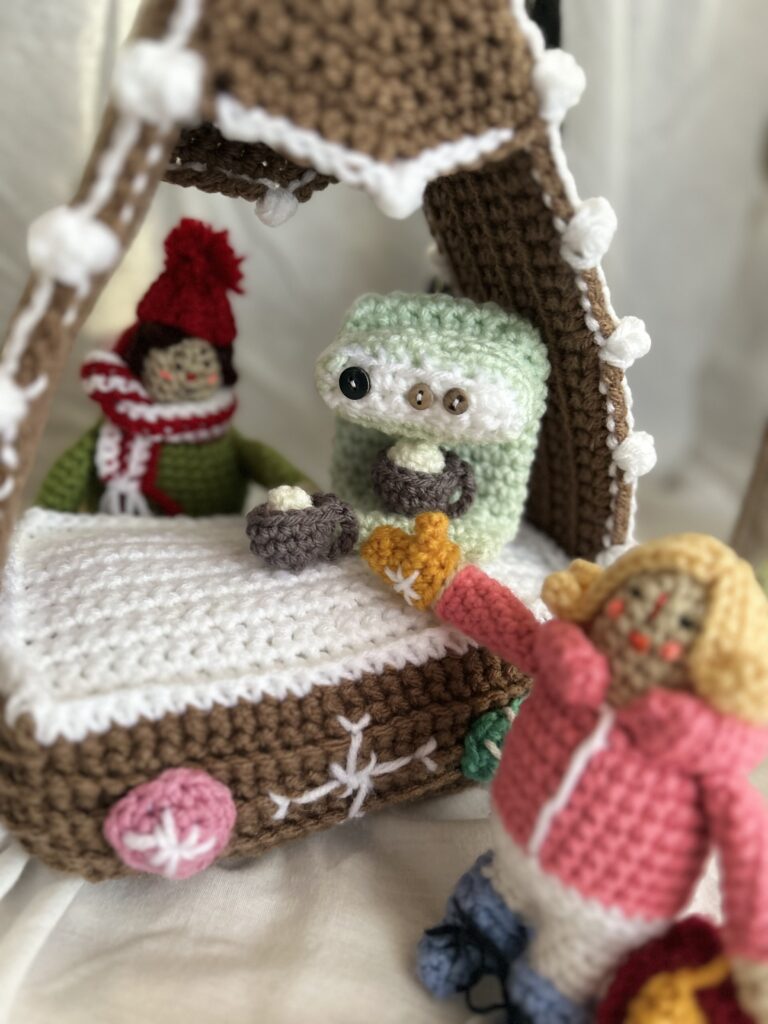
Great Job! You’ve made the Cocoa Shop!! Now let’s add a few cute accessories to go with it!
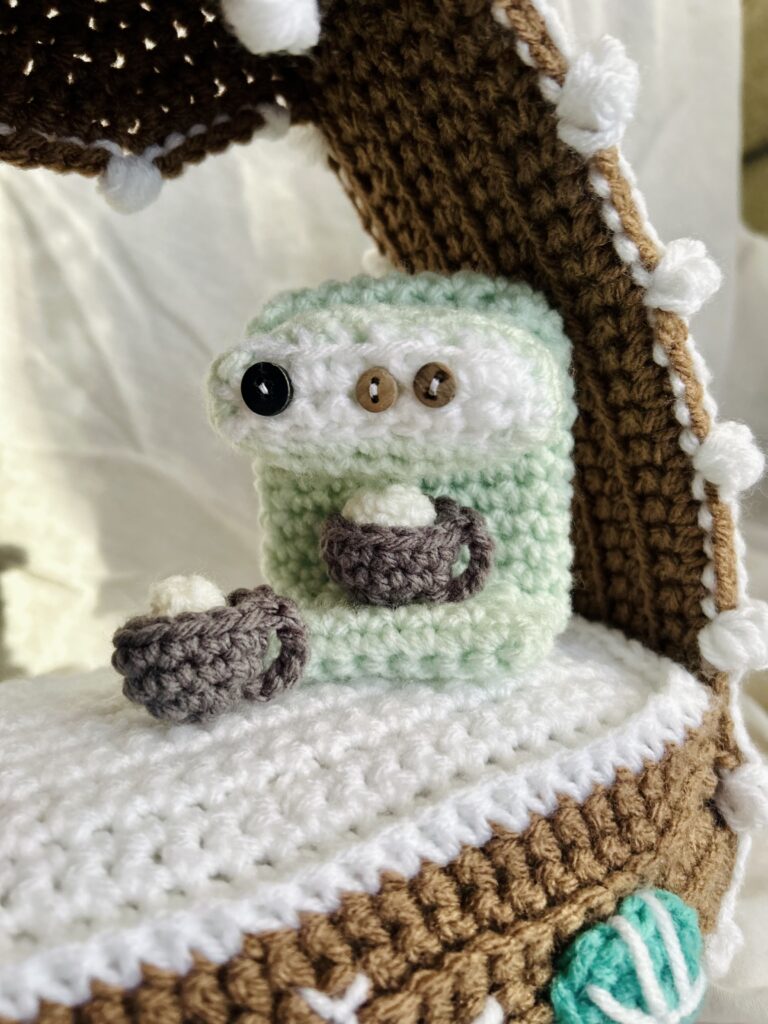
Cocoa Machine:
Row 1: With Mint colored yarn, CH 9, turn. (9)
Row 2: SC in the second CH from the hook and in each remaining ST across. CH 1, turn.(8)
Row 3: SC in each ST across. CH 1, turn. (8)
Rnd 4: SC in BLO of each ST around. (8 across, 2 on each side and 8 across the other side= 20 ST)
Rnd 5-12: SC in each ST around. (20)
Rnd 13: SC in the first 8 SC, which should be across the long edge of the Rnd. CH 1, turn, leaving the rest of the Rnd unworked. (8)
Row 14- 25: SC in the 8 SC from the previous Rnd. CH 1, turn. (8)
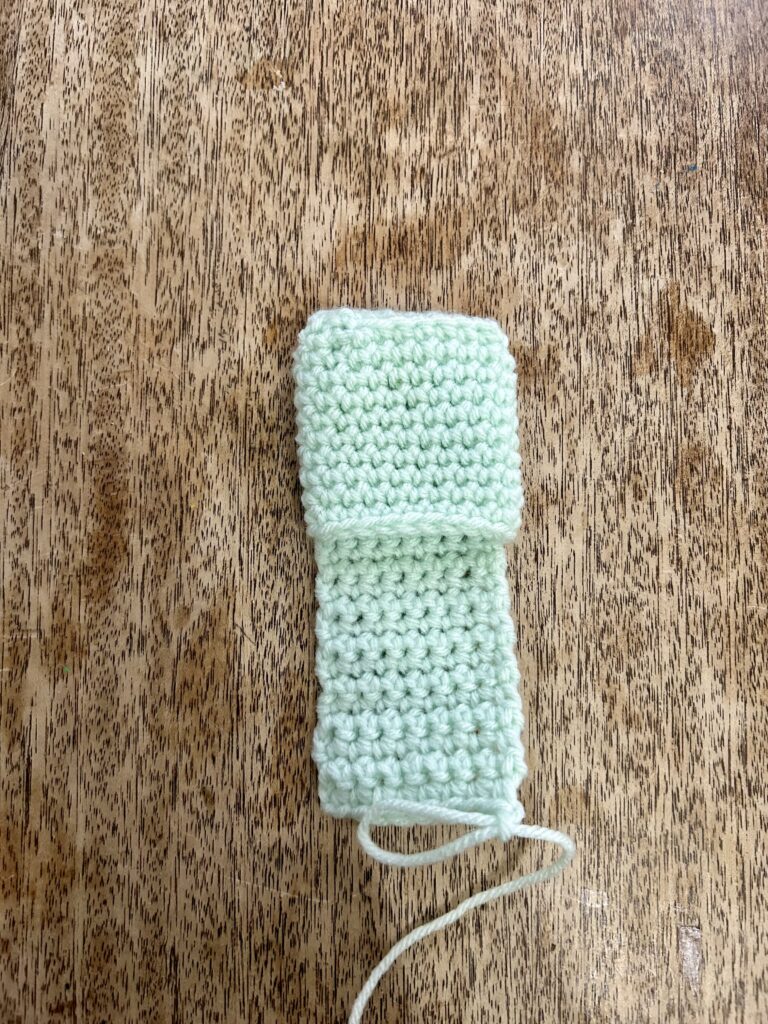
Fasten off, leaving a long tail for stitching.
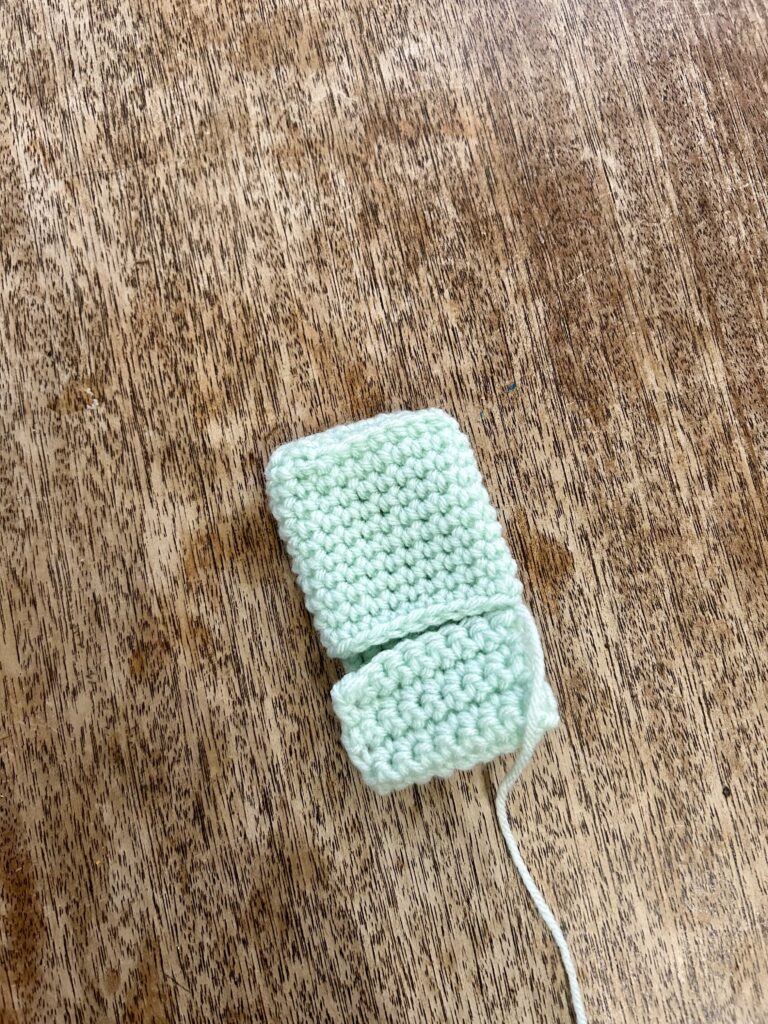
Fold the long tab in half to meet at the base of the cocoa machine. (See Picture.) Using a yarn needle and the long tail for stitching, stitch across the unfinished side edges.
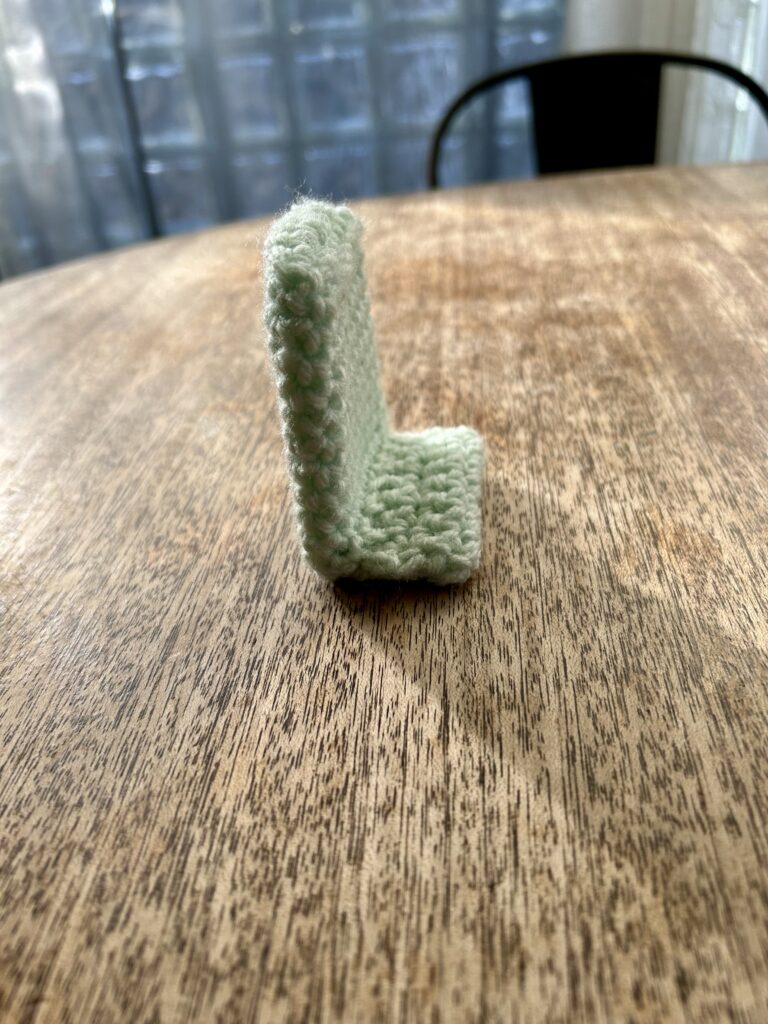
Now, lay the panel on a piece of Pellon and trace around the rounded square section down to the seam line. Cut out the Pellon piece and insert it inside the cocoa machine to create rigidity in the upper section.
Fold the lower section at a 90 degree angle and stitch the unfinished lower edge in place.
Dripper Piece:
Row 1: With white yarn, CH 9, turn. (9)
Row 2: SC in the second CH from the hook and in each remaining ST across. CH 1, turn.(8)
Row 3: SC in each ST across, color change to mint at the last pull through of the last ST. CH 1, turn. (8)
Rnd 4: SC in BLO of each ST around. (8 across, 2 on each side and 8 across the other side= 20 ST)
Rnd 5-6: SC in each ST around. (20)
Fasten off, leaving a tail for stitching.
Using a yarn needle and the long tail for stitching, begin to stitch the dripper piece to the front of the cocoa machine. Stuff with fiberfill as you work your way around. Finish the seam and weave in end. Add 3 small buttons to the front if desired. (If making for a small child, you may want to avoid the choking hazard of buttons by substituting embroidery instead.)
Cocoa Mugs:
Rnd 1: With Gray Yarn and size 3.5mm hook, 6 SC in a magic loop. Pull the free end snuggly to close the loop.(6)
Rnd 2: 2 SC in each ST around. (12)
Rnd 3: SC in each ST around. CH 4. Attach the chain with a SLST in Rnd 2 directly blow the CH to form a handle for the mug. (12 ST+ CH 4.) Fasten off and weave in end.

Whipped Cream:
Rnd 1: With Off White Yarn and size 3.5 mm hook, 6 SC in a magic loop. Pull the free end snugly to close the loop. (6)
Rnd 2-4: HDC in each ST around. (6)
Fasten off, leaving a tail for stitching. Weave the tail through the BlO of each ST and pull snugly to close the loop. Stitch the Whipped cream puff into the mug.

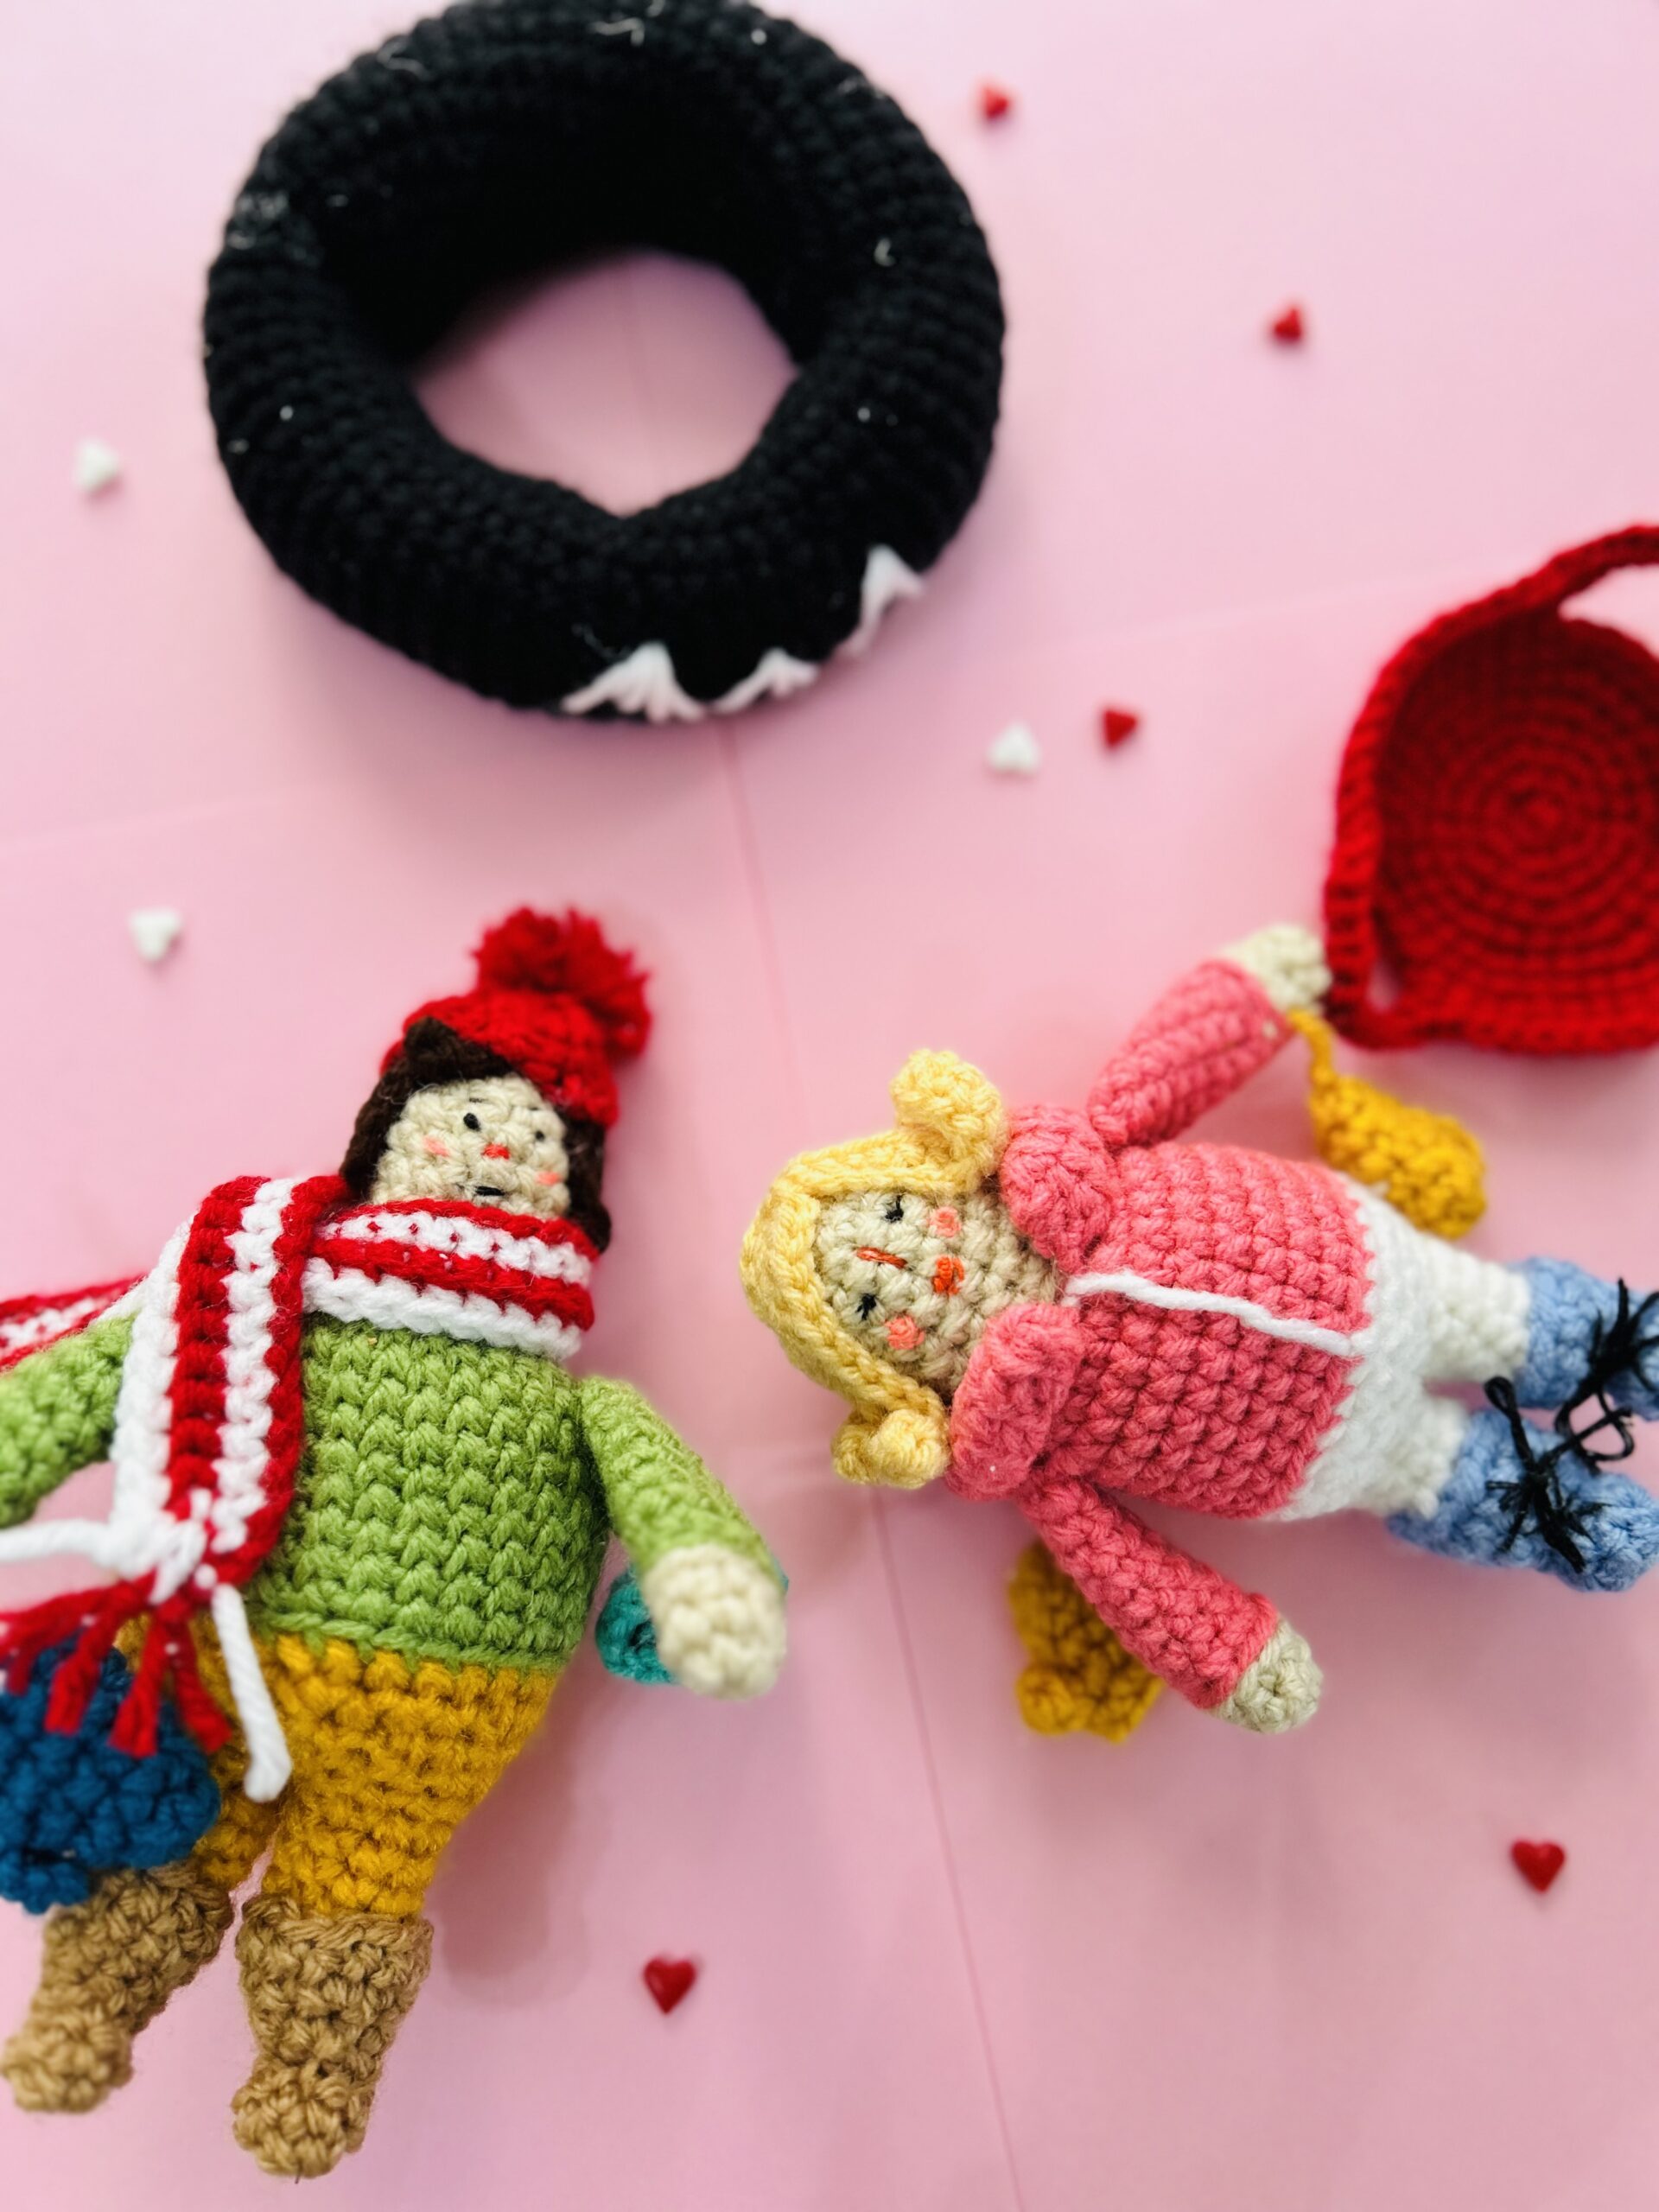
Need to make the Klondike Sled Kids to go with your Cocoa shack? Find the free pattern here.
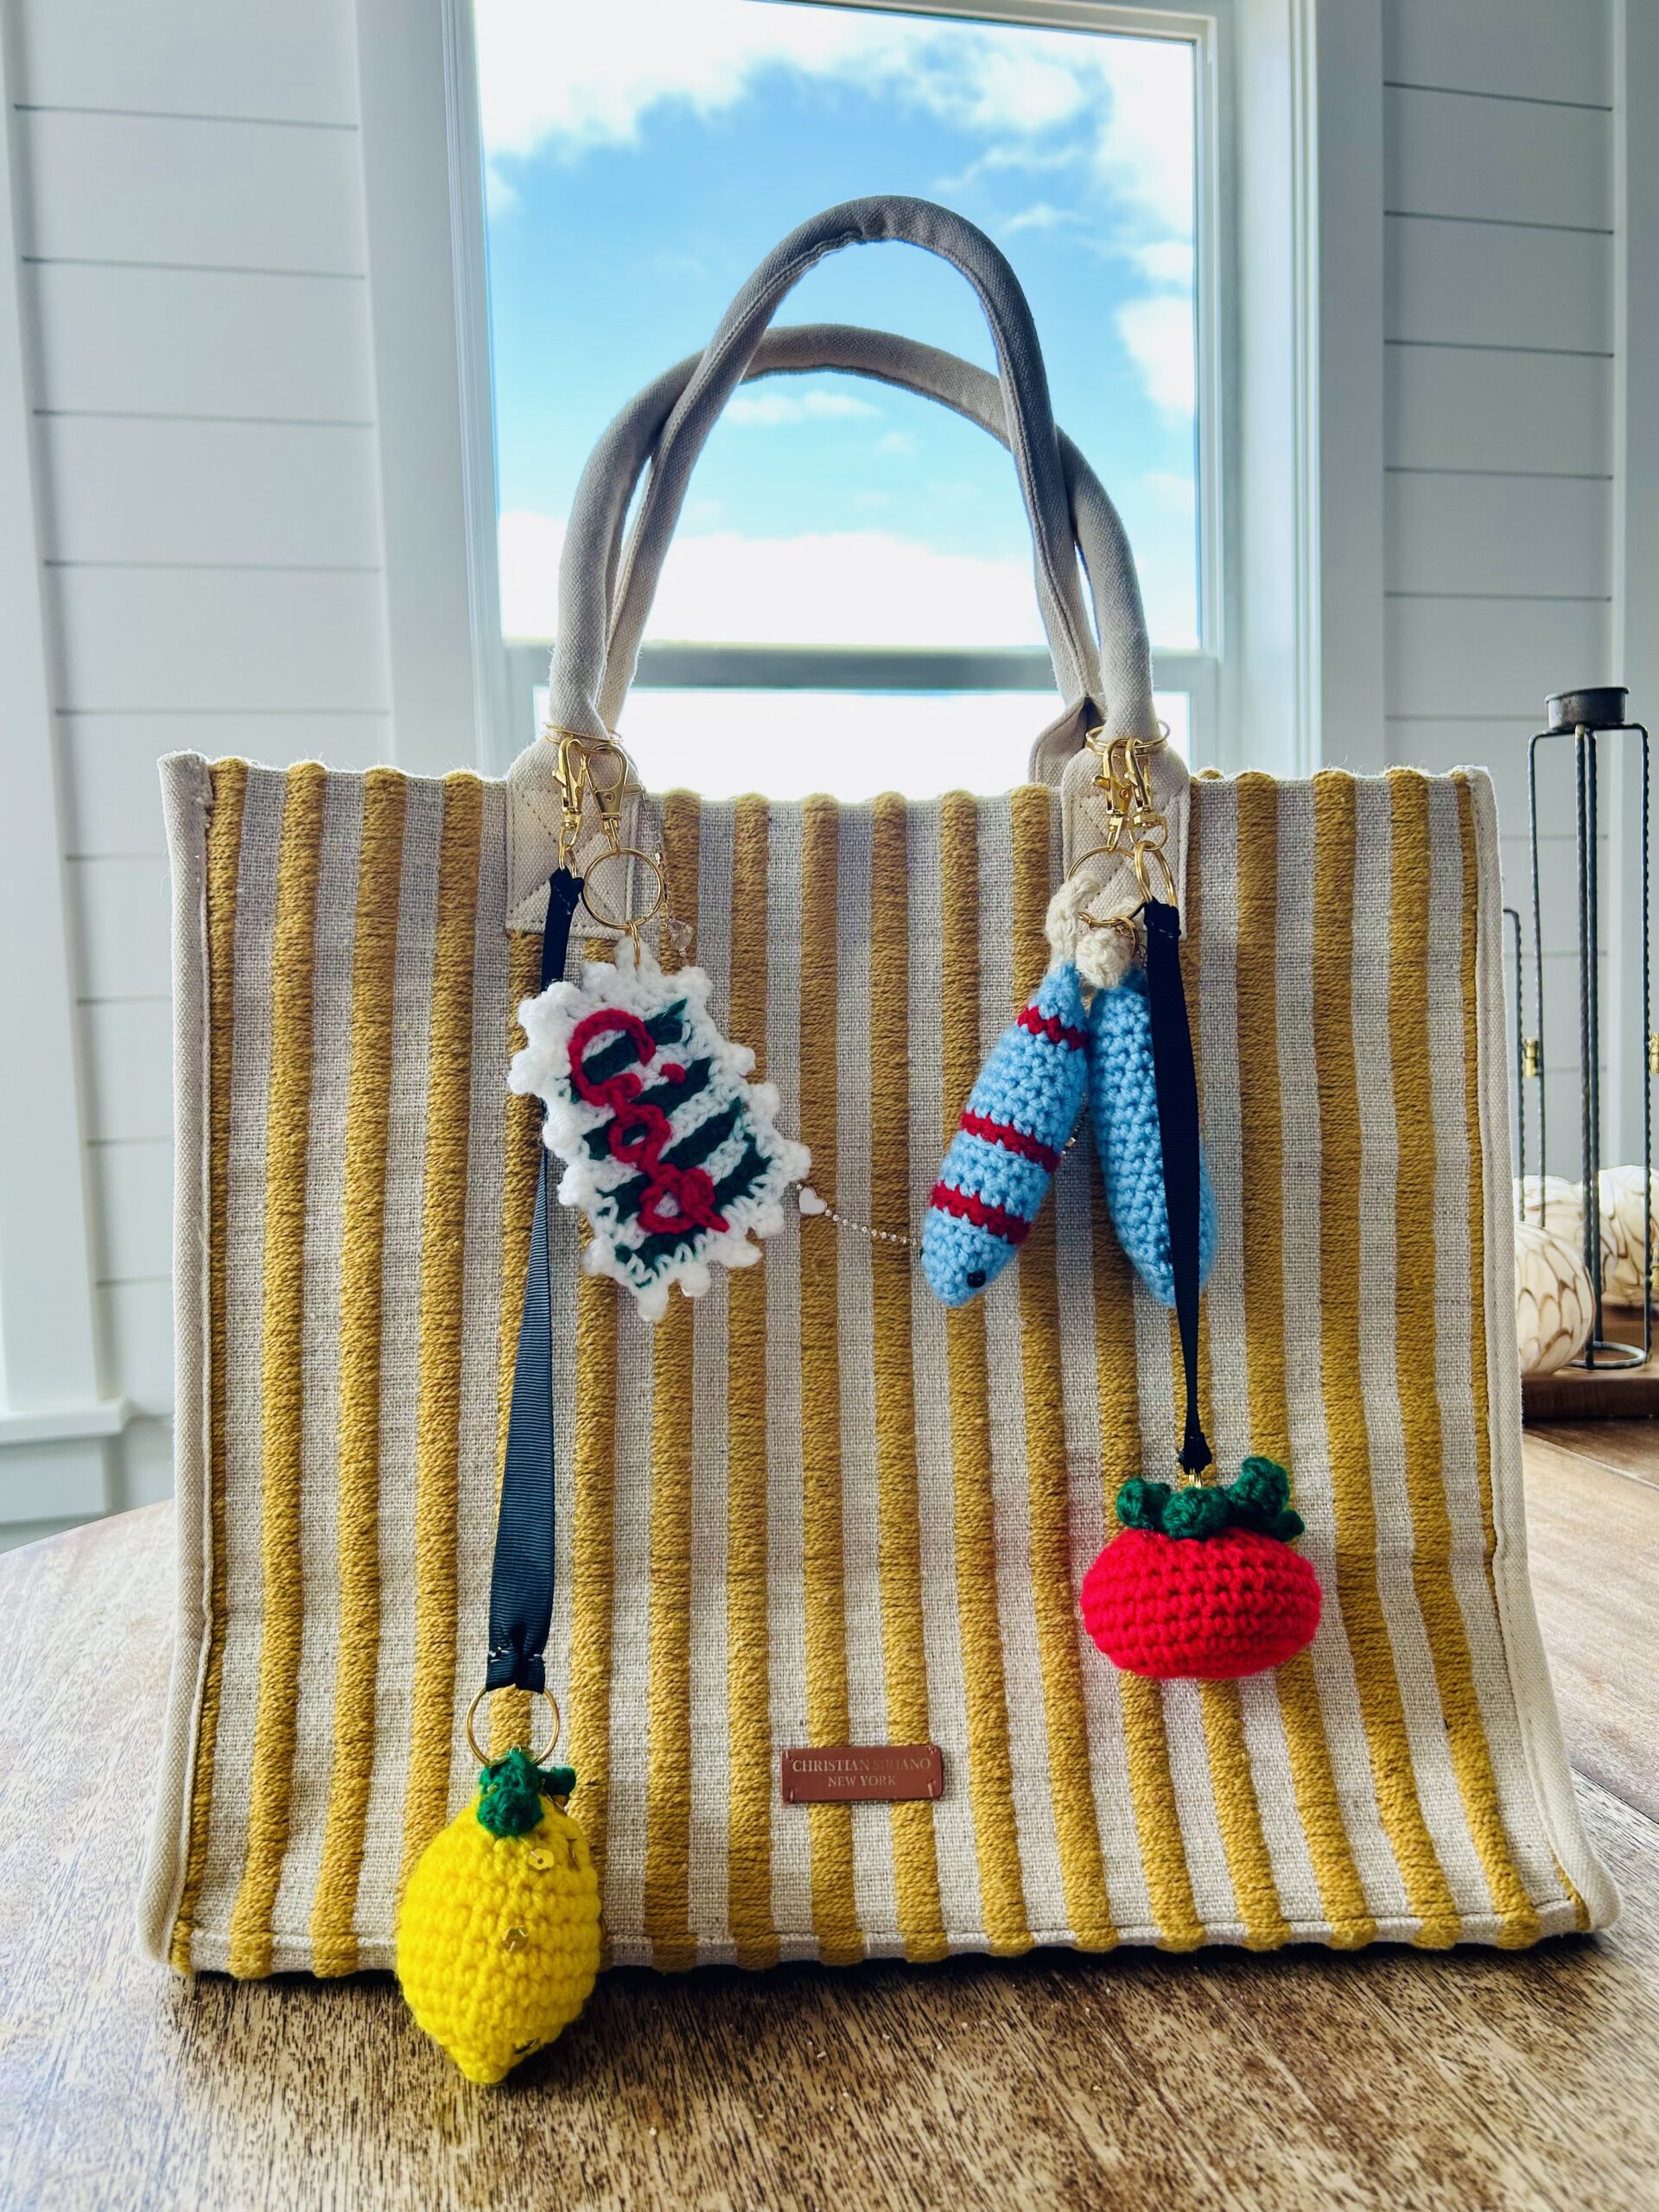
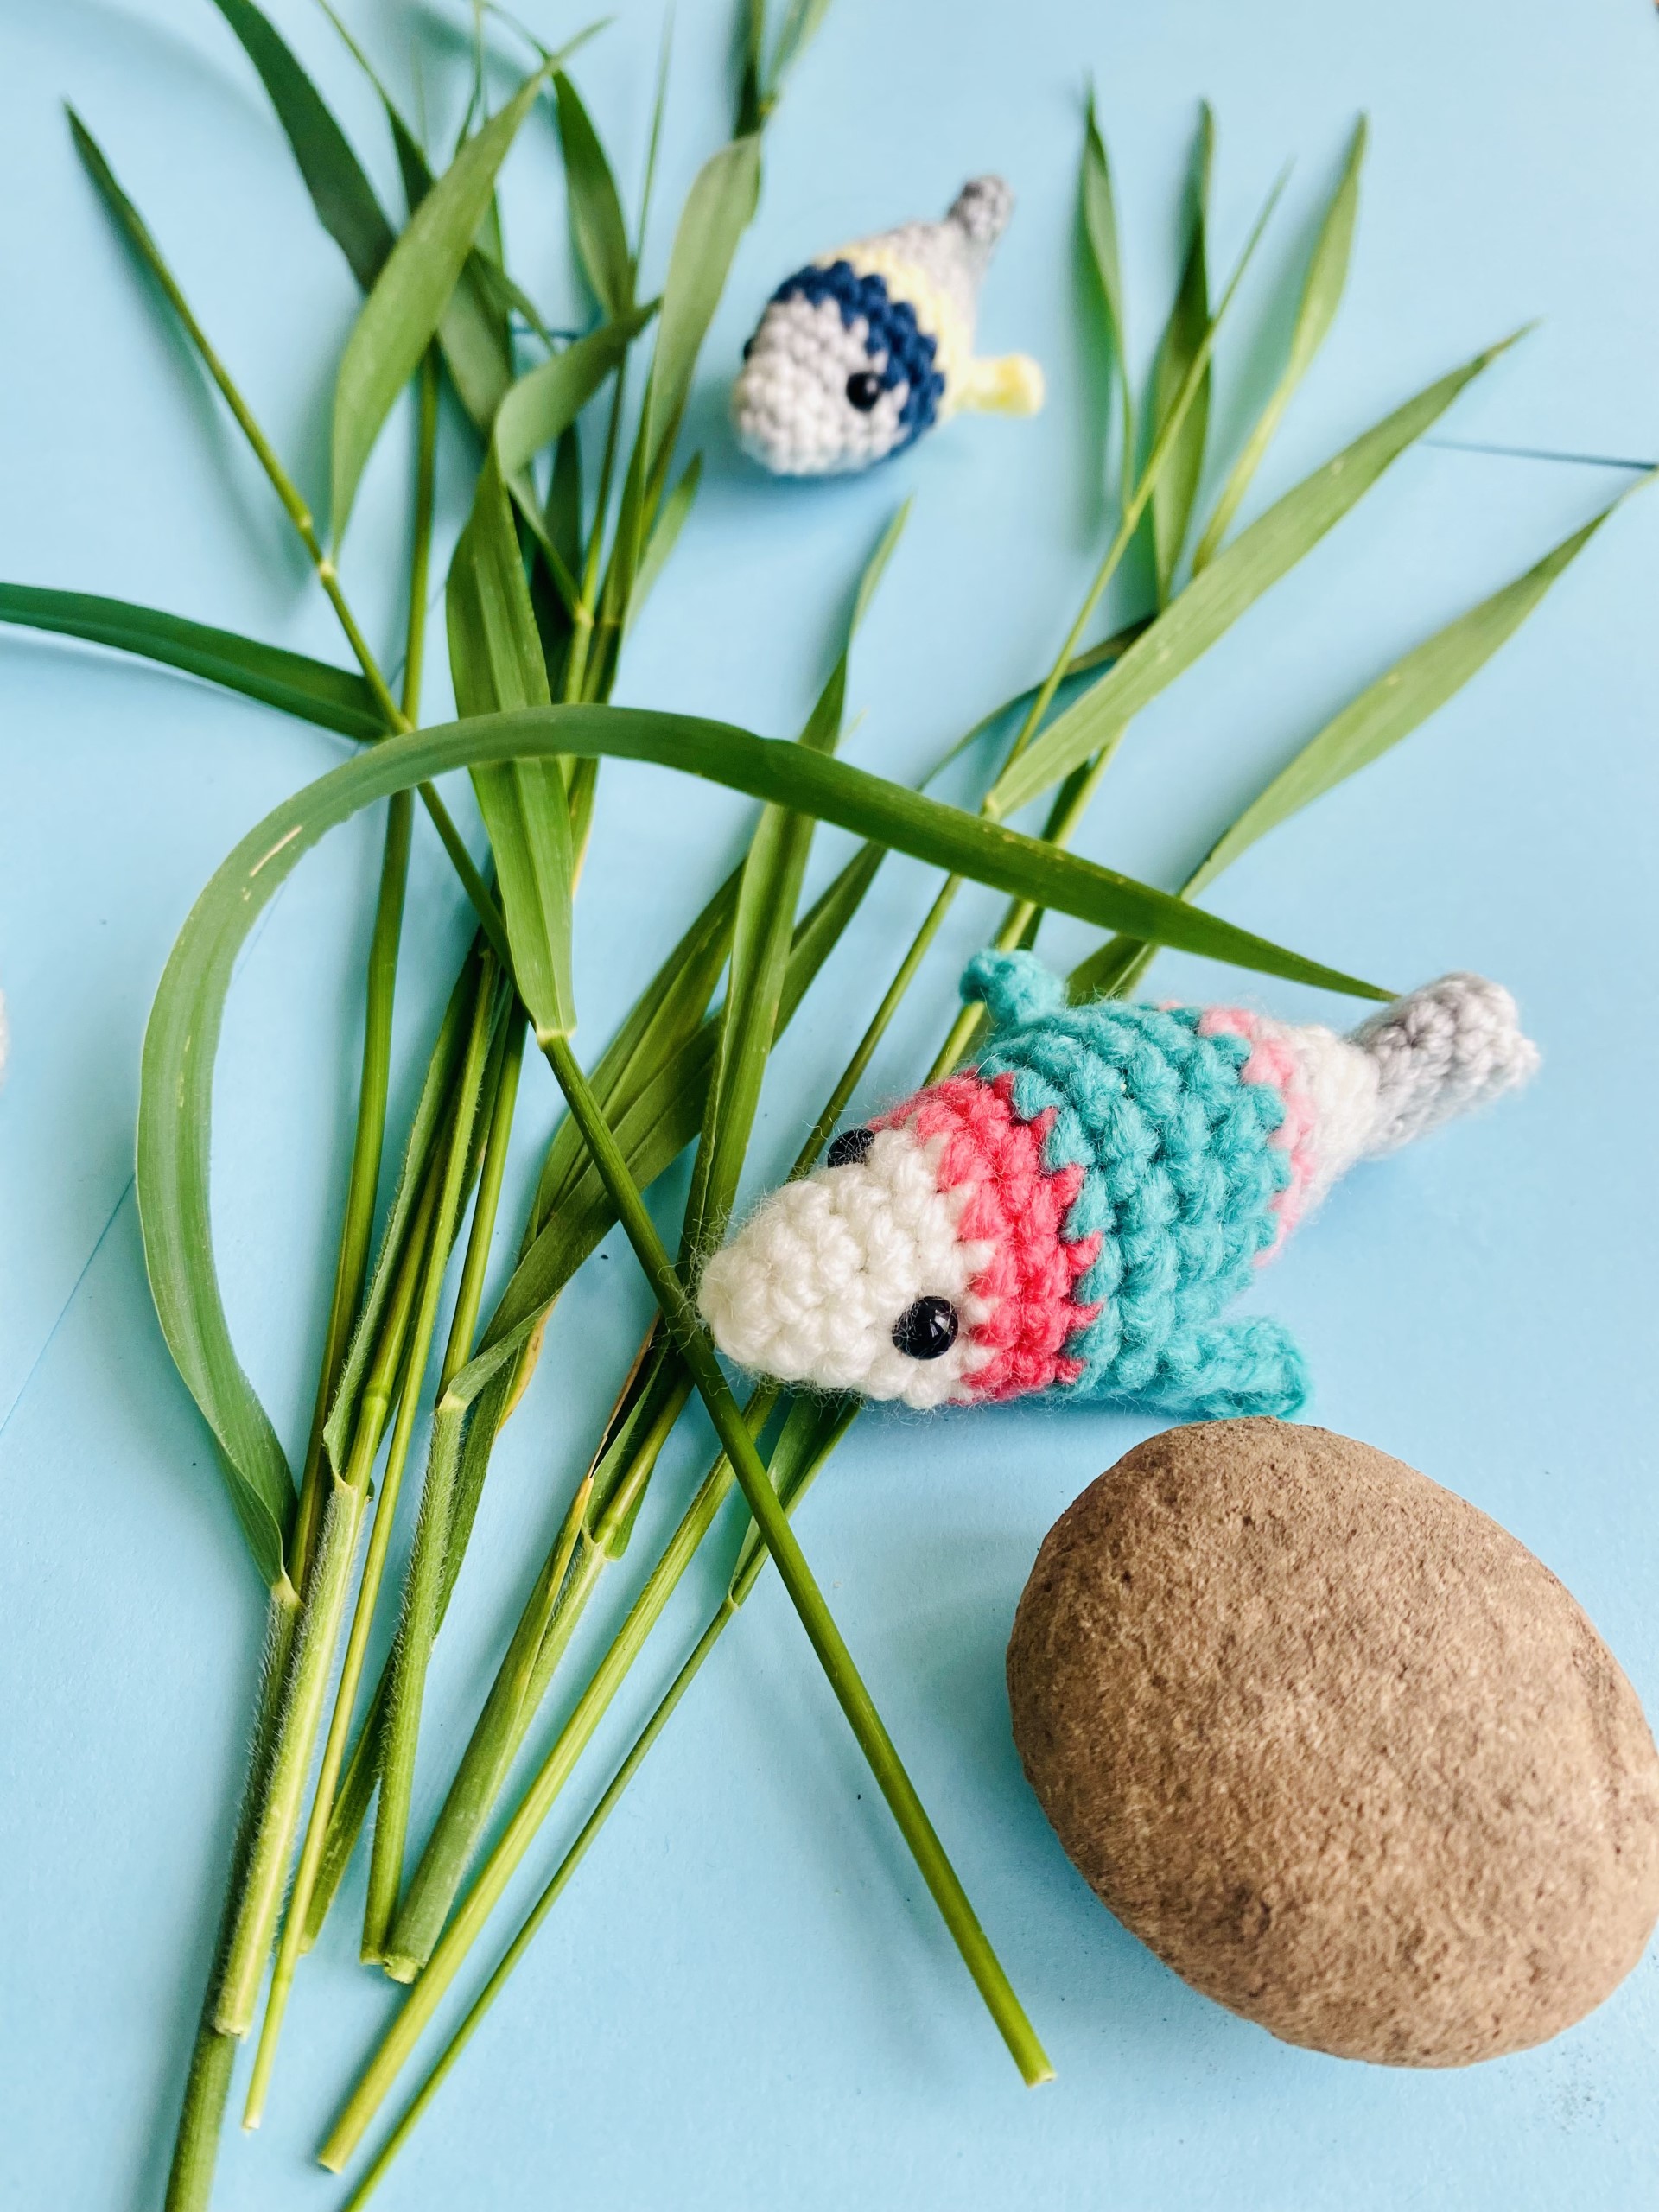
Want to make a Love Bird for Valentines Day? Click here.
Celebrate February all month long with these delicious Berries and Cream Sugar Cookies.
Briarberry
My name is Abby Holmgren and I love to create and share ideas through crochet, sewing, fashion, cooking, and visual arts. Briarberry Farmhouse is where I share inspiration.