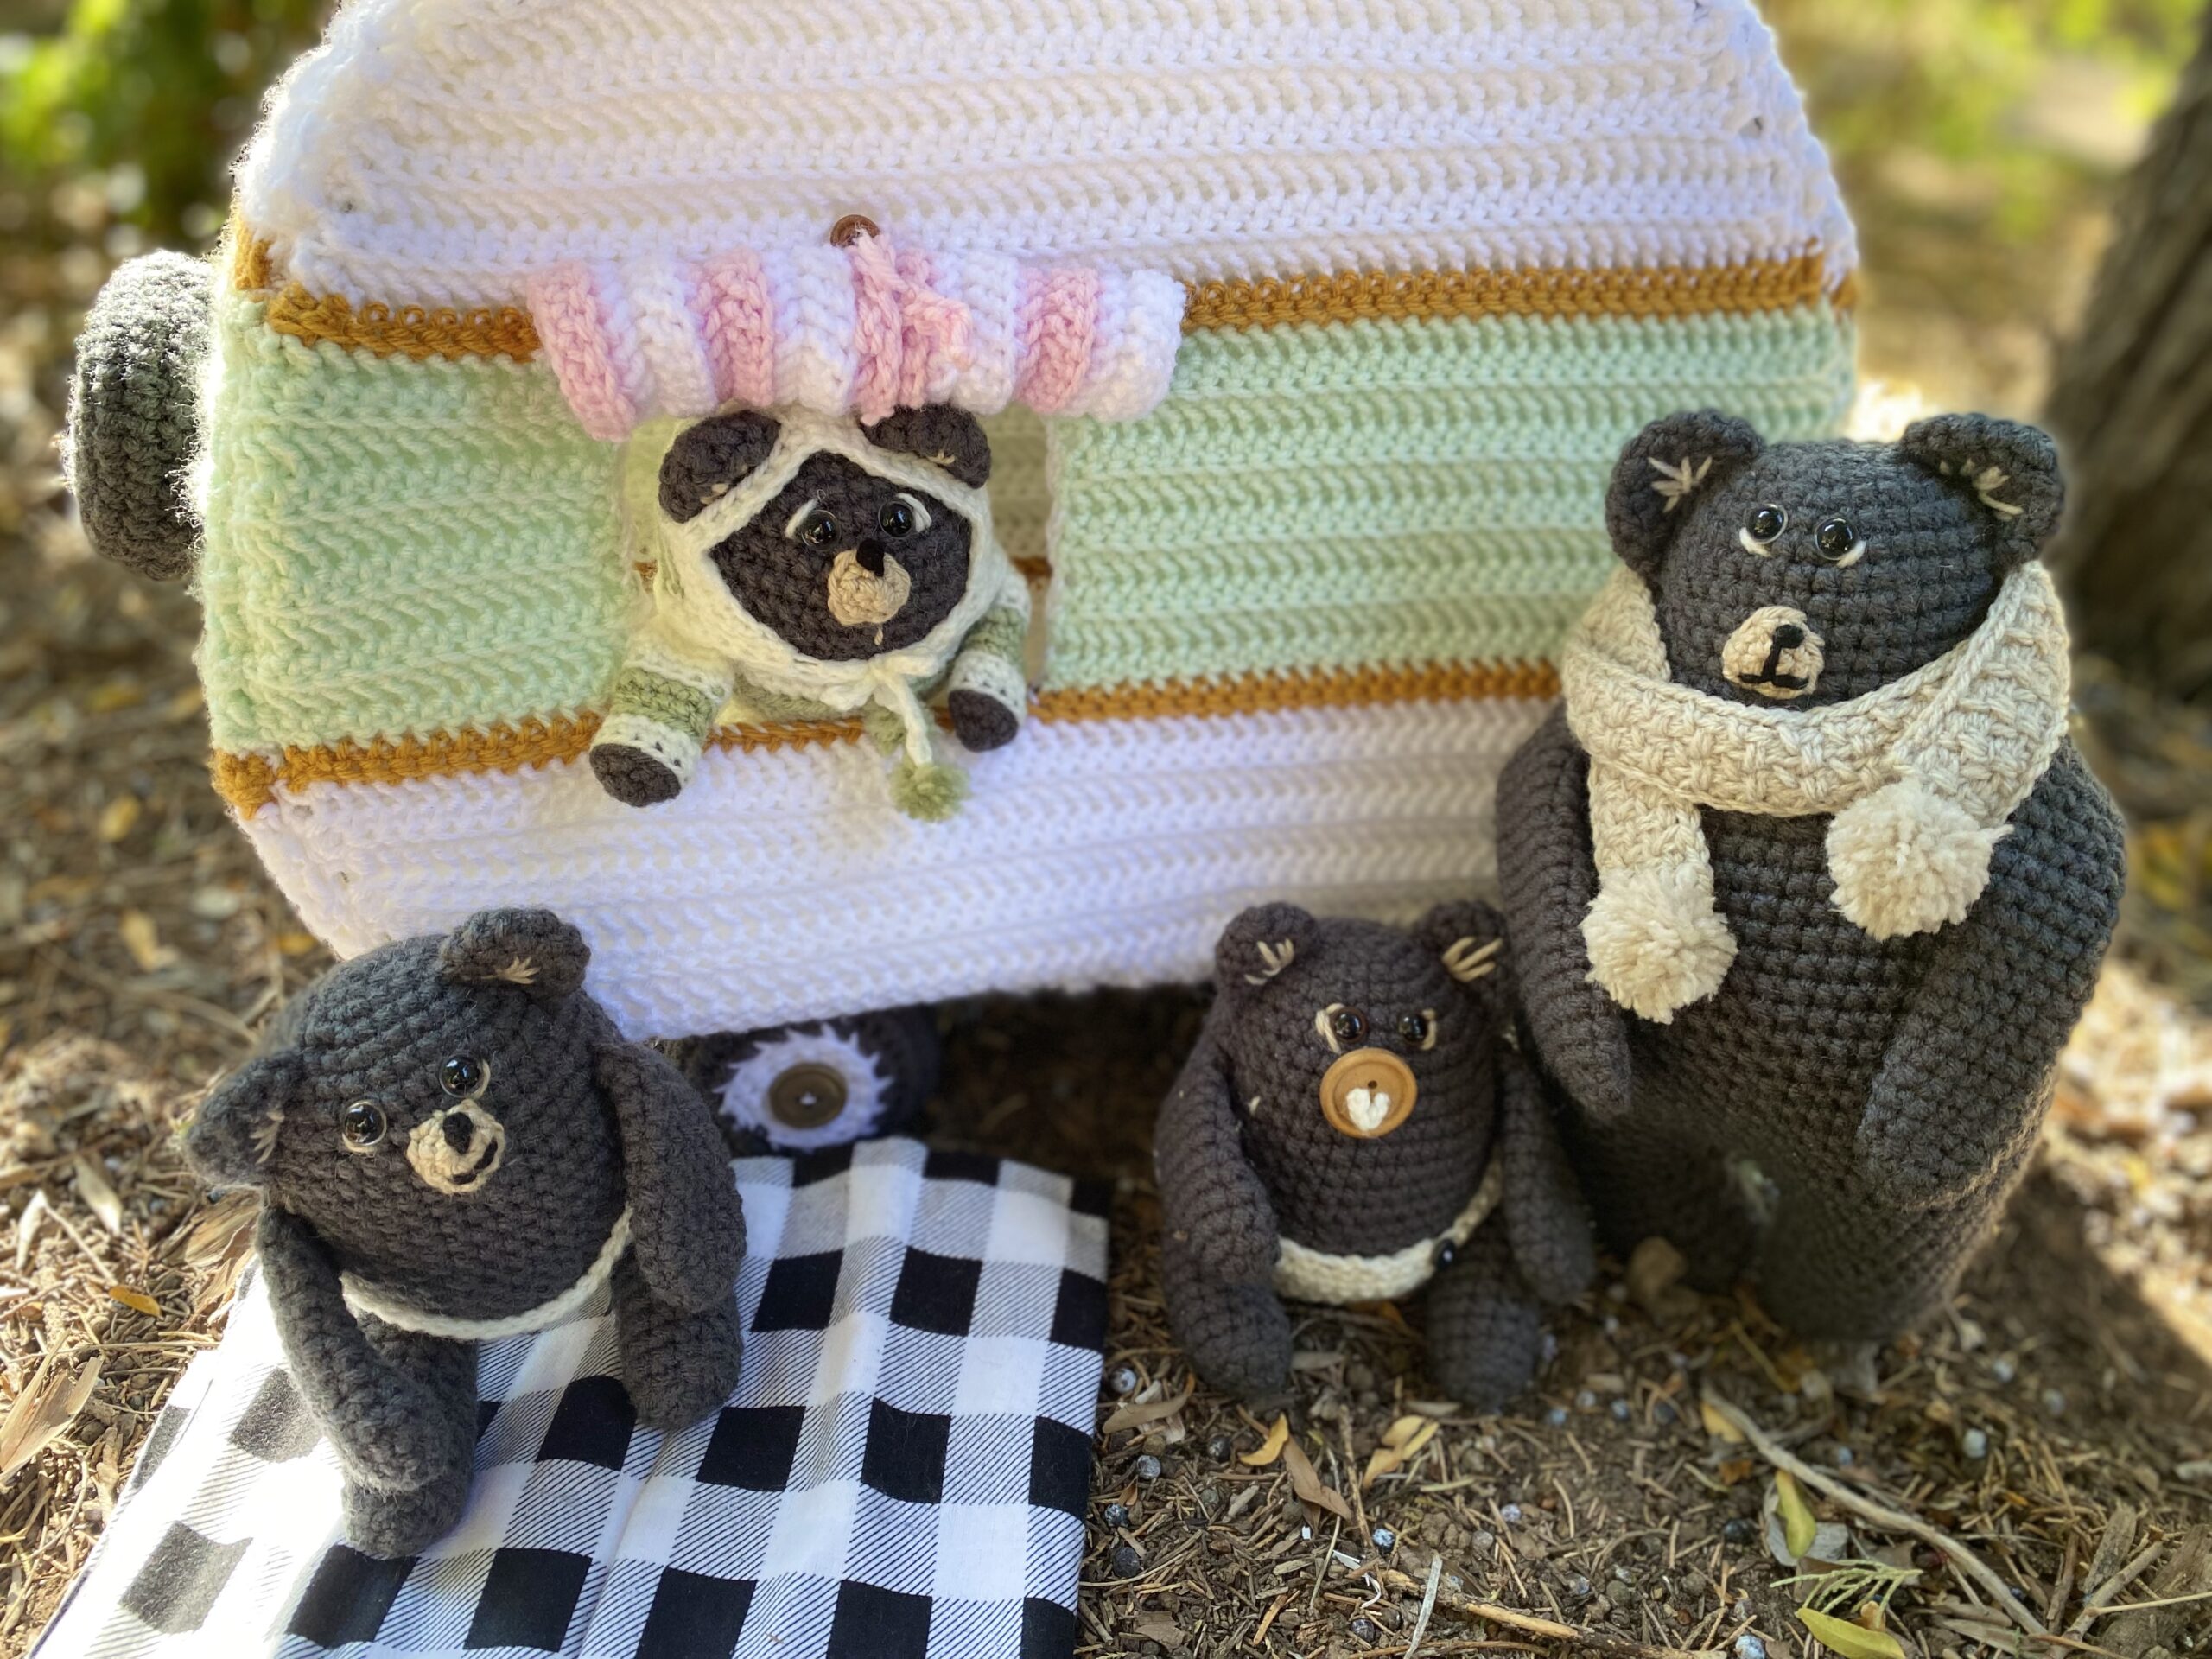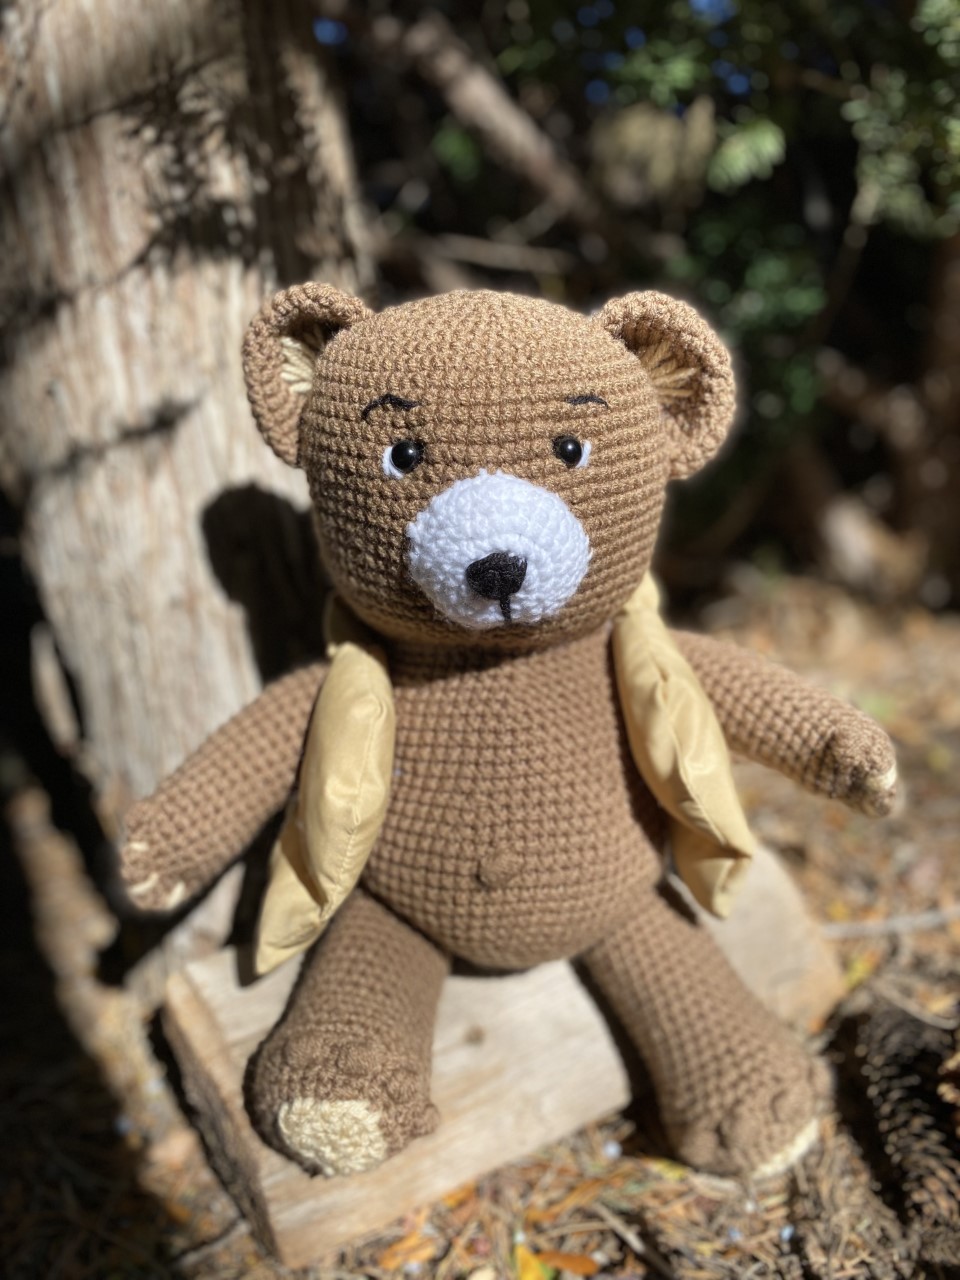
Hickory Bear
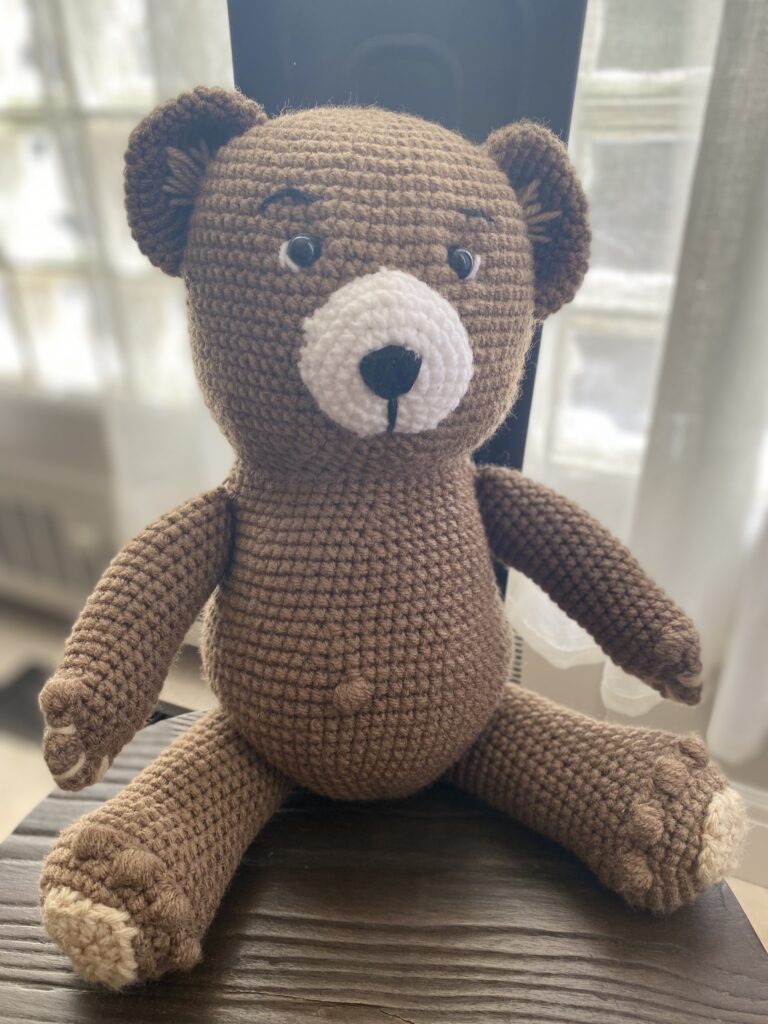
Meet Hickory, a bear who loves adventures and snuggling. Whether it’s camping in a beautiful national park, hiking to the top of a peak, fishing for rainbow trout, or spelunking through a dark cave, Hickory would love to come along and enjoy the fun. At heart, he is a fearless explorer and loves seeing the world. When the expeditions for the day are complete, he is always ready for snuggling and an eskimo kiss goodnight.
This pattern for Hickory Bear is an advanced beginner pattern where you will practice Single Crochet, increasing, decreasing, a bobble stitch, and stitching the separate pieces of the body together. I hope you’ll give it a try.

Meet Hickory, a bear who loves adventure!
Materials:
- one skein Red Heart Super Saver yarn in Cafe Latte.
- Small amount of Red Heart Super Saver Beige.
- Small amount of Red Heart Super Saver yarn in Black.
- Red Heart Super Saver yarn in White.
- Crochet hook Size E. 3.5 mm.
- Fiberfill
- yarn needle
- Stitch markers
- Safety Eyes
Gauge:
9 stitches X 9 rows = 2X2 inch square
Pattern used for gauge: SC
Sizes:
Finished bear is 15″ tall X 6″ wide (Width is measured across Hickory’s tummy. )
Abbreviations:
CH – Chain
SC– Single Crochet
HDC – Half-double Crochet
5HDCB– 5 Half double crochet bobble
DC – Double Crochet
ST(S) – Stitch(es)
SK – Skip
Notes:
Hickory the Bear is created beginning with the head and then the body. When both are completed the head and body are stitched together at the neck ,and the arms, legs, and tail are crocheted and stitched to the body. Let’s get started.
Special Stitches:
5 hDC bobble :
This stitch will be used a few times during the pattern to create Hickory’s belly button, and toes.
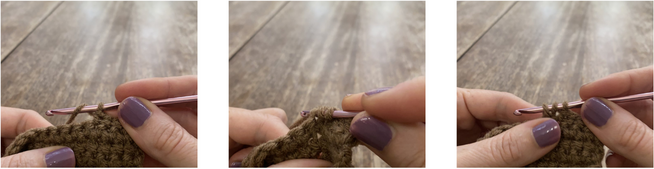
- Yarn Over
- Insert hook into the next ST and pull up a loop.
- Yarn over and insert hook into the same stitch.
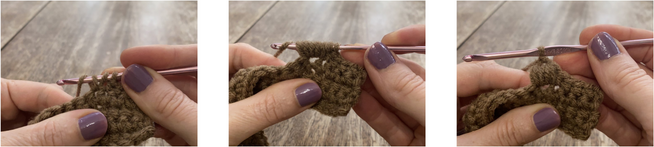
4. Pull up another loop.
5.Yarn over and pull up a loop two more times. You should have 11 loops on the hook.
6. Yarn over once more and pull through all loops on the hook. 5 HDC Bobble made.
Pattern Instructions:
Head:
Rnd 1: Beginning with Cafe Latte yarn, 8 SC in magic ring. Pull snugly. (8)
Rnd 2: Increase in all 8 stitches. (16)Place a stitch marker in last stitch as a visual reminder of the beginning of the next round.
Rnd 3: *SC in next stitch, 2 SC in next ST ** Repeat from * to ** around. (24)
Rnd 4:*SC in next 2 ST, 2 SC in next ST. ** Repeat from * to ** around. (32)
Rnd 5: * SC in next 3 ST, 2 SC in next ST. ** Repeat from * to ** around. (40)
Rnd 6: * SC in next 4 ST, 2 SC in next ST. ** Repeat from * to ** around. ( 48)
Rnd 7: *SC in next 5 ST, 2 SC in next SC. ** Repeat from * to ** around. (56)
Rnd 8: *SC in next 6 St, 2 SC in next ST.** Repeat from * to ** around. (64)
Rnd 9: *SC in next 7, 2 SC in next ST.** Repeat from * to ** around. (72)
Rnd 10-25: SC in each ST around. (72)
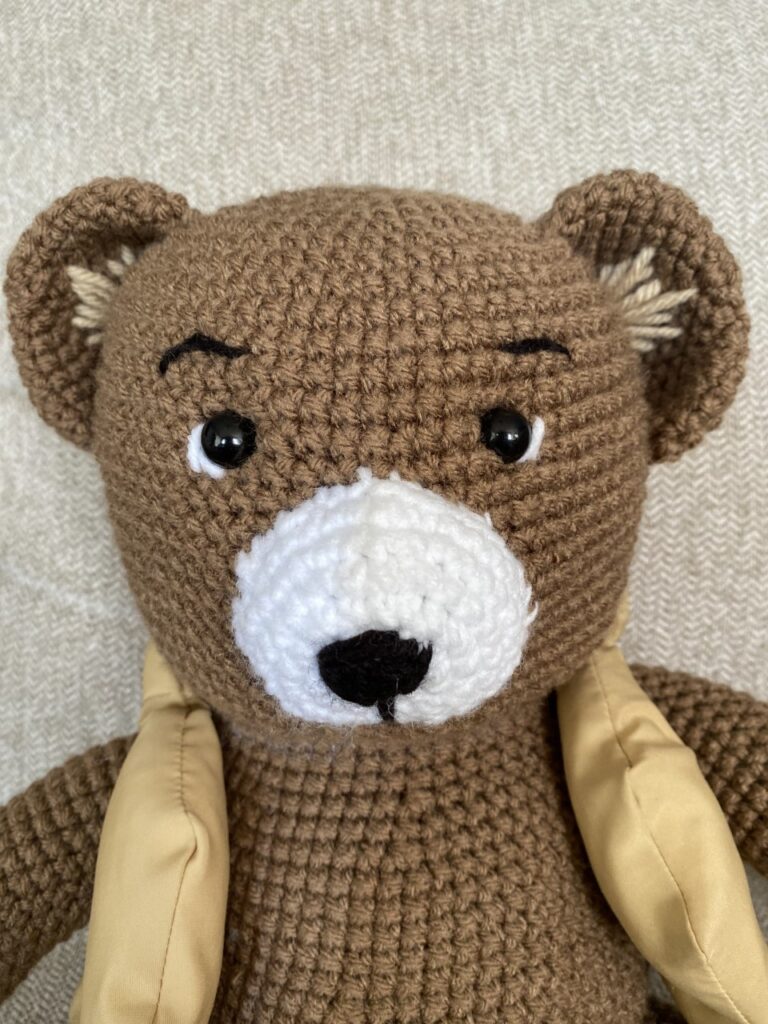
Fasten eyes on Row 14 with 9 SC ST between each eye placement.
Rnd 26: *SC in next 5 ST, Decrease.** Repeat from * to ** around. (60)
Rnd 27: *SC in next 4 SC, Decrease. ** Repeat from * to ** around. (48)
Rnd 28: * SC in next 3 SC, Decrease.** Repeat around. (36)
Rnd 29: SC in each ST around. (36)
Fasten off, leaving a long tail for stitching the head to the body. Embroider eyebrows.
Muzzle: Crochet 1
Rnd 1: 6 SC in magic ring. (6)
Rnd 2: 2 SC in each ST around. (12)
Rnd 3: *SC in next ST, 2 SC in next St. **. Repeat from * to ** around. (18)
Rnd 4: * SC in next 2 ST, 2 SC in next ST. ** Repeat from * to ** around. (24)
Rnd 5: * SC in next 3, 2 SC in next ST** repeat from * to ** around. (30)
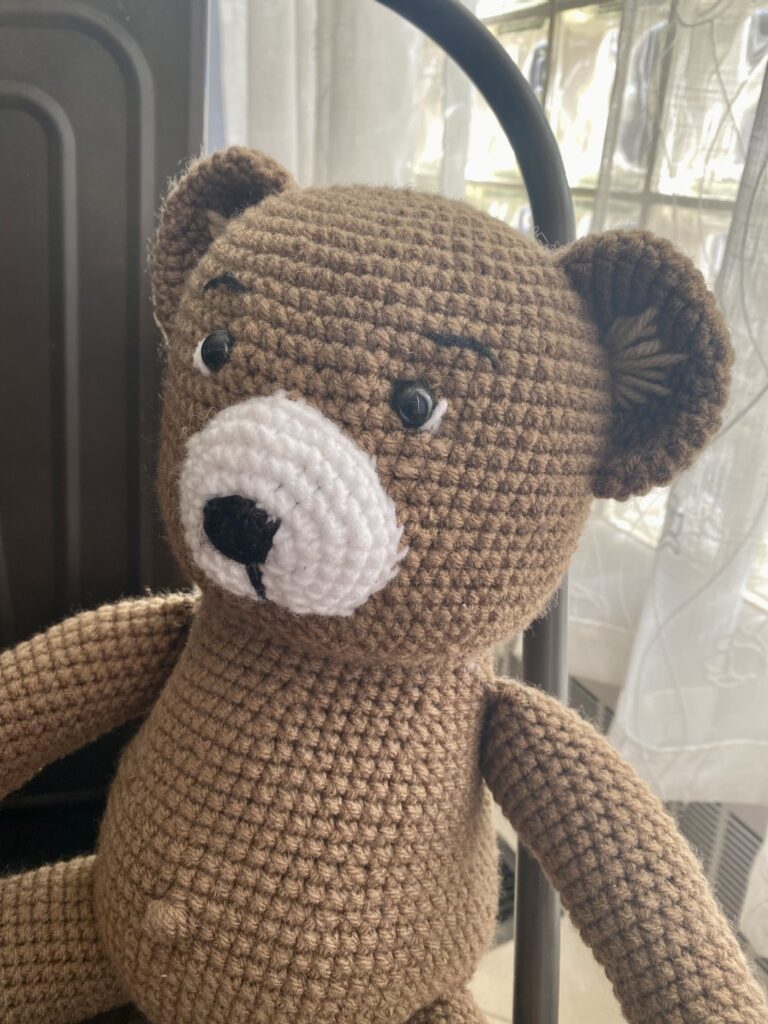
Rnd6: SC in each ST around. (30) Fasten off, leaving a long tail for stitching. Embroider nose and mouth. Stuff lightly with fiberfill and stitch muzzle to head.
centered between the eyes with the top of the muzzle at the level of the eyes.
Stuff head firmly with fiberfill.
After stuffing the head firmly with fiberfill, indent the eyes by placing a backwards running stitch directly behind one eye and connecting the running string to the other eye inside the head. Pull to desired tightness and secure with a knot. Adjust Fiberfill as needed.
Hickory Body:
Rnd 1: 6 SC in a magic ring. (6)
Rnd 2: 2 SC in each ST around. (12)
Rnd 3: * SC in next ST, 2 SC in next ST.** Repeat from * to ** around. (18)
Rnd 4: * SC in next 2 ST, 2 SC in next ST. ** Repeat from * to ** around. ( 24)
Rnd 5: * SC in next 3 ST, 2 SC in next ST. ** Repeat from 8 to ** around. (30)
Rnd 6: * SC in next 4 ST, 2 SC in next ST.** Repeat from * to ** around. (36)
Rnd 7: * SC in next 5 ST, 2 SC in next ST. ** Repeat from * to ** around. (42)
Rnd 8: * SC in next 6 ST, 2 SC in next ST. * * Repeat from * to ** around. (48)
Rnd 9: * SC in next 7 ST, 2 SC in next ST. ** Repeat from * to ** around. (54)
Rnd 9: * SC in next 8 ST, 2 SC in next ST. ** Repeat from * to ** around.( 60)
Rnd 10: * SC in next 9 ST, 2 SC in next ST. ** Repeat from * to ** around. (66)
Rnd 11: * SC in next 10 ST, 2 SC in next ST. ** Repeat from * to ** around. (72)
Rnd 12 –17: SC in each ST around. (72)
Rnd 18: SC in the next 35 St. 5 HDCbobble in the next ST. Belly button made . SC in the next 36 St. ( 72)
Rnd 19: SC in each ST around. (72)
Rnd 20: * SC in next 8 ST, Decrease across the next two ST. ** Repeat around. (66)
Rnd 21: SC in each ST around. (66)
Rnd 22: * SC in the next 7 ST, Decrease over the next two ST. ** Repeat from * to ** around. ( 60)
Rnd 23– 27: SC in each ST around. ( 60 )
Rnd 28: * SC in the next 6 ST, Decrease over the next two ST. ** Repeat from * to ** around. ( 53)
Rnd 29: SC in each ST around. (53)
Rnd 30: * SC in the next 5 ST, Decrease over the next two ST.** Repeat from * to ** around. SC in next 3 to finish the row. (45)
Rnd 31: SC in each ST around. (45) Rnd 32: SC in each ST around. (45) Fasten off, leaving a long tail for stitching. Stuff the body firmly and stitch the head to the body at the neck with belly button from row 18 aligned with the front center of the head. HICKORY EARS: (Make 2) Rnd 1: 6 SC in Magic ring. (6) Rnd 2: 2 SC in each ST around. (12) Rnd 3: * SC in next ST, 2 SC in next ST** Repeat from * to ** around. (18) Rnd 4: * SC in next 2 ST, 2 SC in next ST.** Repeat from * to ** around. ( 24) Rnd 5: * SC in next 3 ST, 2 SC in next ST. ** Repeat from * to ** around. ( 30) Rnd 6: * SC in next 4 ST, 2 SC in next ST. ** Repeat from * to ** around. (36) Rnd 7–9: SC in each ST around. ( 36)
Hickory Ears:
Fasten off, leaving a long tail for stitching. Using beige yarn, embroider the inside of Hickory’s ears by making straight running stitches. See photo.
Fold ear in half with contrast stitching facing forward. With the bottom of the ear in line with the top of the nose, stitch ear to Hickory’s head, allowing the ear to curve to match the curvature of Hickory’s head. Repeat again for the other ear.
HICKORY ARMS: (Make 2)
Rnd 1: 6 SC in magic ring. (6)
Rnd 2: 2 SC in each ST around. (12)
Rnd 3: * SC in next ST, 2 SC in next ST.** Repeat from * to ** around. ( 18)
Rnd 4–5: SC in each ST around: (18)
Rnd 6: 5 HDC Bobble in first ST. This bobble stitch will be Hickory’s thumb. CH1, SC in each remaining ST around. (18)
Rnd 7–25: SC in each ST around (18)
Fasten off, leaving a long tail for Stitching.
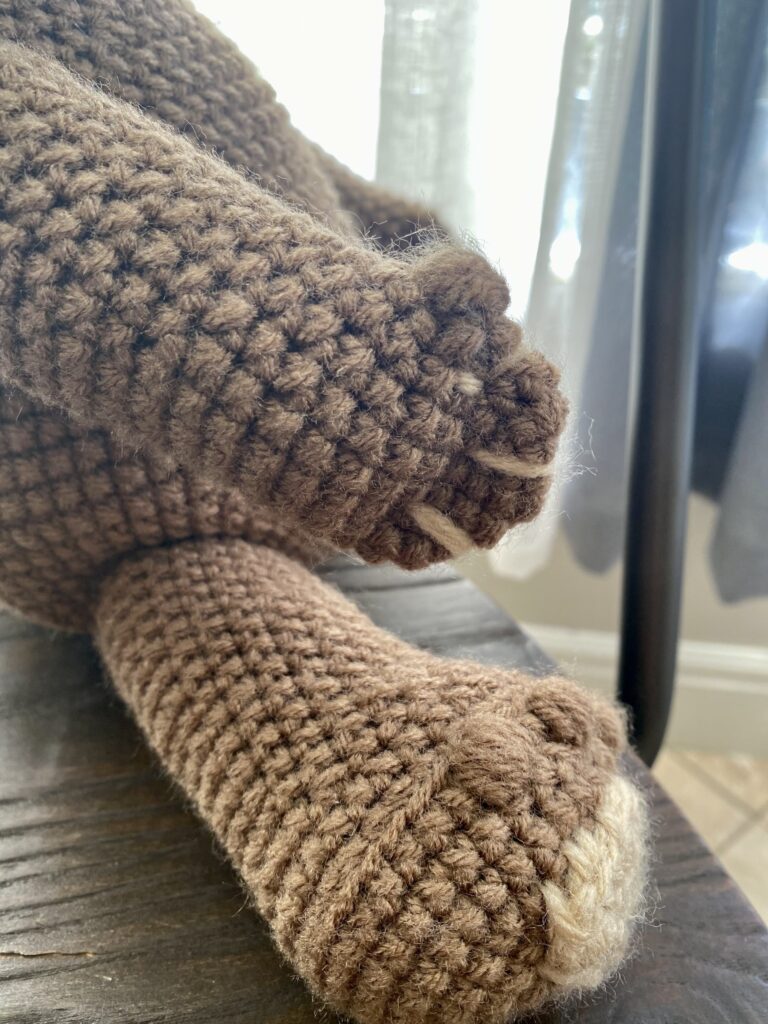
Using Beige yarn, embroider Hickory’s fingers by laying the arm flat and embroidering 3 running stitches one inch apart along the top edge of the paws. Stuff firmly with fiberfill and secure arm to hickory’s sides
in line with the base of the neck.
HICKORY LEGS: (Make 2)
Rnd 1: 8 SC in magic ring.(8)
Rnd 2: 2 SC in each ST around. (16)
Rnd 3: * SC in next ST, 2 SC in next ST.** Repeat from * to ** around. (24)
Rnd 4: * SC in next 2 St, 2 SC in next ST.** Repeat from * to ** around. (32)
Rnd 5–6 : SC in each ST around. (32)
Rnd 7: SC in next 2 ST.* 5 HDC Bobble in next ST, SC in next 2 ST** repeat from * to ** 3 more times. SC in remaining 20 ST.
Rnd 8: In BLO, SC in each ST around. (32)
Rnd 9–10: SC in each ST around. (32)
Rnd 11:* SC in next 2 ST, decrease over next 2 ST.** Repeat from * to ** around. (24)
Rnd 12–25: SC in each ST around. (24)
Fasten off, leaving a long tail for stitching. ^
FOOT PADS: (Make 2)
Rnd 1: 6 SC in magic loop. Pull tightly maintaining half circle shape . CH 1, turn.
Rnd 2:* 3 DC in first ST, SC in next ST, ** Repeat from * to ** two more times. Fasten off, leaving a long tail for stitching. Stitch foot pads to bottom of legs. Stuff legs firmly with fiberfill. Stitch legs to sides of body, with toes on the same side as the face.
TAIL: (Make 1)
Rnd 1: 6 SC in a magic loop.(6)
Rnd 2; 2 SC in each ST around. (12)
Rnd 3: * SC in next ST, 2 SC in next ST.** Repeat from * to ** around. ( 18)
Rnd 4-5: SC in each ST around. (18)
Fasten off leaving a long tail for stitching. Fold tail in half and stitch to center back of body.

If you would prefer a Printable PDF of this pattern click here.
Copyright:
This pattern and its images are copyright protected and the sole property of briarberryfarmhouse.com.
Please do not redistribute, transfer, or sell the pattern, or alter it to claim as your own. You may sell any products you create from this pattern. Please credit the designer by linking online listings to briarberryfarmhouse.com or tagging @ Briarberryfarmhouse.
Briarberry
My name is Abby Holmgren and I love to create and share ideas through crochet, sewing, fashion, cooking, and visual arts. Briarberry Farmhouse is where I share inspiration.