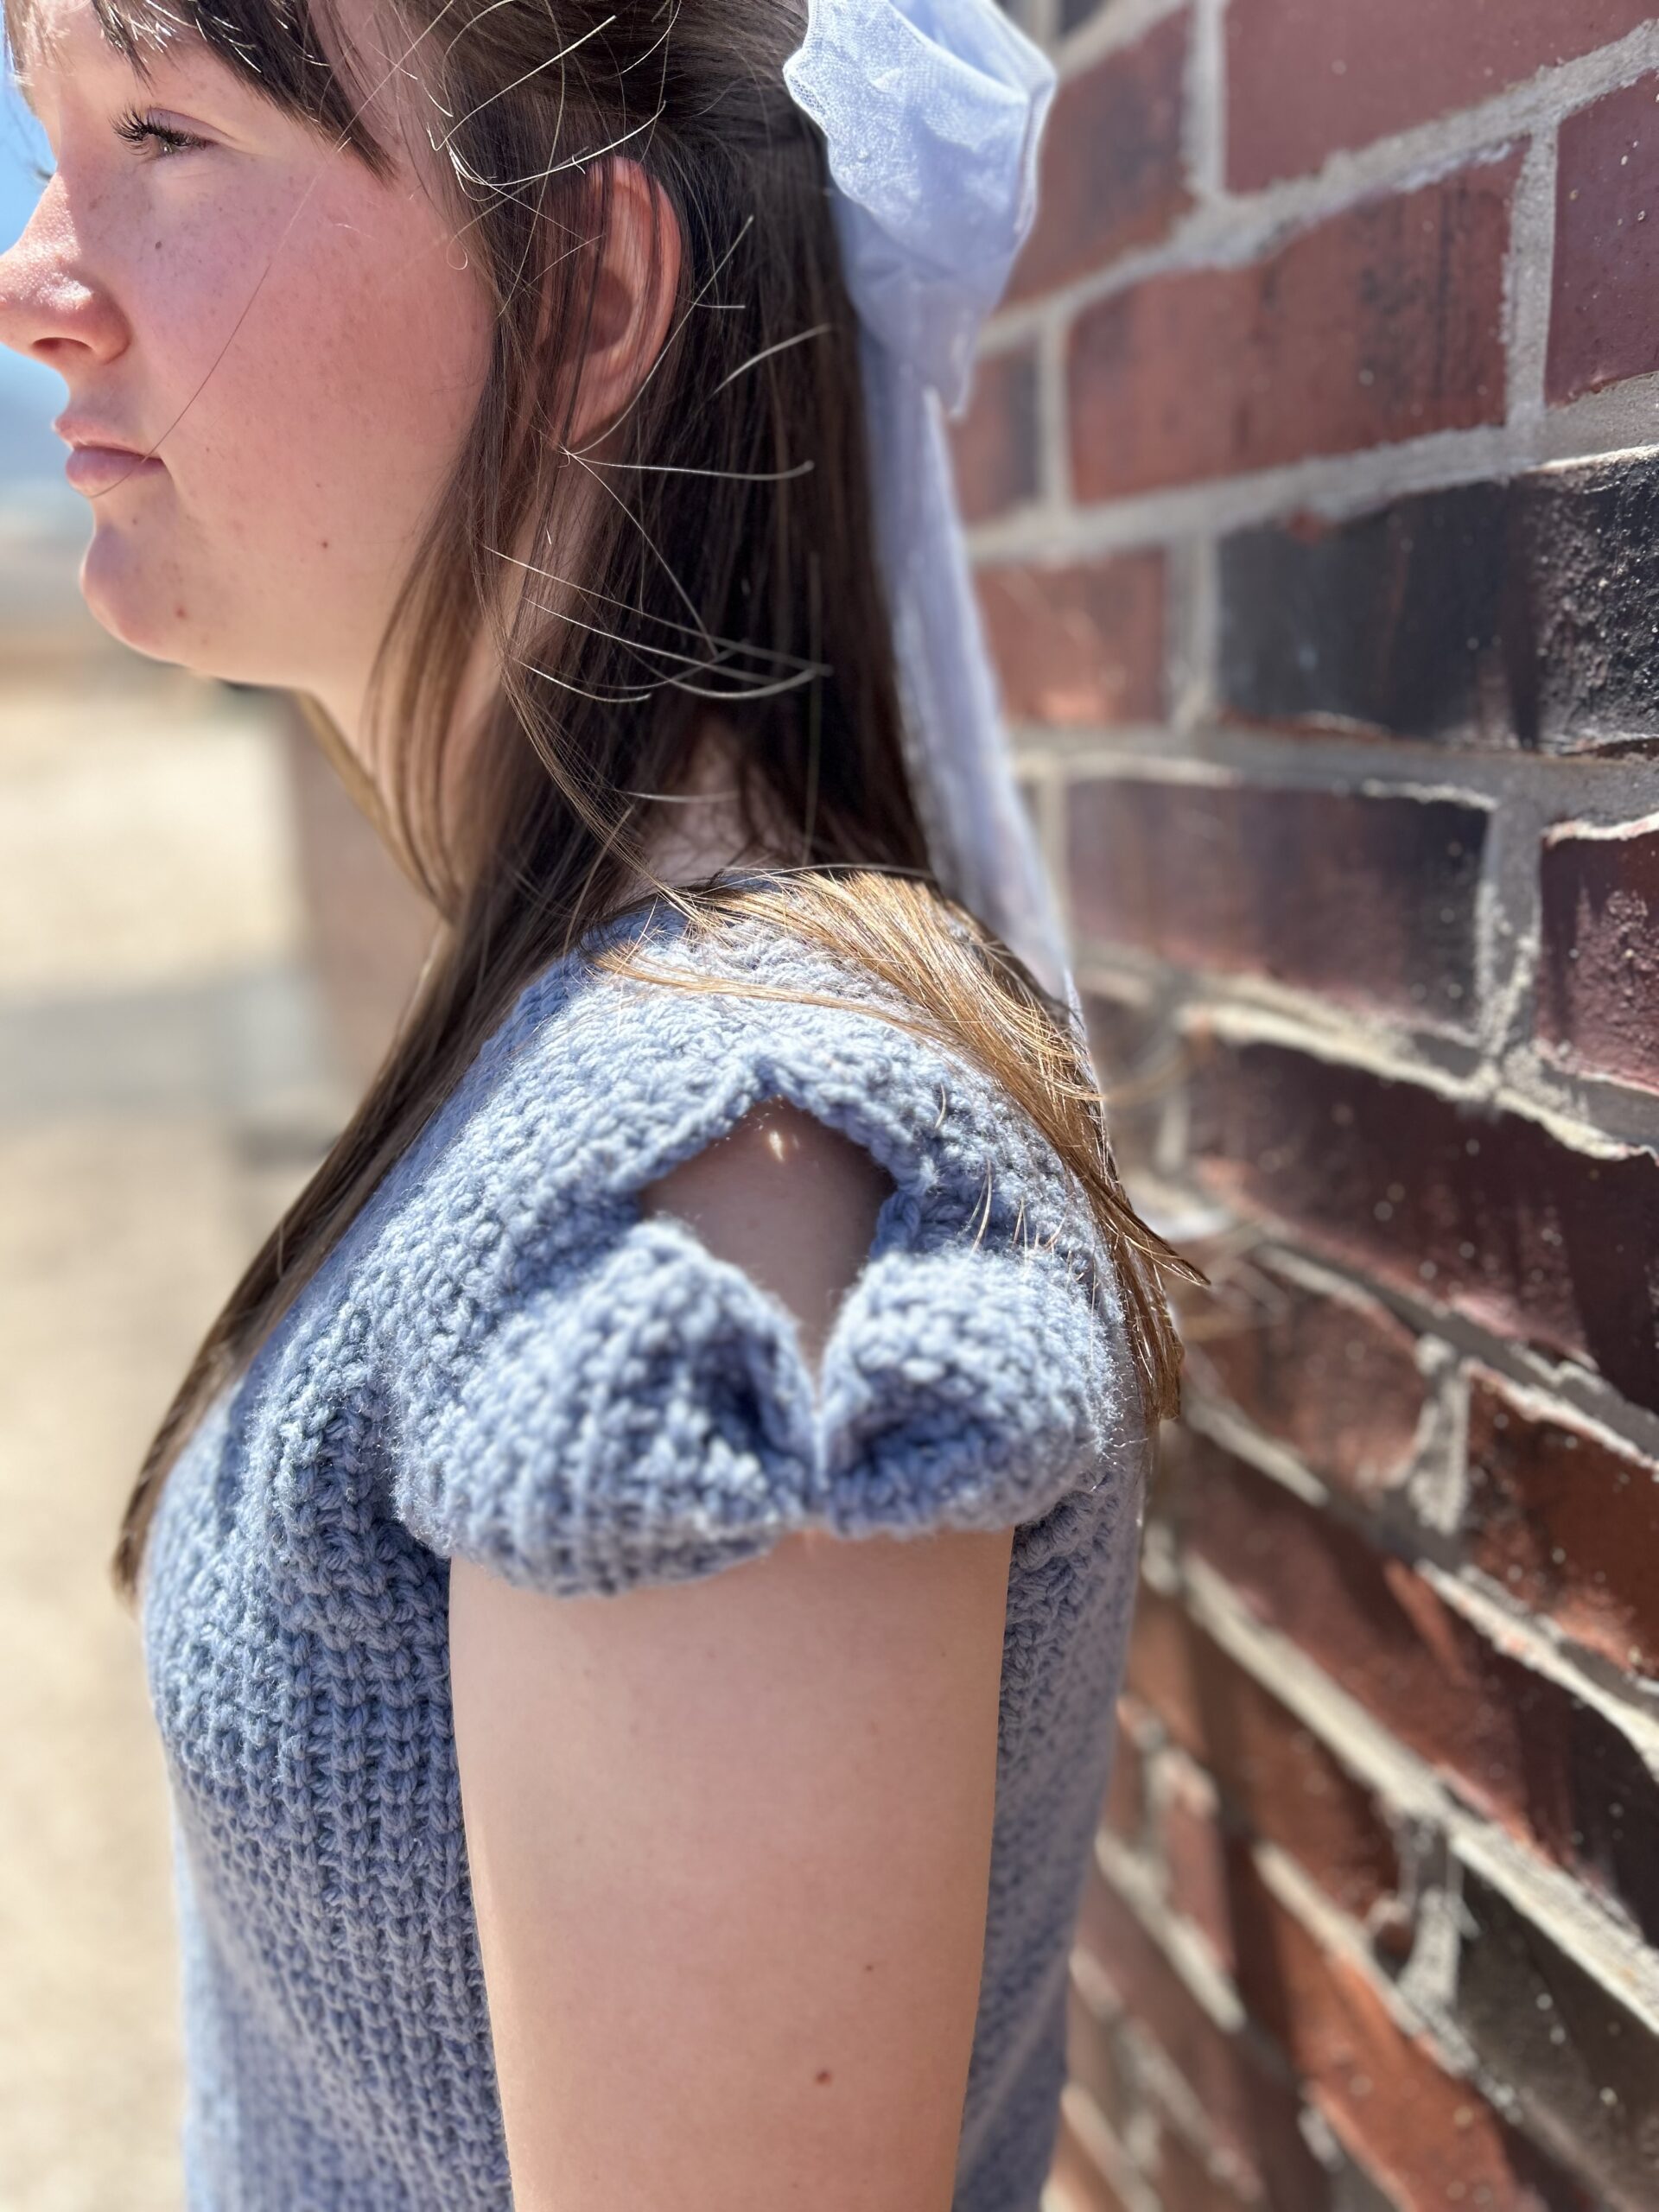
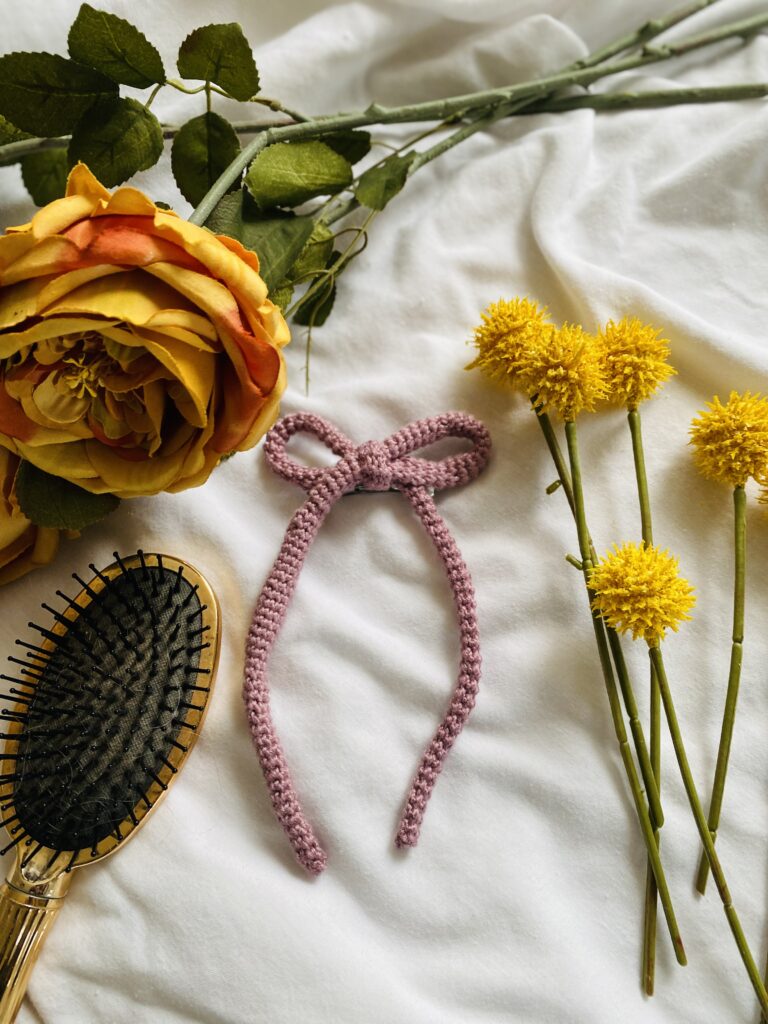
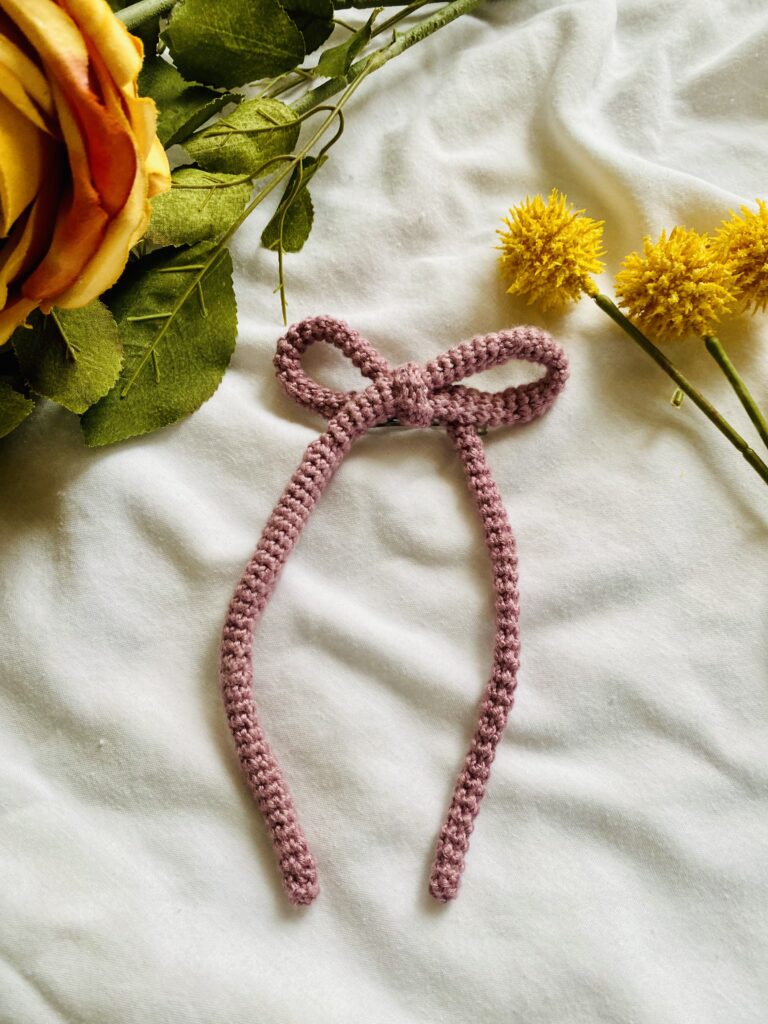
Old Money Crocheted Hair Bow
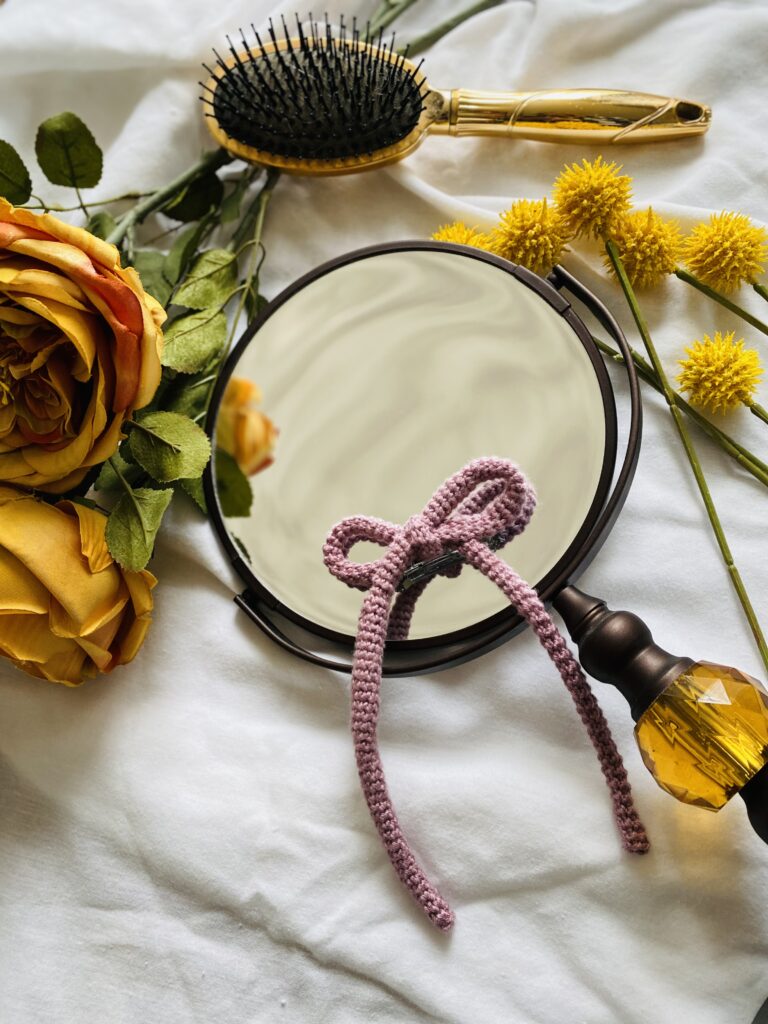
I love the “Old Money” fashion trend and the way it’s bringing a classic twist along with a bit more dressed up look to clothing and fashion lately. If you’re like me, you might be noticing BOWS popping up everywhere, especially as a hair accessory. What a cute and classy way to finish a look and add a mix of girlhood innocence and ladylike sophistication to any outfit, even dressed down ones. With these thoughts in mind, I wanted to crochet a very basic girls and ladies hairbow pattern. This pattern would be beautiful in any color of yarn and is so versatile to whatever you’d like to match it with. I have been wanting to try out Truboo yarn for quite a while because of it’s beautiful sheen. This bamboo and rayon mix yarn always catches my eye when I’m browsing the yarn section but I haven’t ever used it before this project. There is a nice variety of colors available and I’m excited to make more projects with it. This pattern is an advanced beginner pattern because the size of the work is small which adds a bit of an additional challenge while working. Even so, the stitch is basic single crochet throughout so still a great project for a beginner. I hope you’ll enjoy making something beautiful for you or for a special person in your life. Let’s get started.
Instructions:
Materials:
Truboo Bamboo rayon yarn in Mushroom size 3 light.
Needle and thread to match your yarn color.
Size D3 (3-3.125 mm) hook
Size 2 1/4 in barrette
Finished project:
7 inches long by 3.75 inches wide.
Pattern Instructions:
Rnd 1: CH 5. SL ST into the first CH of the Rnd to form a loop. (5)
Rnd 2: in FLO, SC in each ST around. (5)
Rnd 3-160 : SC in FLO of each ST around. (5)
Continue working rows until crocheted length reaches 28 inches. Fasten off and weave in ends.
Now, tie your crocheted strand into a bow with equal lengths of tails on both sides. This might take a few tries to get it right. Once you are happy with the look of your bow, it’s time to stitch it in place using a needle and matching thread. I secured the center knot by stitching all the way through it a few times.
Now fasten the bow onto the barrette. You can do this by gluing or stitching. I stitched mine in place and secured the loops of the bow over the arch of the barrette to conceal the barrette.
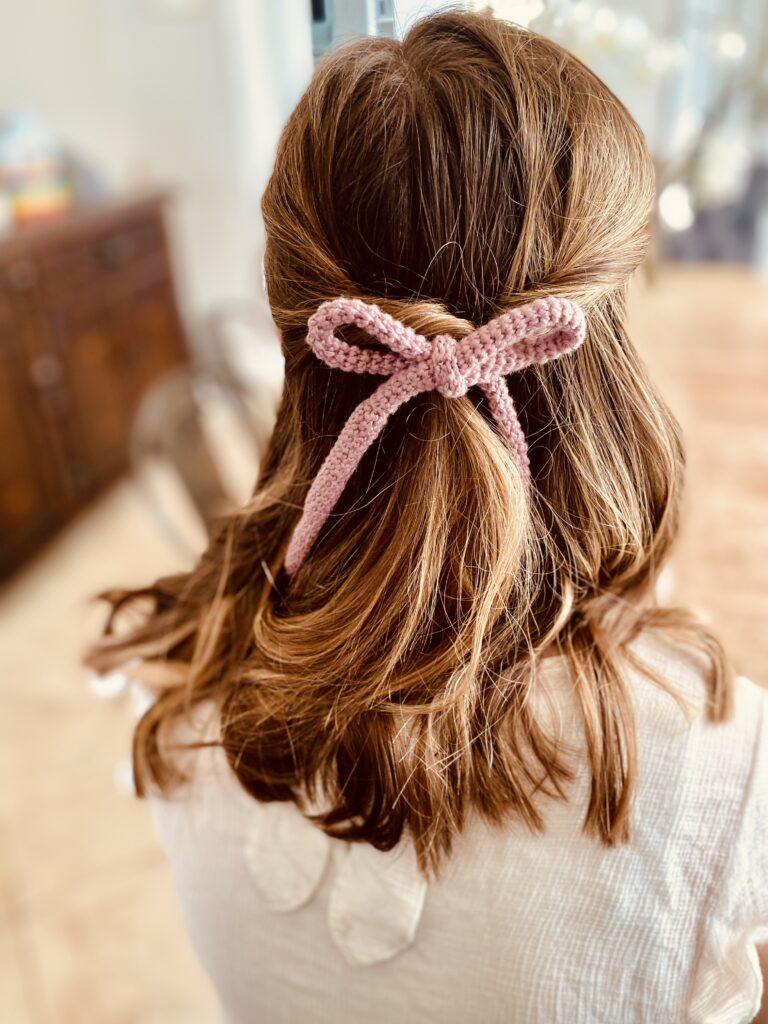
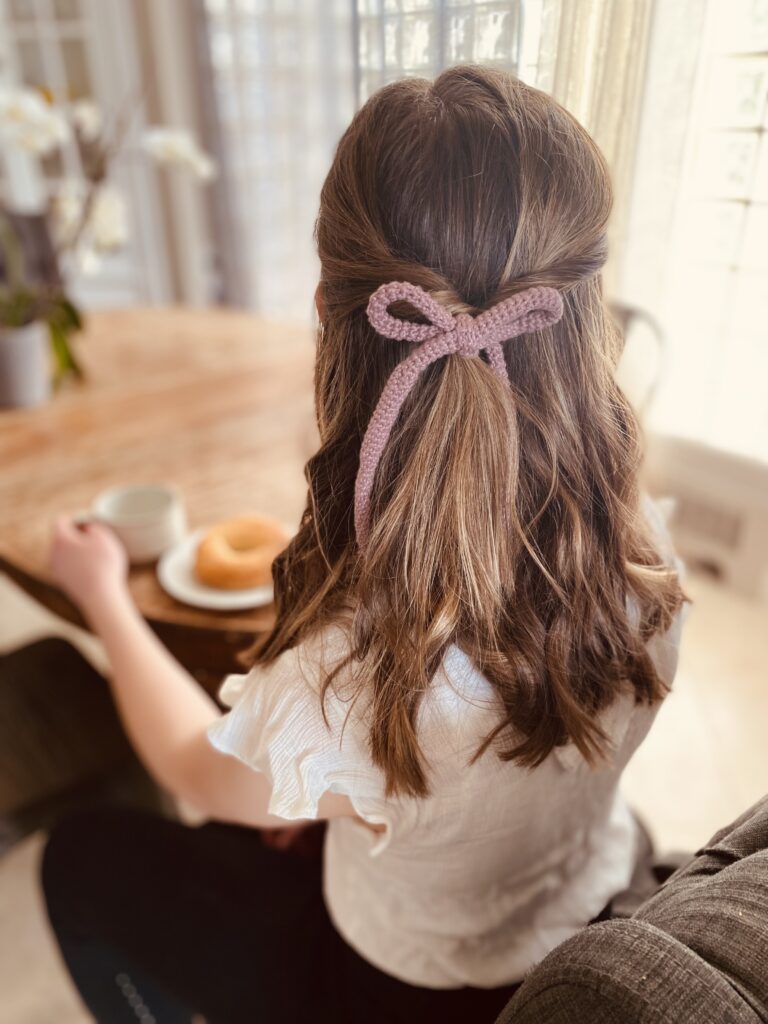
Now your lovely barrette is ready to wear:) Enjoy showing it off;)
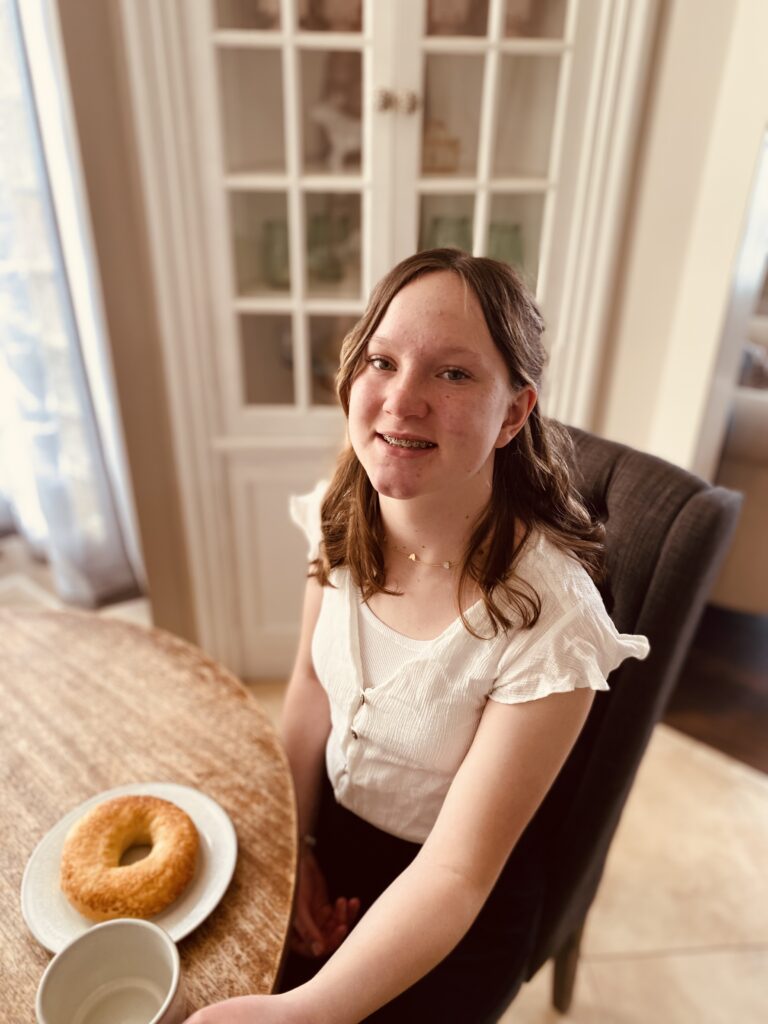
What a cute model! Special thanks to my daughter Dolce for letting me fix her hair to take a few pictures of the hairbow. She made the bow look extra classy.
Briarberry
My name is Abby Holmgren and I love to create and share ideas through crochet, sewing, fashion, cooking, and visual arts. Briarberry Farmhouse is where I share inspiration.