Pilgrims Sampler Apron
Pilgrim’s Sampler Apron
This apron idea came out of feeling inspired by all of the beautiful ways creators are using Granny Squares to make things like sweaters, skirts, jackets, hot pads, everything! I love the fun and retro feel that comes with adding colorful granny squares to a project. As I was crocheting the squares for this apron, I couldn’t help but think of my Grandma Sherrie, who taught me to crochet and who was also a wonderful cook. After making a few of these Granny Squares, I thought that combining the Granny squares into a sewing project for an apron would be a fun and creative fusion of crochet and sewing.
For this project, the Granny Square pattern that we will use was created by Erangi Udeshika from Crochetforyoublog.com. I know that you will be inspired by her story and I hope you’ll enjoy browsing her blog for other projects in addition to this one. I was so thrilled to see that she was sharing this pattern and many others for free. Click the link below for the Bobble Drops Flower pattern which will instruct you in making this granny square.
Bobble Drops Flower Granny Square
Pilgrims Sampler Apron
Materials needed:
Yarn for granny squares in colors of your choice. My colors are Red Heart super saver in Aran, Navy, and Big Twist Yarn in Camel.
Size H8 Crochet hook
1.5 yards of apron fabric of your choice
Pattern Instructions:
We will begin by making 6 Granny Squares using the Bobble Drops Flower Granny Square Pattern above. It’s important for each of the Granny squares to be the same measurements so be sure to follow the pattern carefully.
Once you have made your 6 Granny Squares, we will begin to make the apron chest panel.
Assembly:
- Rnd 1: Attach yarn in your color of choice (I used Aran) to one of the Granny Squares at one of the right side corner stitches of the Granny Square. Now single crochet across one side of the granny square. (14) Ch1, turn.
Rnd 2-3: SC in each of the 14 ST across. Ch 1, turn.
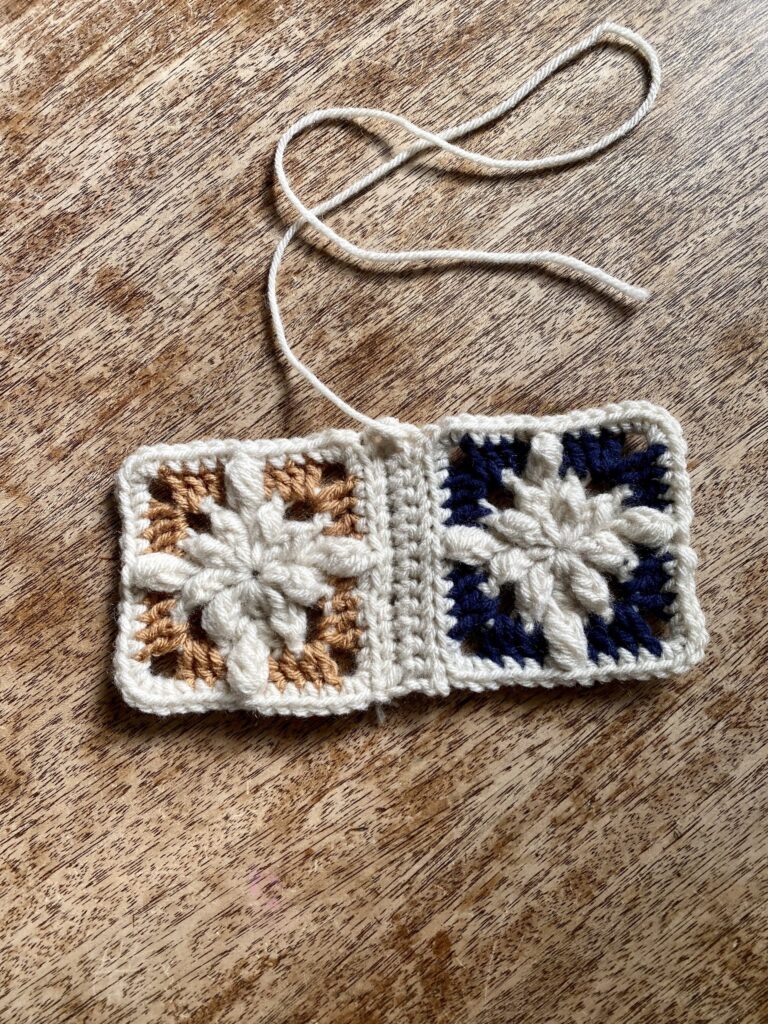
Fasten off, leaving a tail for stitching another Granny Square to this crocheted edge.
Using a yarn needle and the yarn tail above, whipstitch a second Granny Square to the panel starting at the corner stitch and ensuring that both granny squares are facing the same direction.
Repeat 2 more times with the other four Granny squares to make 2 more sets of 2 granny square panels. Now you should have 3 rectangular panels.
2. Now, attach yarn (Aran) at the corner stitch of the right side of one of the granny square panels. See picture.
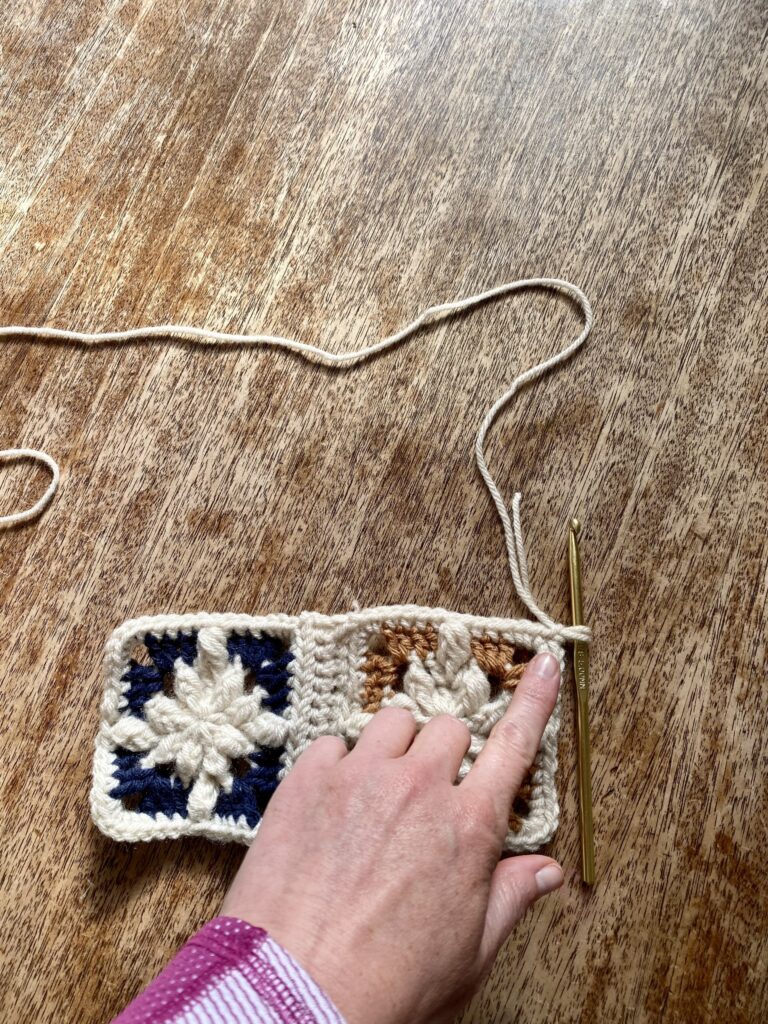
Single crochet in each stitch across the top of the panel long ways. Ch 1, turn. (33)
* Single Crochet in each ST across working back across the stitches from the previous row. Ch 1, turn.** Repeat from * to ** once more. (33)
Fasten off, leaving a tail for stitching. Using a yarn needle, stitch the long edge of the panel to the long edge of one of the other two panels.
Repeat step two until you have joined all of the granny squares into one Rectangular Panel.
Top Border:
Row 1: Attach Aran yarn at the top right side of of the rectangular panel. Single Crochet in each ST across. (34). CH 1, turn.
Row 2-3: SC in each ST across.(34) Ch 1, turn.
Fasten off and weave in end.
Halter Strap for Apron:
Attach yarn in Aran at the bottom right side edge of the panel. SC in each ST across, moving across all three sets of panels on the side edge. (53) Don’t turn yet. CH 105, turn. (This long chain will be the strap that goes over your head and continues down the other side of the chest panel when completed.)
Row 2-3: SC in each ST across. (158) Ch 1, turn.
At the last pull through for row 3, color change to Navy yarn.
Row 4: SL ST in BLO of each ST across. (158) Ch 1, turn.
Row 5-7: SC in each ST across. (158) Ch 1, turn.
After Row 7, color change to Camel Yarn.
Row 8: SL ST in BLO of each ST across. (158) Ch 1, turn.
Row 9-11: SC in each ST across. (158) Ch 1, turn.
Fasten off and weave in ends.
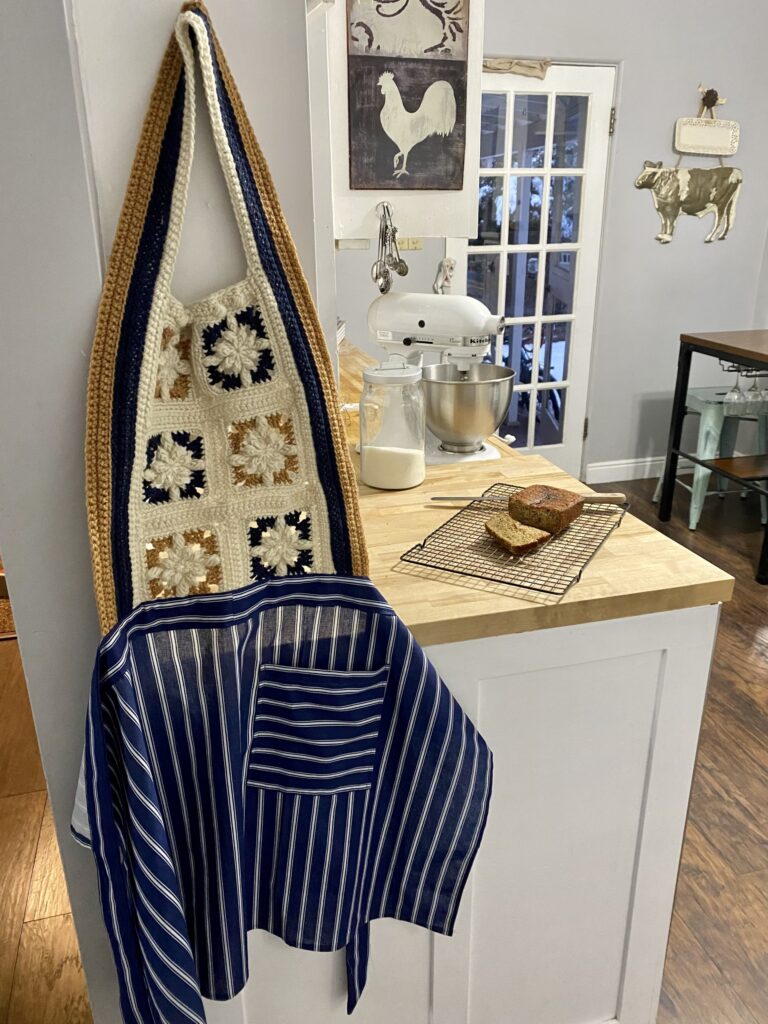
Now, smooth out the long strap and align the end so that the strap follows the unattached long edge of the panel (the long side that isn’t bordered by the strap.) Ensuring no twists in the strap, stitch the strap to the side of the panel. Fasten off and weave in ends. Great job! Now your panel should look something like this.
Fabric Apron Assembly:
Now it’s time to cut the fabric for our Apron skirt, tie and pocket. From your fabric of choice cut:
Waistband Tie: 2 Strips 72″ X 2.5″ (I had to piece 2 36″ pieces together to make this length.)
Apron Skirt: one 25″ X 36 ” piece.
Recipe Pocket: One 8″X9.5″ piece.
Sewing Instructions:
- With the Apron Skirt Piece, begin by folding over the sides of the apron along the 25″ side edges. Fold over 1/4″ and then fold over again. Press, and stitch in place along the edge with a 1/4″ seam.
- Next, do the same for the bottom edge of the skirt. Fold up 1/4″ and then another 1/4″. Press and stitch in place with a 1/4″ seam.
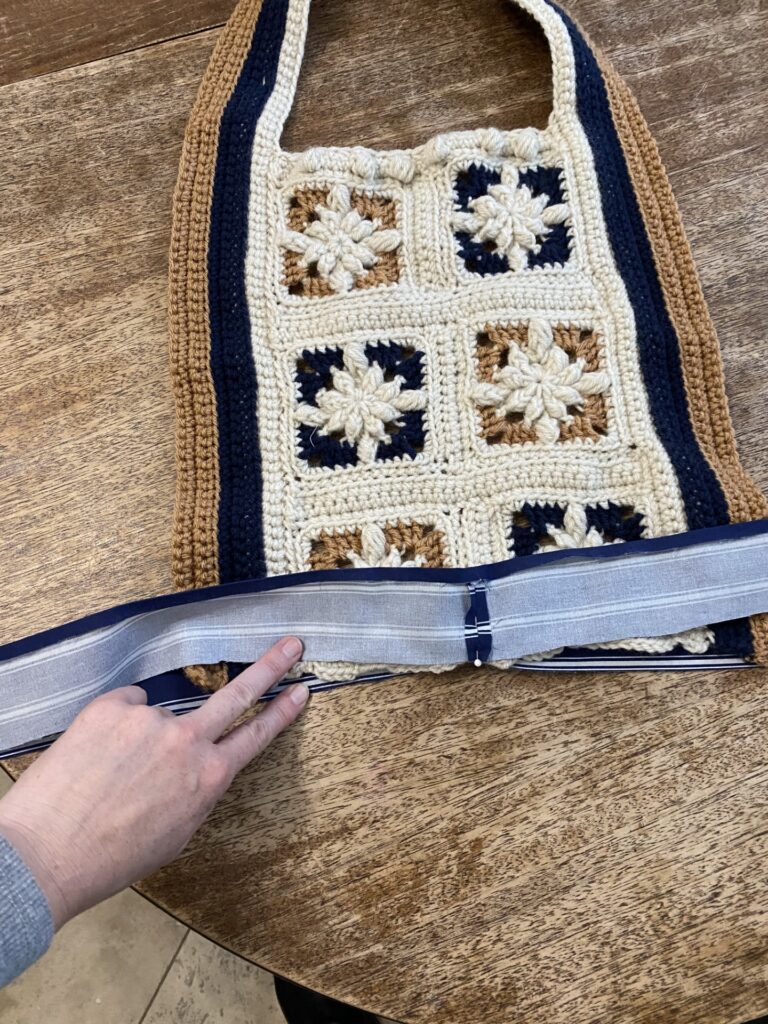
- If you had to piece your waistband tie together like I did, stitch the 36″ pieces together to form two 72″ X 2.5 strips. Now, fold over one long edge of each strip 1/4″ and press.
- Set the crocheted apron panel on a flat surface. Place the center point of the waistband tie over the top of the center point of the lower edge of the apron with the right side of the fabric facing the right side of the apron and the raw edge of the apron tie matching the lower edge of the apron panel. It should look like the picture above. Pin the waistband tie in place at center point of apron panel and across the width of the crocheted panel.
- Now that we have on strap aligned, we need to align the other strap to match also. Flip the apron panel over so that it is facing down. Now, match the center point of the waistband tie with the center point of the lower edge of the apron panel at the back. (Remember that the right side of the fabric tie should be face down with the raw edge of the tie even with the lower edge of the crocheted panel.
- Now begin to sandwich the apron panel between the two apron tie raw edges and pin together across the width of the lower apron edge. Continue pinning along the raw edge of the tie. Stitch across the pinned edge with a 1/2″ seam, securing the lower edge of the apron in the seam and continuing all the way across the waistband tie. Now turn the waistband ties right side out.
- Now we will do the same thing as step 6, but this time we will be sandwiching the apron skirt in between the folded over and pressed, edges of the waistband. Begin by centering the top, raw edge of the skirt panel at the centerpoint of the Crocheted panel. Fold down the center point of the waistband ties to Sandwich the skirt panel and pin in place. Pin across the skirt panel and continue pinning all the way across the tie. Stitch in place close to the edge ensuring that you are catching both the front and back ties of the waistband.
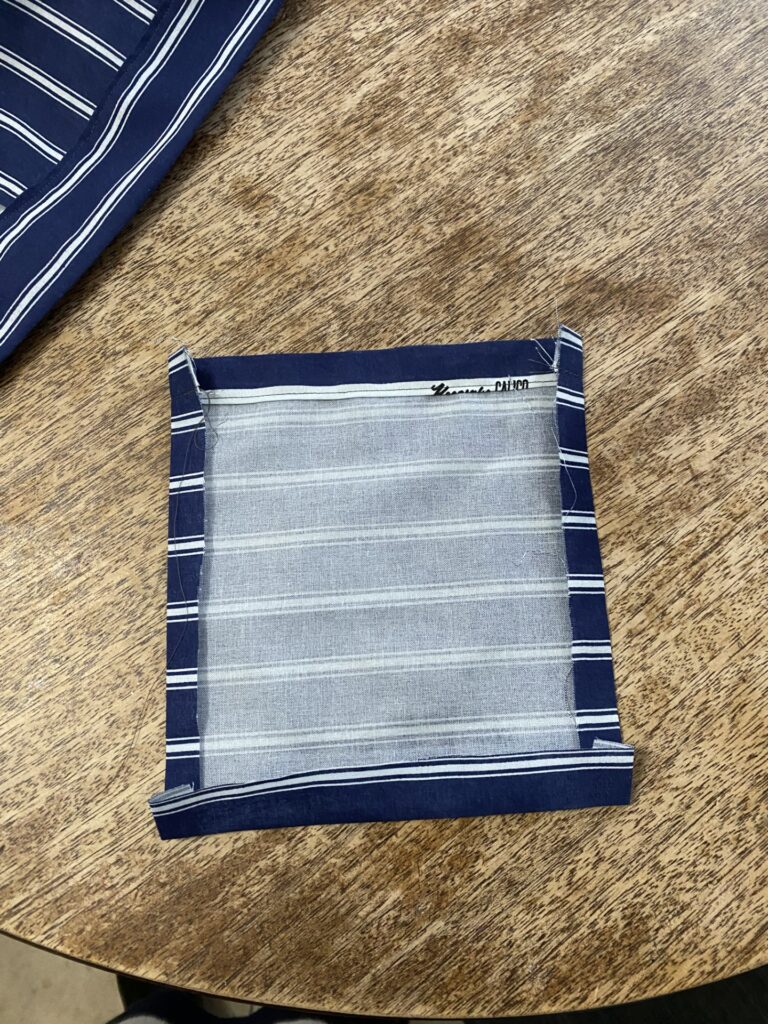
- Recipe Pocket:
- Press under the two long edges and one of the short edges of the apron pocket 1/4″ and press.
- Fold over the top edge of the pocket 1/4″ and again another 1/4.” Press and stitch across close to the folded edge.
- Pin the pocket in place where desired on the apron skirt and stitch around the side edges and lower edge of the pocket, leaving the top of the pocket open.
Whew! You did it! Now, throw on your cute apron and dance around the house!

Briarberry
My name is Abby Holmgren and I love to create and share ideas through crochet, sewing, fashion, cooking, and visual arts. Briarberry Farmhouse is where I share inspiration.