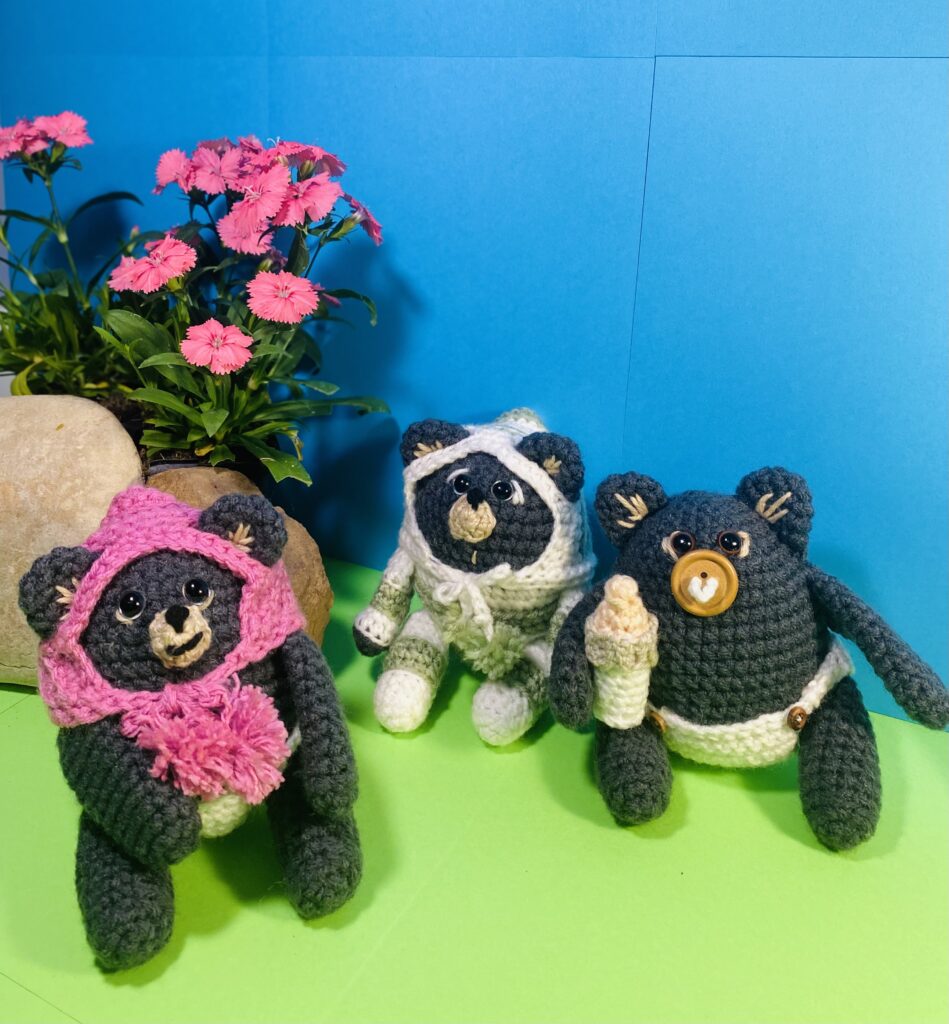
Summer Camp: Baby Briarbears
In the quiet stillness of the forests winter, three baby black bears were born. Even in the midst of a cold hibernation, their Mama bear responds to their every need for food and warmth as she nurtures and protects them. Now as the season warms and the sunshine has melted most of the snow, the baby bears have grown curious, but still a bit afraid of the bright new world around them. They are anxious to see and explore the expanses outside of the bear cave. Slowly and carefully, in a tangle of tumbling and crawling paws at her heels, Mama Bear escorts her baby briarbears out into their beautiful future.
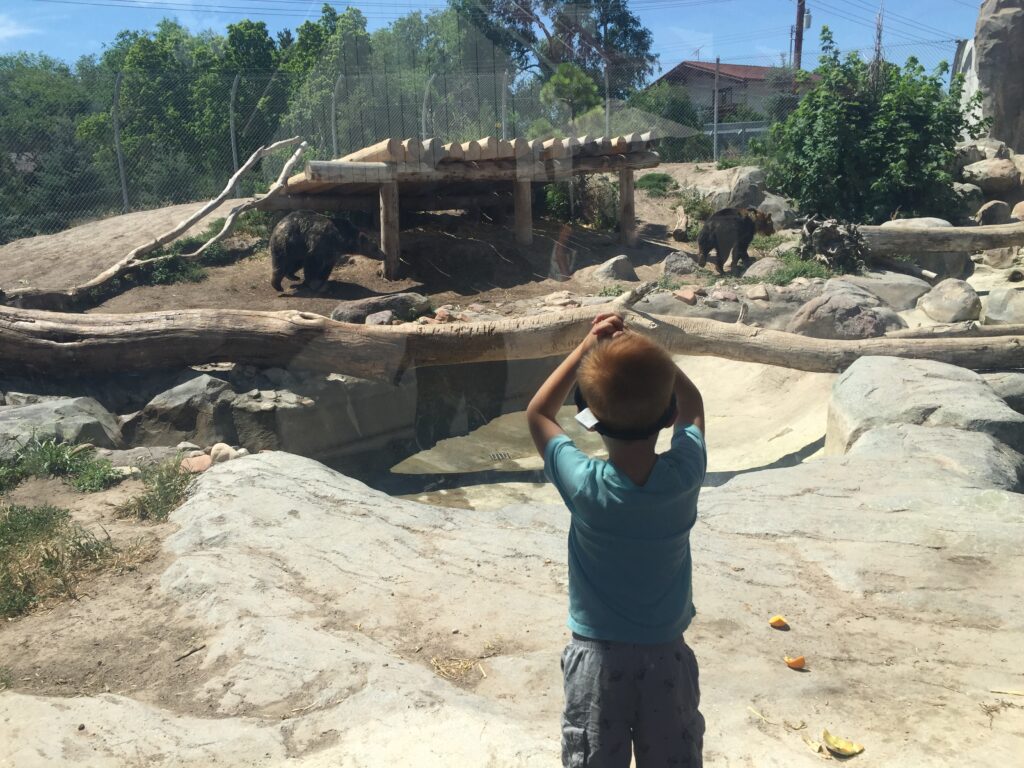
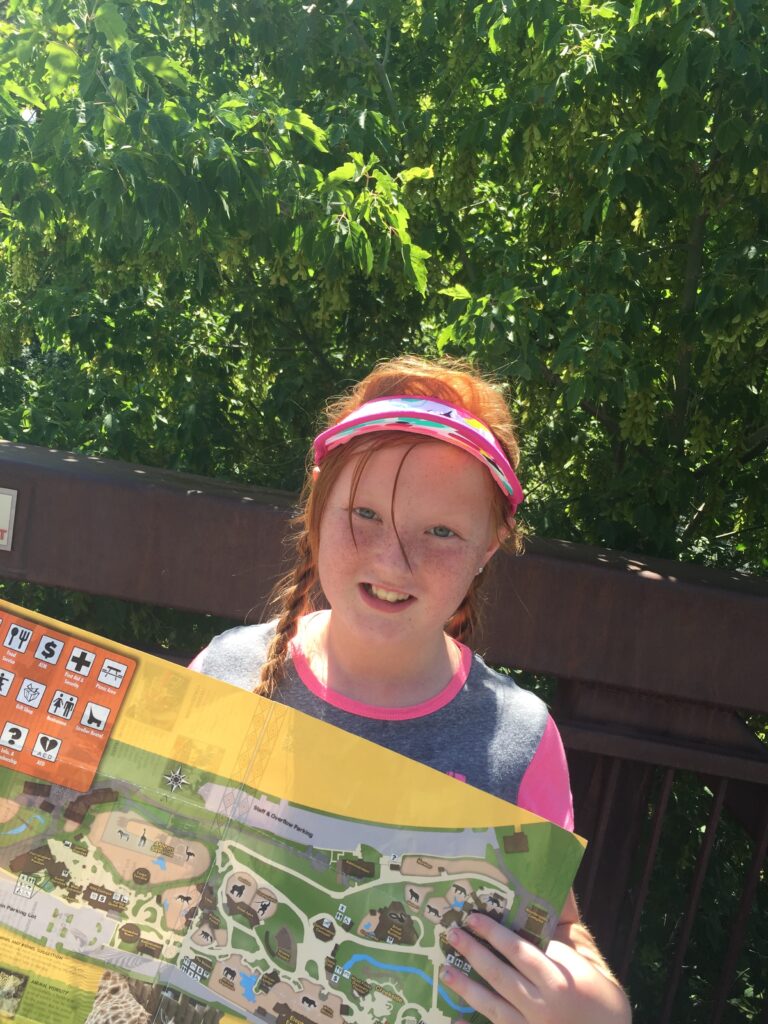
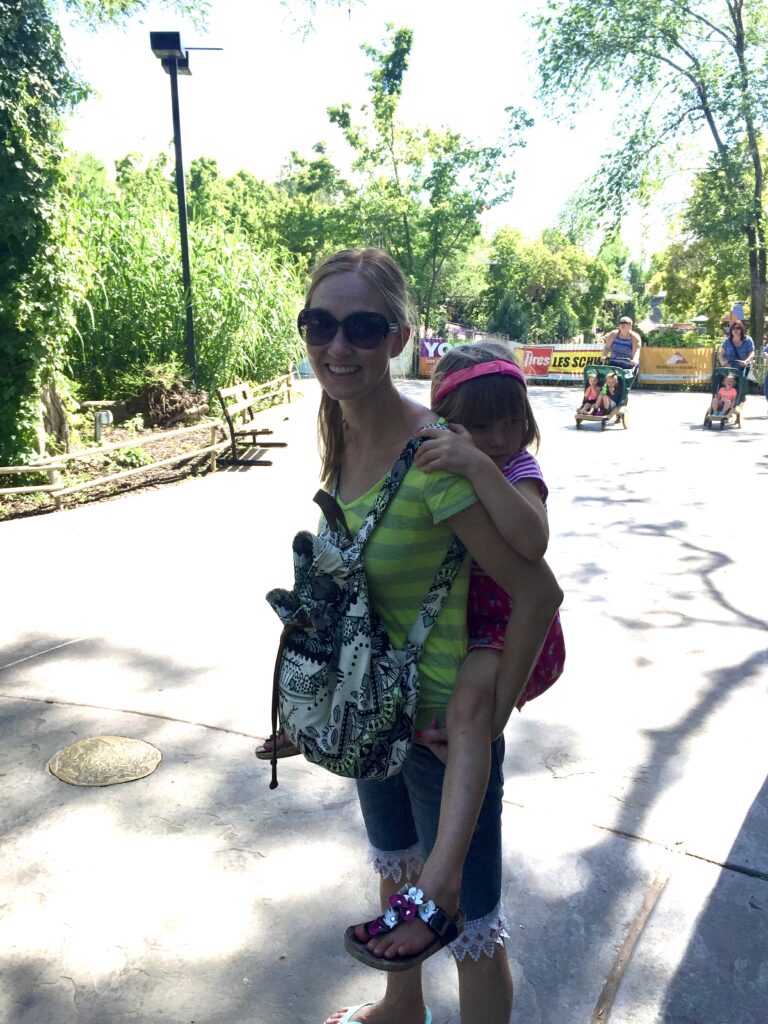
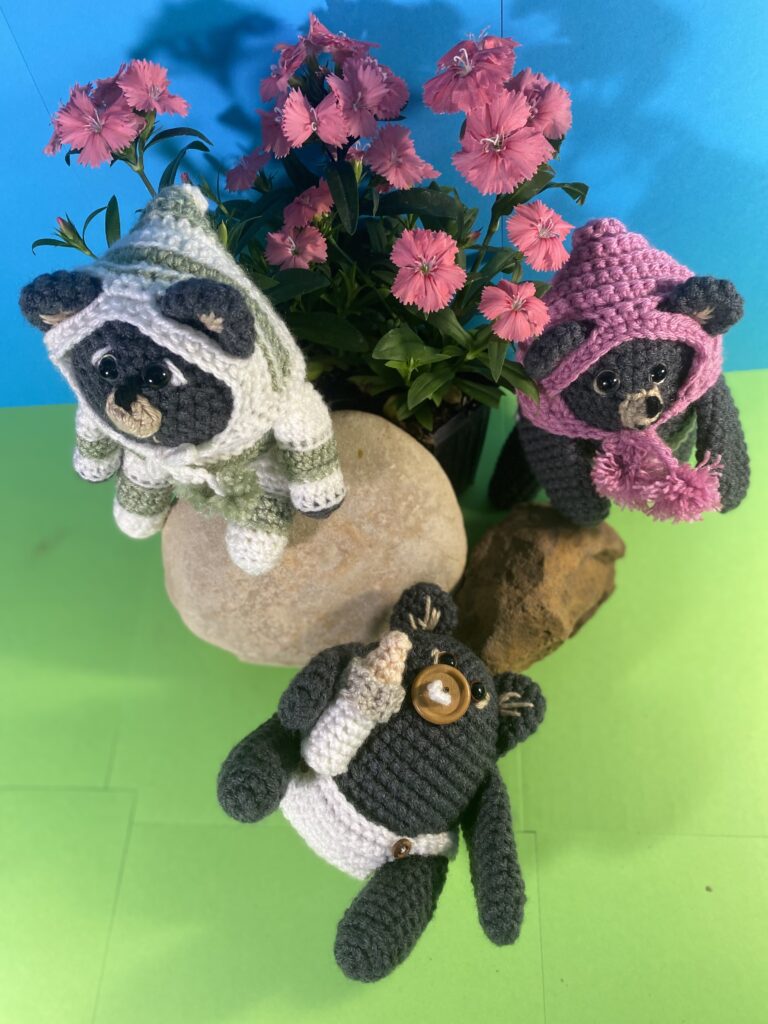
A few years ago I took my kids to the zoo on a hot day in June. As we walked all around the zoo, it was such a warm day that most of the animals were resting and trying to stay cool. However, when we made the turn to the bears habitat, there was a bit of commotion as people gathered around to watch the baby black bears playing. The heat had no effect on their playful antics as they ran and wrestled with each other and played with the toys in their area. They chased a ball into the water and swam together with their siblings and got into all sorts of mischief as their Mama bear sat and watched them. It was a happy reminder of the light of curiosity in little ones and the energy that comes when we explore in this wide, beautiful world. I don’t think that my kids realized it, but I saw each of them in the adorable Baby Black Bears that day.
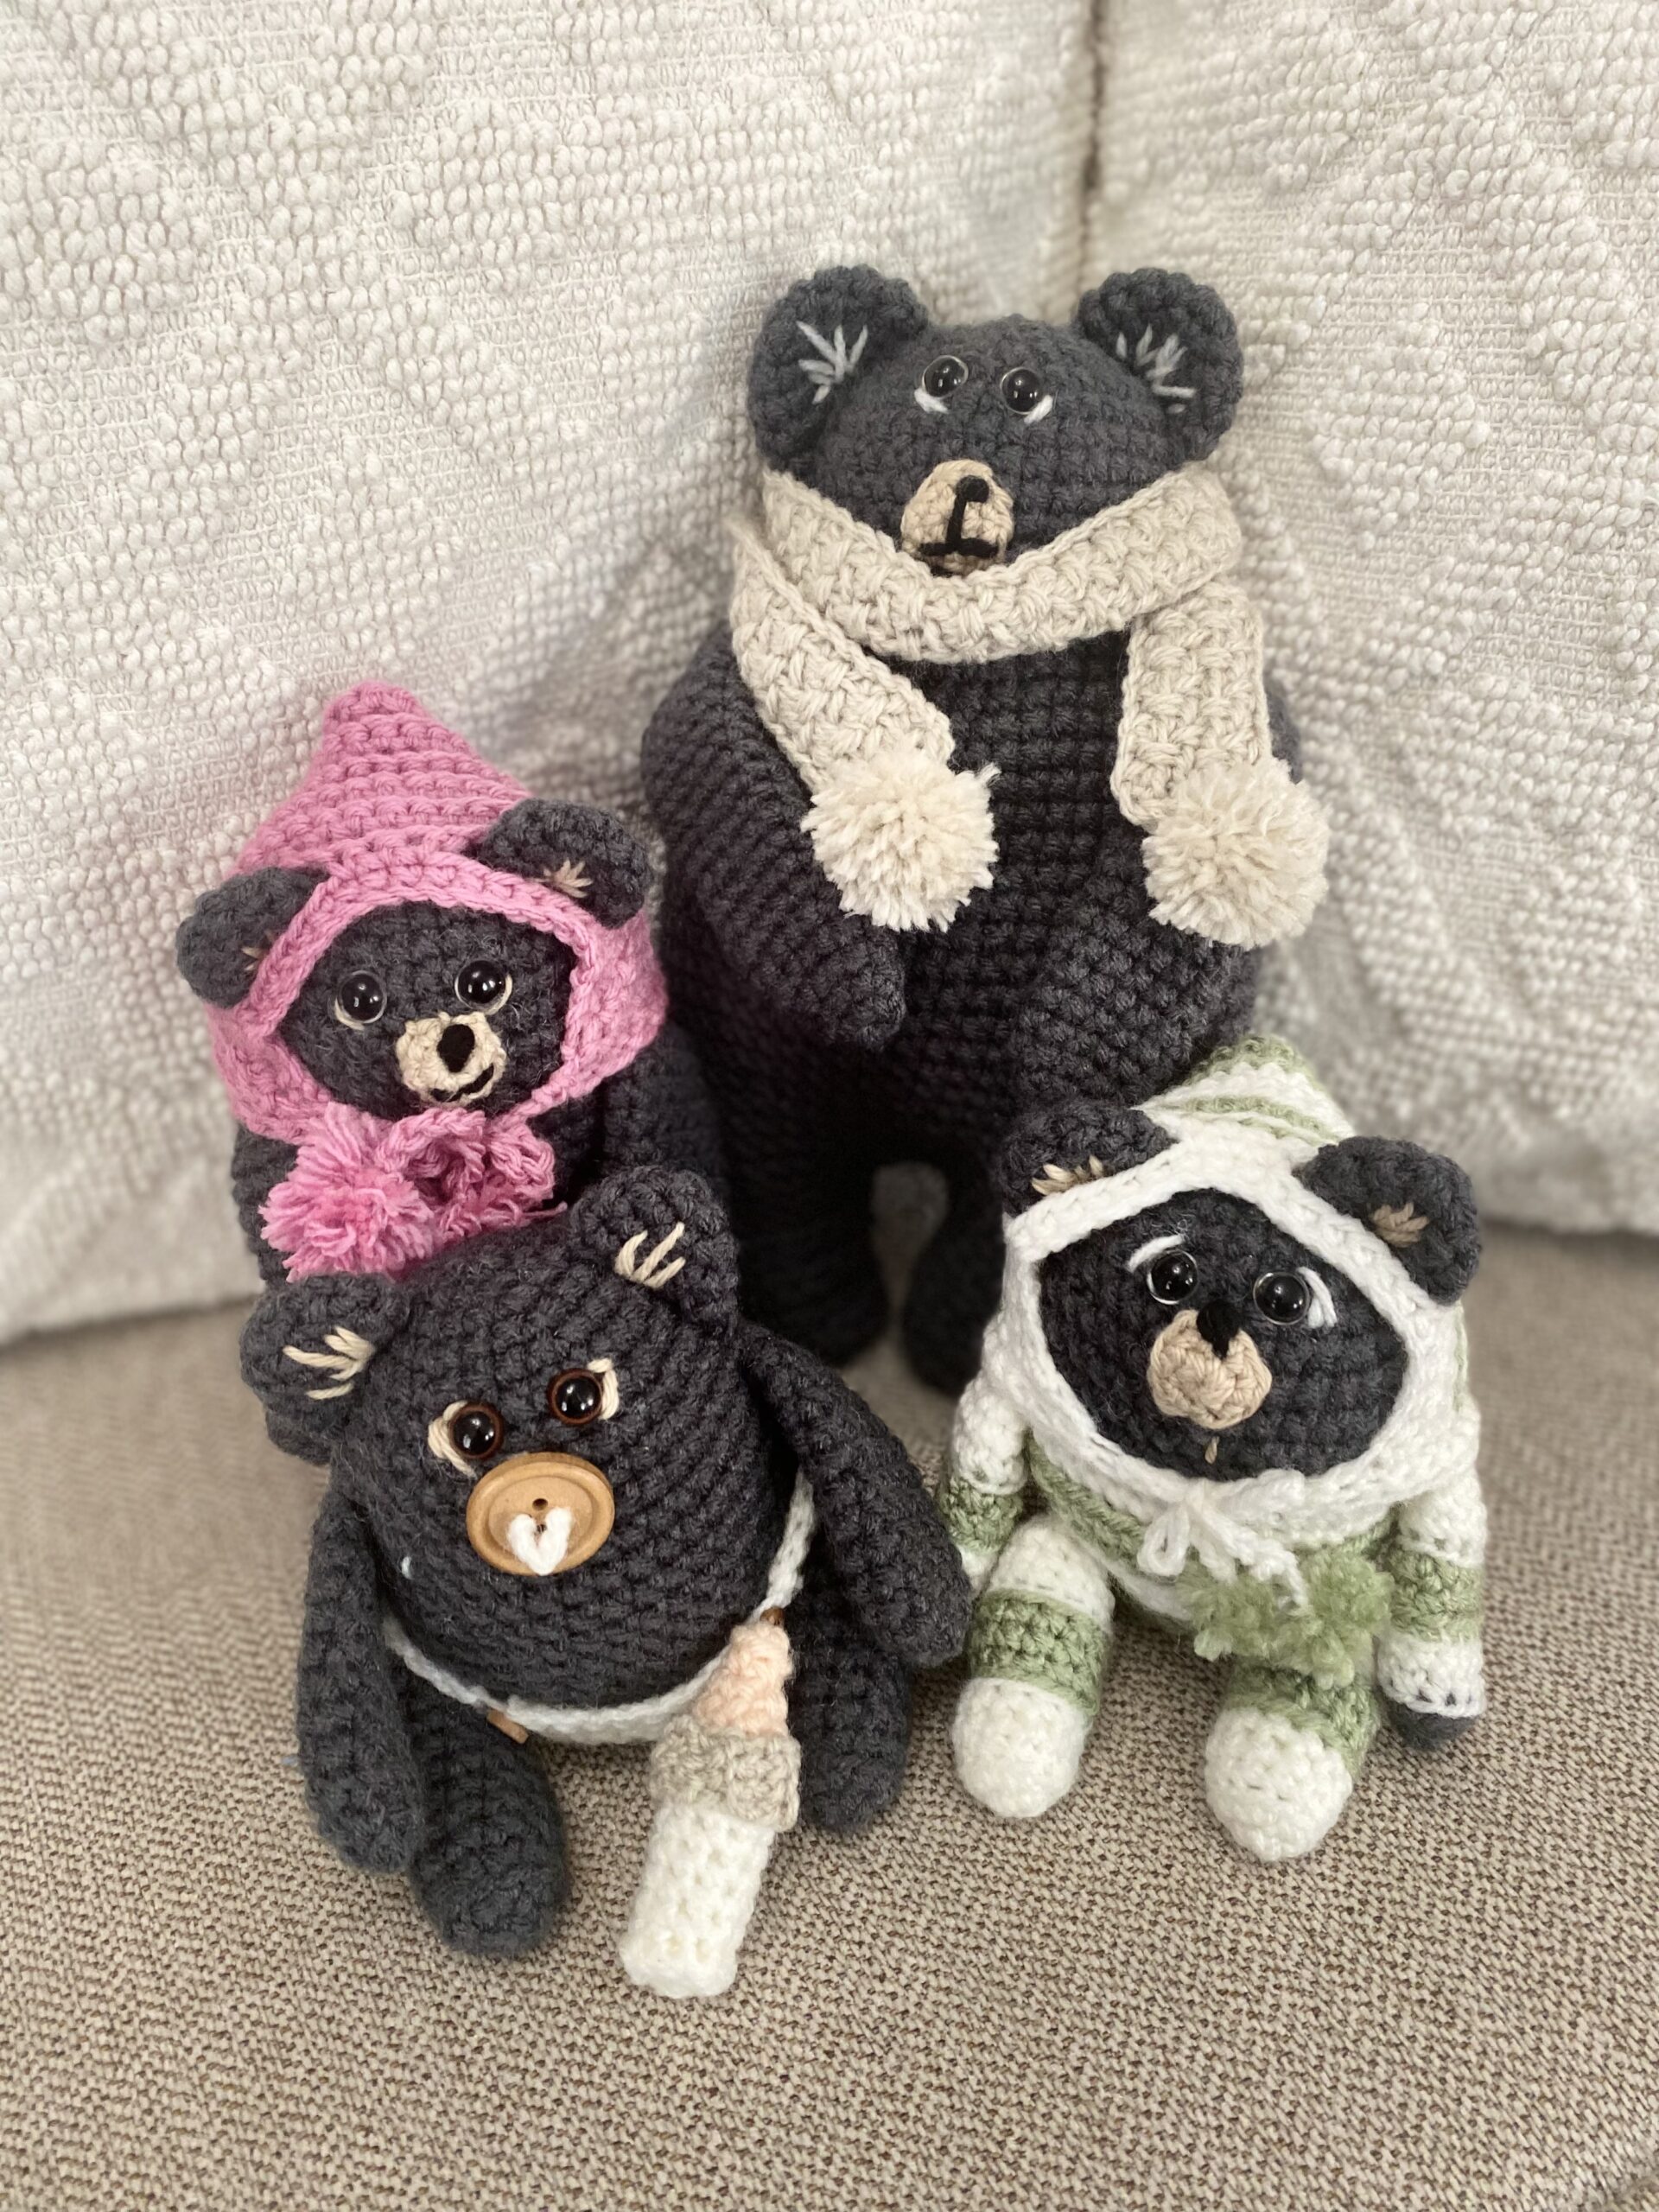
These little black bears are a lot of fun to crochet! The pattern is a simple way to practice the basic stitches of magic loop and single crochet and it’s a great way to practice pattern reading, ending with a cute little toy. You can change the look of the bears by adding unique details to each one, such as a button binky or a colored bonnet. In this example I love how each of the baby’s is in a different stage of getting ready for the day. Stay tuned for more accessories and fun to crochet items as part of this Summer Camp Collection. Patterns for bottles, diapers, blankets, and a few other surprises will be available soon. I hope you’ll enjoy making them and the fun playtimes ahead when they are complete.

Materials:
Red Heart Super Saver yarn in Charcoal
Size E4 (3.5 mm) crochet hook
Red heart super saver in Tan
Safety Eyes
Fiberfill
Yarn needle
Pattern Instructions
Special Stitches: We will be using the Magic Loop Stitch several times as we make these Bears. If you are new to this stitch or would like a quick refresher, visit my Helpful Tutorials Page Here.
Head and Body:
Rnd 1: 6 SC in a magic loop. Pull free end of the loop snugly to close the loop. (6)
Rnd 2: 2 SC in each ST around. (12)
Rnd 3: *SC in next ST, 2 SC in next ST,** Repeat from * to ** around. (18)
Rnd 4: *SC in the next 2 ST, 2 SC in next ST.** Repeat from * to ** around. (24)
Rnd 5: *SC in the next 3 ST, 2 SC in next ST.** Repeat from * to ** around. (30)
Rnd 6: SC on each ST around. (30)
Rnd 7: *SC in the next 4 ST, 2 SC in the next ST.** Repeat from * to ** around. (36)
Rnd 8: SC in each ST around. (36)
Rnd 9: *SC in the next 5 ST, 2 SC in the next ST.** Repeat from * to ** around. (42)
Rnd 10-15: SC in each ST around. (42)
Rnd 16: *SC in the next 5 ST, Decrease.** Repeat from * to ** around. (36)
Rnd 17: SC in each ST around. (36)
Rnd 18: *SC in the next 4 ST, Decrease.** Repeat from * to ** around. (30)
Rnd 19: SC in each ST around. (30)
Rnd 20: *SC in the next 3 ST, Decrease.** Repeat from * to ** around. (24)
Rnd 21: *SC in the next 2 ST, Decrease.** Repeat from * to ** around. (18)
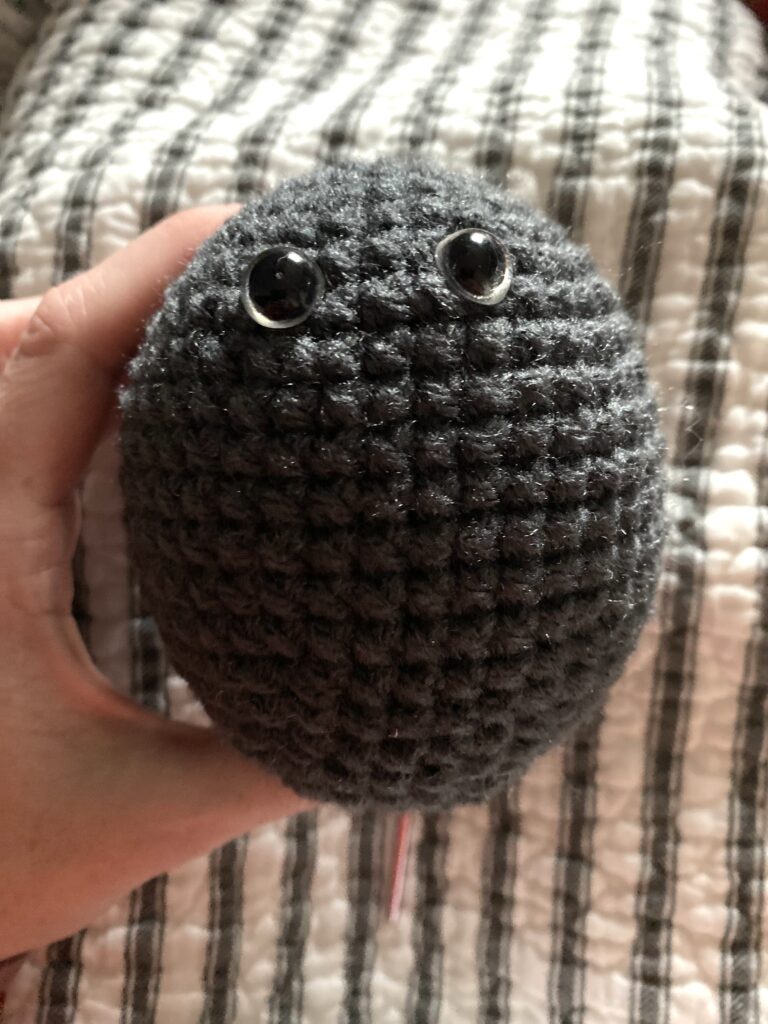
Place safety eyes in row 6, with 3 Stitches between the eyes. The eyes make up a big part of the personality of the bear so try a few different placements of the eyes. Ensure that you like the placement before securing the eyes with the back piece.
Stuff Bear body firmly with fiberfill.
Rnd 22: * SC in the next ST, Decrease.** Repeat from * to ** around. (12)
Rnd 23: Decrease around. (6)
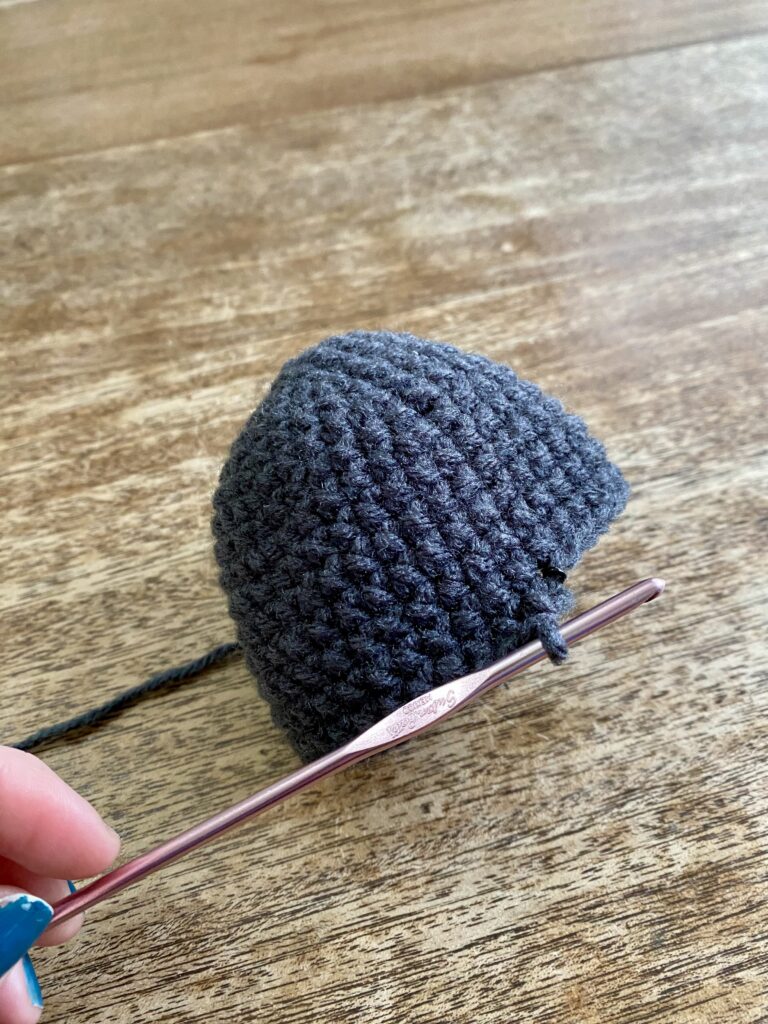
Fasten off, leaving a long tail for weaving.
Using the long tail and a yarn needle, insert needle through BLO of each of the 6 stitches of the final row. Pull the end snugly to close the hole and fasten in place.
Ears: (Make 2)
Rnd 1: 6 SC in a magic loop. Pull free end snugly to close the loop. (6)
Rnd 2: 2 SC in each ST around. (12)
Rnd 3-4: Sc in each ST around. (12)
Fasten off, leaving a long tail for stitching.
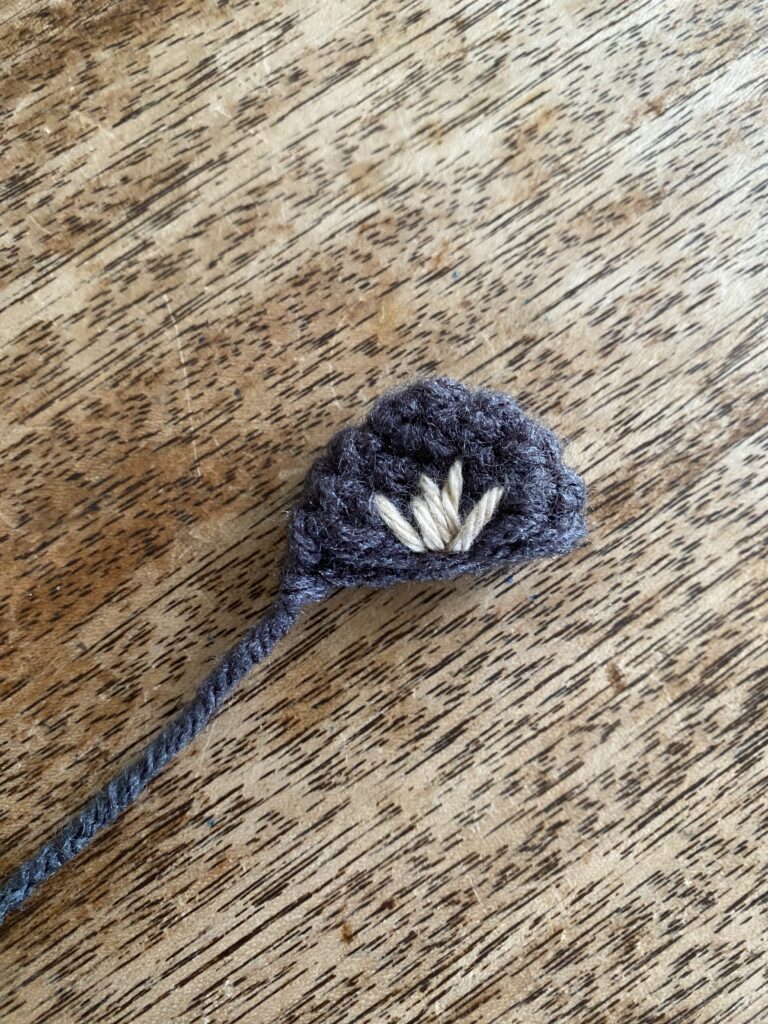
Embroider the inner ears with Oatmeal colored yarn and a yarn needle. To do this, I make several stitches of different lengths that fan out from the center of the ear. See picture below.
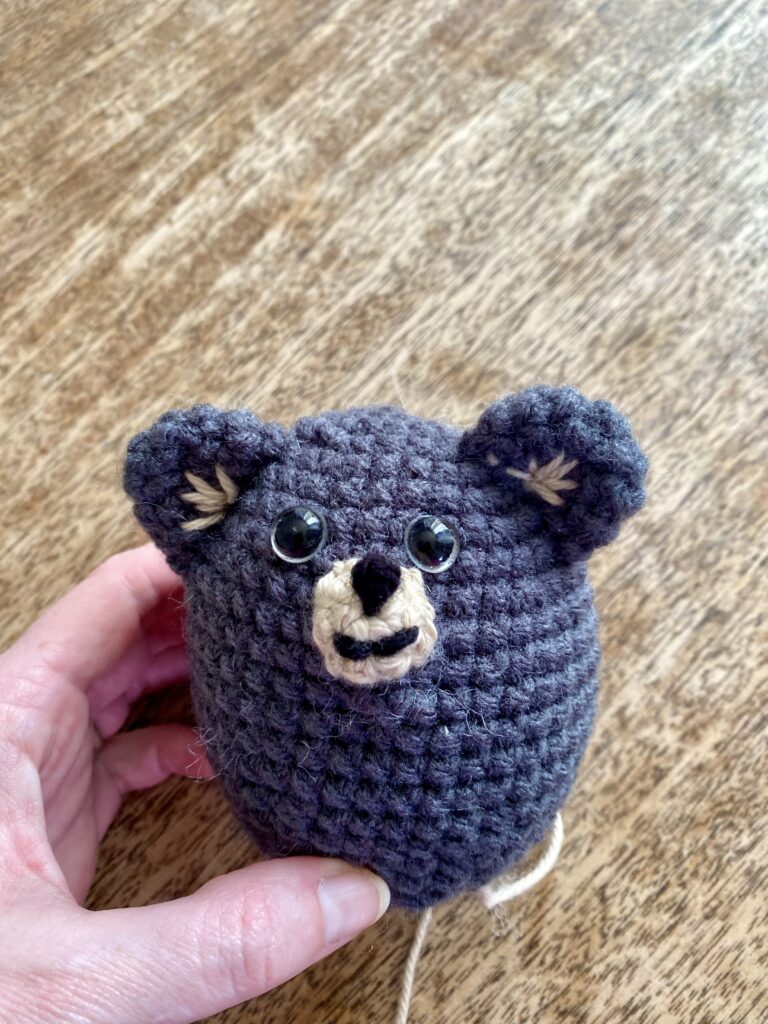
Using the long tail and a yarn needle. Stitch the ears to the head of the bear above the eyes on each side.
Muzzle:
Rnd 1: Using Oatmeal colored yarn, make 6 SC in a magic loop. Pull the free end snuggly to close the loop. (6)
Rnd 2: * SC in the next ST, 2 SC in the next ST** Repeat from * to ** around. (9)
Fasten off, leaving a long tail for stitching.
Embroider nose and mouth on the muzzle using black yarn or embroidery floss.
Stitch muzzle to face of the bear between the eyes.
Arms: (Make 2)
Rnd 1: 6 SC in a magic loop. Pull the free end snuggly to close the loop. (6)
Rnd 2: 2 SC in each ST around. (12)
Rnd 3-12: SC in each ST around. (12)
Fasten off leaving a long tail for stitching the arms to the body. Stitch the arms to the sides of the body beneath the ears.
Legs: (Make 2)
Rnd 1: 6 SC in a magic loop. Pull free end snuggly to close the loop.(6)
Rnd 2: 2 SC in each ST around. (12)
Rnd 3: SC in BLO of each ST around. (12)
Rnd 4-13: SC in each ST around. (12)
Fasten off, leaving a long tail for stitching the leg to the body.
Using the long tail, stitch the legs to the sides of the body.
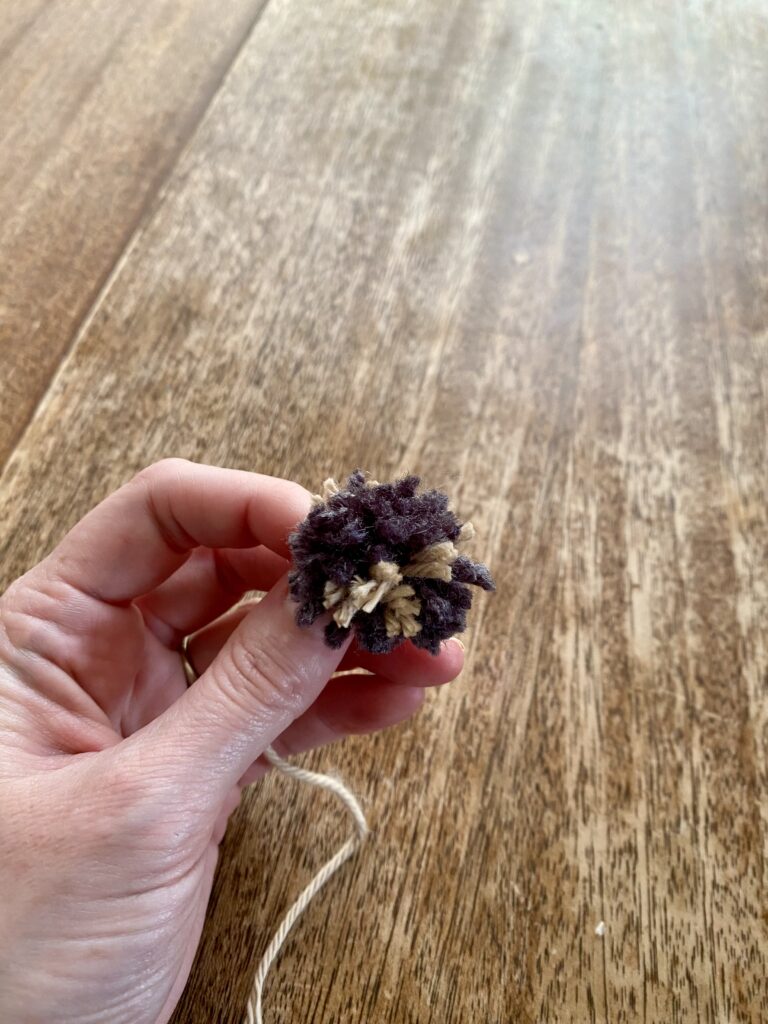
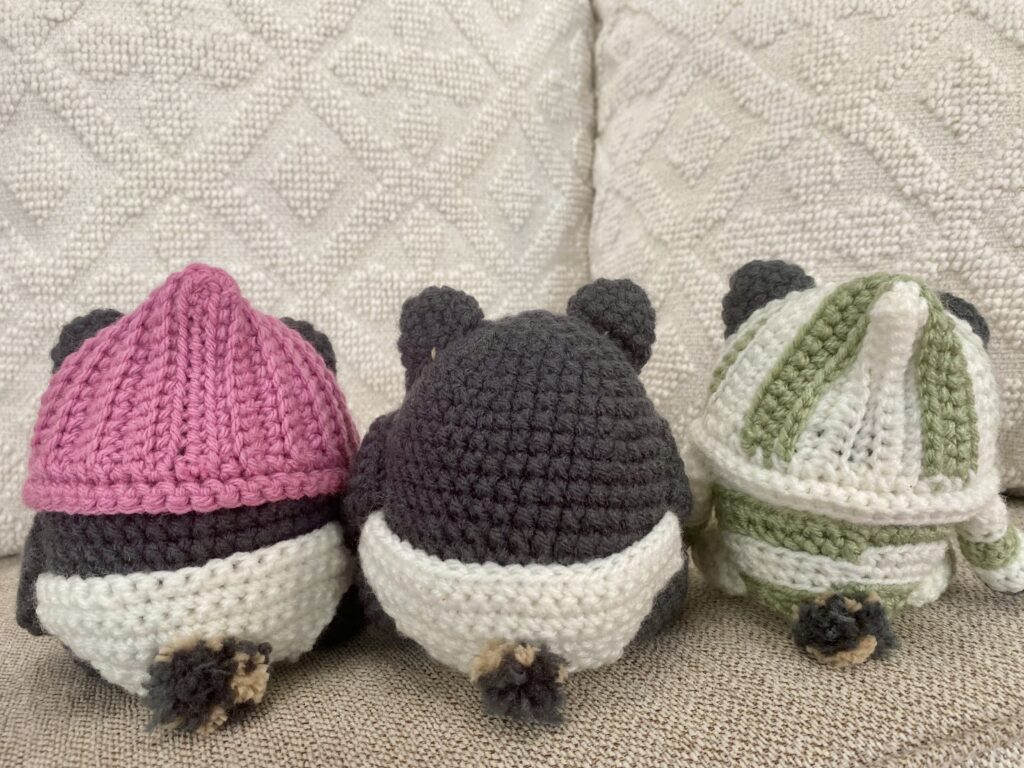
Pom Pom Tail:
Wrap a strand of charcoal colored yarn around two fingers 12 times, clip the yarn but don’t removed from fingers. Now wrap a strand of oatmeal colored yarn 5 times around the two fingers over the top of the charcoal colored yarn. Clip the yarn and removed the yarn bundle from your fingers carefully, keeping the bundle intact. Now tie a 6 inch cut strand of oatmeal colored yarn tightly around the center point of the bundle. Knot the yarn and clip the looped ends in the bundle. Trim into a rounded Pom. Using the knotted ties of the oatmeal yarn strand, tie the tail into place at the back of the bear. Clip the ends.
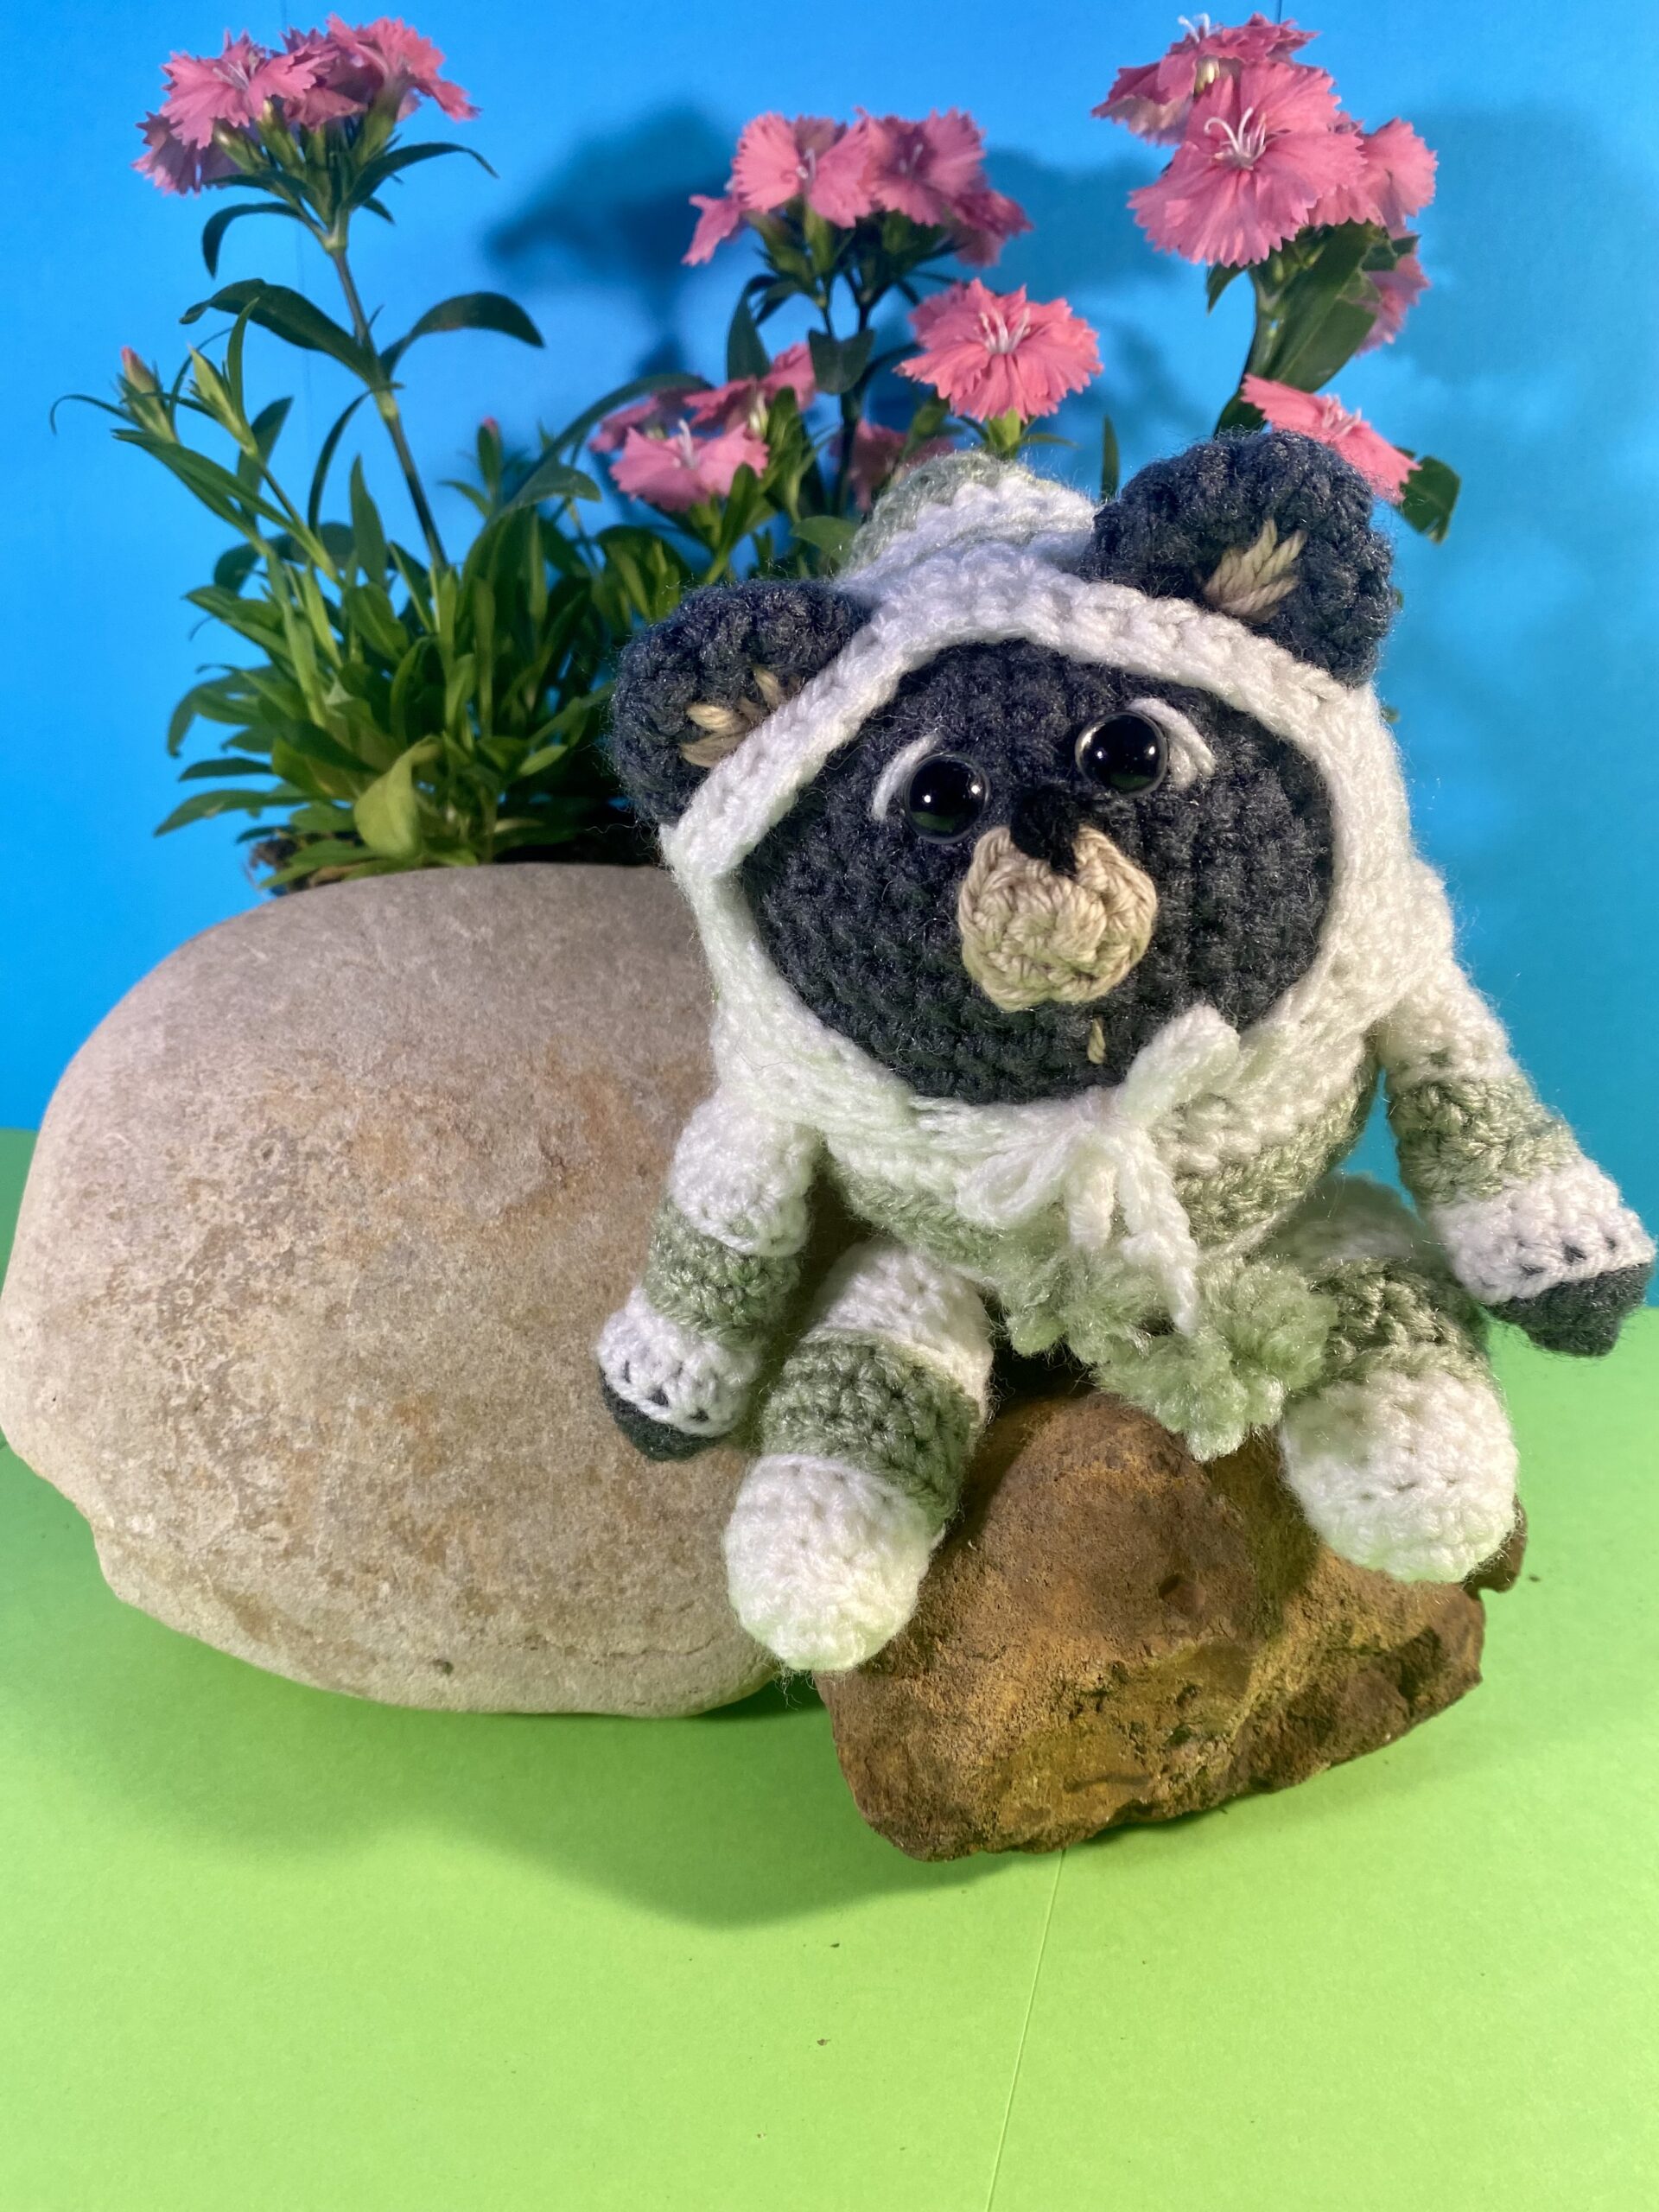
Pajama Briar Bear:

Materials:
Red Heart Super Saver Yarn in Charcoal
Bernat baby yarn in Off White
Mint colored yarn
Size 3.5 mm E4 hook
Fiberfill or your stuffing of choice
Safety eyes
Yarn needle
Your Briarbear could be wearing PJs and you could practice doing some color work by using this variation of the above pattern.
Head and Body:
Rnd 1: 6 SC in a magic loop. Pull free end of the loop snugly to close the loop. (6)
Rnd 2: 2 SC in each ST around. (12)
Rnd 3: *SC in next ST, 2 SC in next ST,** Repeat from * to ** around. (18)
Rnd 4: *SC in the next 2 ST, 2 SC in next ST.** Repeat from * to ** around. (24)
Rnd 5: *SC in the next 3 ST, 2 SC in next ST.** Repeat from * to ** around. (30)
Rnd 6: SC on each ST around. (30)
Rnd 7: *SC in the next 4 ST, 2 SC in the next ST.** Repeat from * to ** around. (36)
Rnd 8: SC in each ST around. (36)
Rnd 9: *SC in the next 5 ST, 2 SC in the next ST.** Repeat from * to ** around. (42)
Rnd 10-11: SC in each ST around. (42) Color Change to Off white. Fasten off Charcoal yarn.
Striping:
Rnd 12: With Off White yarn, SLST in FLO of each ST around. (42)
Rnd 13-14: SC in each ST around. (42)Color change to Mint color at the last pull through of the last stitch of Rnd 14.
Rnd 15: SLST in each ST around. (42)
Rnd 16:* SC in the next 5 ST, Decrease.** Repeat from * to ** around. (36)
Rnd 17: SC in each ST around. (36)Color change to off white at the last pull through of the last stitch of the round. Leave green attached at the back of the work.
Rnd 18: SLST in each ST around.(36)
Rnd 19: With Off white yarn. *SC in the next 4 ST, Decrease.** Repeat from * to ** around. (30)
Rnd 20: SC in each ST around. (30) Color change to green at the last pull through of the last ST.
Rnd 21: With green yarn, SLST in each ST around. (30)
Rnd 22: *SC in next 3 ST, Decrease. ** Repeat from * to ** around. (24)
Rnd 23: *SC in the next 2 ST, Decrease.** Repeat from * to ** around.(18) Color change to Off White at the last pull through of the last ST of the round. Fasten off Green.
Place safety eyes in row 6, with 3 Stitches between the eyes. The eyes make up a big part of the personality of the bear so try a few different placements of the eyes. Ensure that you like the placement before securing the eyes with the back piece.
Stuff body firmly with fiberfill.
Rnd 24: SLST in each ST around. (18)
Rnd 25: *SC in the next ST, Decrease.** Repeat from * to ** around. (12)
Rnd 26: Decrease around. (6)
Fasten off, leaving a long tail. Using the long tail and a yarn needle, weave tail through BLO of each of the remaining 6 ST of the round. Pull snuggly to close the loop. Secure with a knot and weave in end.
Ears: (Make 2)
Use the pattern instructions and embroidery instructions for the Ears above.
Muzzle:
Follow the directions above for the Muzzle and embroidery.
Arms: (Make 2)
Rnd 1: with charcoal colored yarn, make 6 SC in a magic loop. Pull free end snuggly to close the loop. (6)
Rnd 2: 2 SC in each ST around. Color Change to off white at the last pull through of the last stitch of the round. (12) Fasten off Charcoal.
Rnd 3: SLST in each ST around. (12)
Rnd 4-5: SC in each ST around. (12)
Color change to Green at the last pull through of the last ST of Rnd 5.
Rnd 6: SLST in each ST around. (12)
Rnd 7-8: SC in each ST around. Color change to off white at the last pull through of the last ST of Rnd 8. (12)
Rnd 9-11: Repeat Rnds 3-5.
Rnd 12: SC in each ST around. (12) Fasten off, leaving a long tail for stitching the arm to the body.
Rnd 13: Decrease around.
Using a yarn needle and the long tail, stitch the arm to the side of the body.
Legs: (Make 2)
Rnd 1: With Off White yarn, make 6 SC in a magic loop. Pull the free end snugly to close the loop. (6)
Rnd 2: 2 SC in each ST around. (12)
Rnd 3: SC in BLO of each ST around. (12)
Rnd 4-5: SC in each ST around. (12)
Color change to green on the last pull through of the last stitch of Rnd 5.
Rnd 6: With green, SLST in BLO of each ST around. (12)
Rnd 7-9: SC in each ST around. (12)
Color change to Off White at the last pull through of the last stitch of round 9.
Rnd 10: With Off White yarn, SLST in BLO of each ST around. (12)
RND 11-13: Sc in each ST around. (12)
Stuff leg firmly with fiberfill.
Rnd 14: Decrease around. fasten off, leaving a long tail for stitching. (6)
Using the long tail, stitch the leg to the side of the body. Fasten in place and weave in ends.
Tail: Follow instructions above for the Pom Pom tail.
Embroider around the outer edge of the eyes with off white yarn.
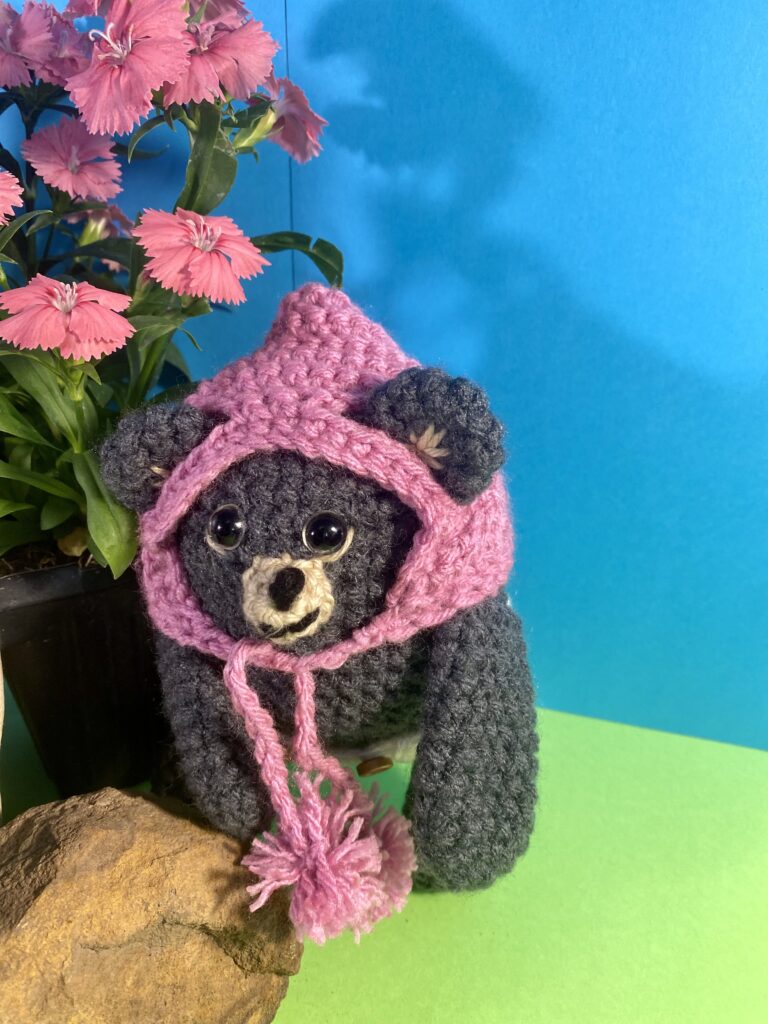
Striped Bonnet:
This bonnet can also be made in one color without the striping by omitting the color changes.
Row 1: With off white yarn, CH 26, Turn.
Row 2: SC in second chain from the hook and in each ST across. Ch , 1, turn. (25)
Row 3: SC in next 5 ST, CH 6, SK the next 6 ST, SC in the next 3 ST, CH 6, SK the next 6 ST, SC in the next 5 ST, CH 1, turn( 25).
Row 4: SC in each ST across. Color change to green at the last pull through of the last ST. CH 1, turn. (25)
Row 5: SLST in each ST across. CH 1, turn. (25)
Row 6: SC in each ST across. CH 1, turn. (25)
Row 7: SC in each ST across. Color change to off white at the last pull through of the last ST. CH 1, turn. (25)
Row 8: SLST in each ST across. CH 1, turn. (25)
Row 9: SC in each ST across. CH 1, turn. (25)
Row 10: SC in each ST across. Color change to green at the last pull through of the last stitch. CH 1, turn. (25)
Row 11: SLST in each ST across. CH 1, turn. (25)
Row 12: SC in each ST across. CH 1, turn. (25)
Row 13: SC in each ST across. Color change to off white at the last pull through of the last ST. CH 1, turn. (25)
Row 14: SLST in each ST across. CH 1, turn. (25)
Row 15: SC in each ST across. CH 1, turn. (25)
Row 16: SC in each ST across. Fasten off, leaving a long tail for stitching.
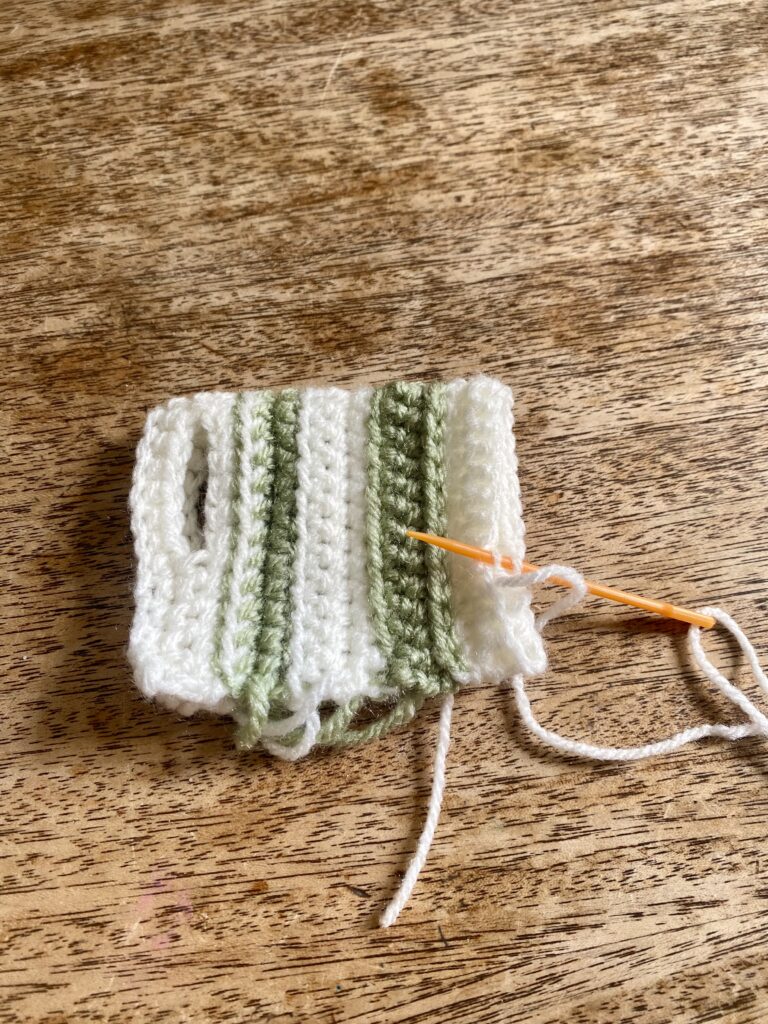
fold the long strip in half, as shown and using a yarn needle and the long tail, stitch the back seam of the hat.
Lower band of bonnet:
Row 1: Attach off white yarn to the front lower corner of the bonnet. SC in the end stitch of each row working around the lower edge of the bonnet. When you have reached the opposite corner, CH 1, turn.
Row 2: SC in BLO of each ST across. Fasten off and weave in ends.
Bonnet Ties:
Attach yarn at the bottom front corner of the bonnet with a SLST. SC in the same stitch. CH 16, fasten off leaving a string to attach a pom pom if desired. Repeat to make a tie on the other front corner of the bonnet.
Pom Pom:
Wrap your yarn color of choice around two fingers 8 times around. Clip the yarn and remove the bundle from your fingers and set it down, keeping the strings of the bundle in place. Cut a piece of yarn 4 inches long. Tie the cut piece of yarn around the center of the bundle and tie snugly. Clip the ends so that the pom pom is nice and puffy and then tie with a knot onto the ends of the bonnet ties.
Thank you so much for visiting Briarberry Farmhouse! I hope you will love this pattern and that you will feel inspired as you create. If you prefer a printable version of this pattern, please visit my etsy shop, Briarberry Farmhouse here. The small fee goes towards supporting my work.
Briarberry
My name is Abby Holmgren and I love to create and share ideas through crochet, sewing, fashion, cooking, and visual arts. Briarberry Farmhouse is where I share inspiration.