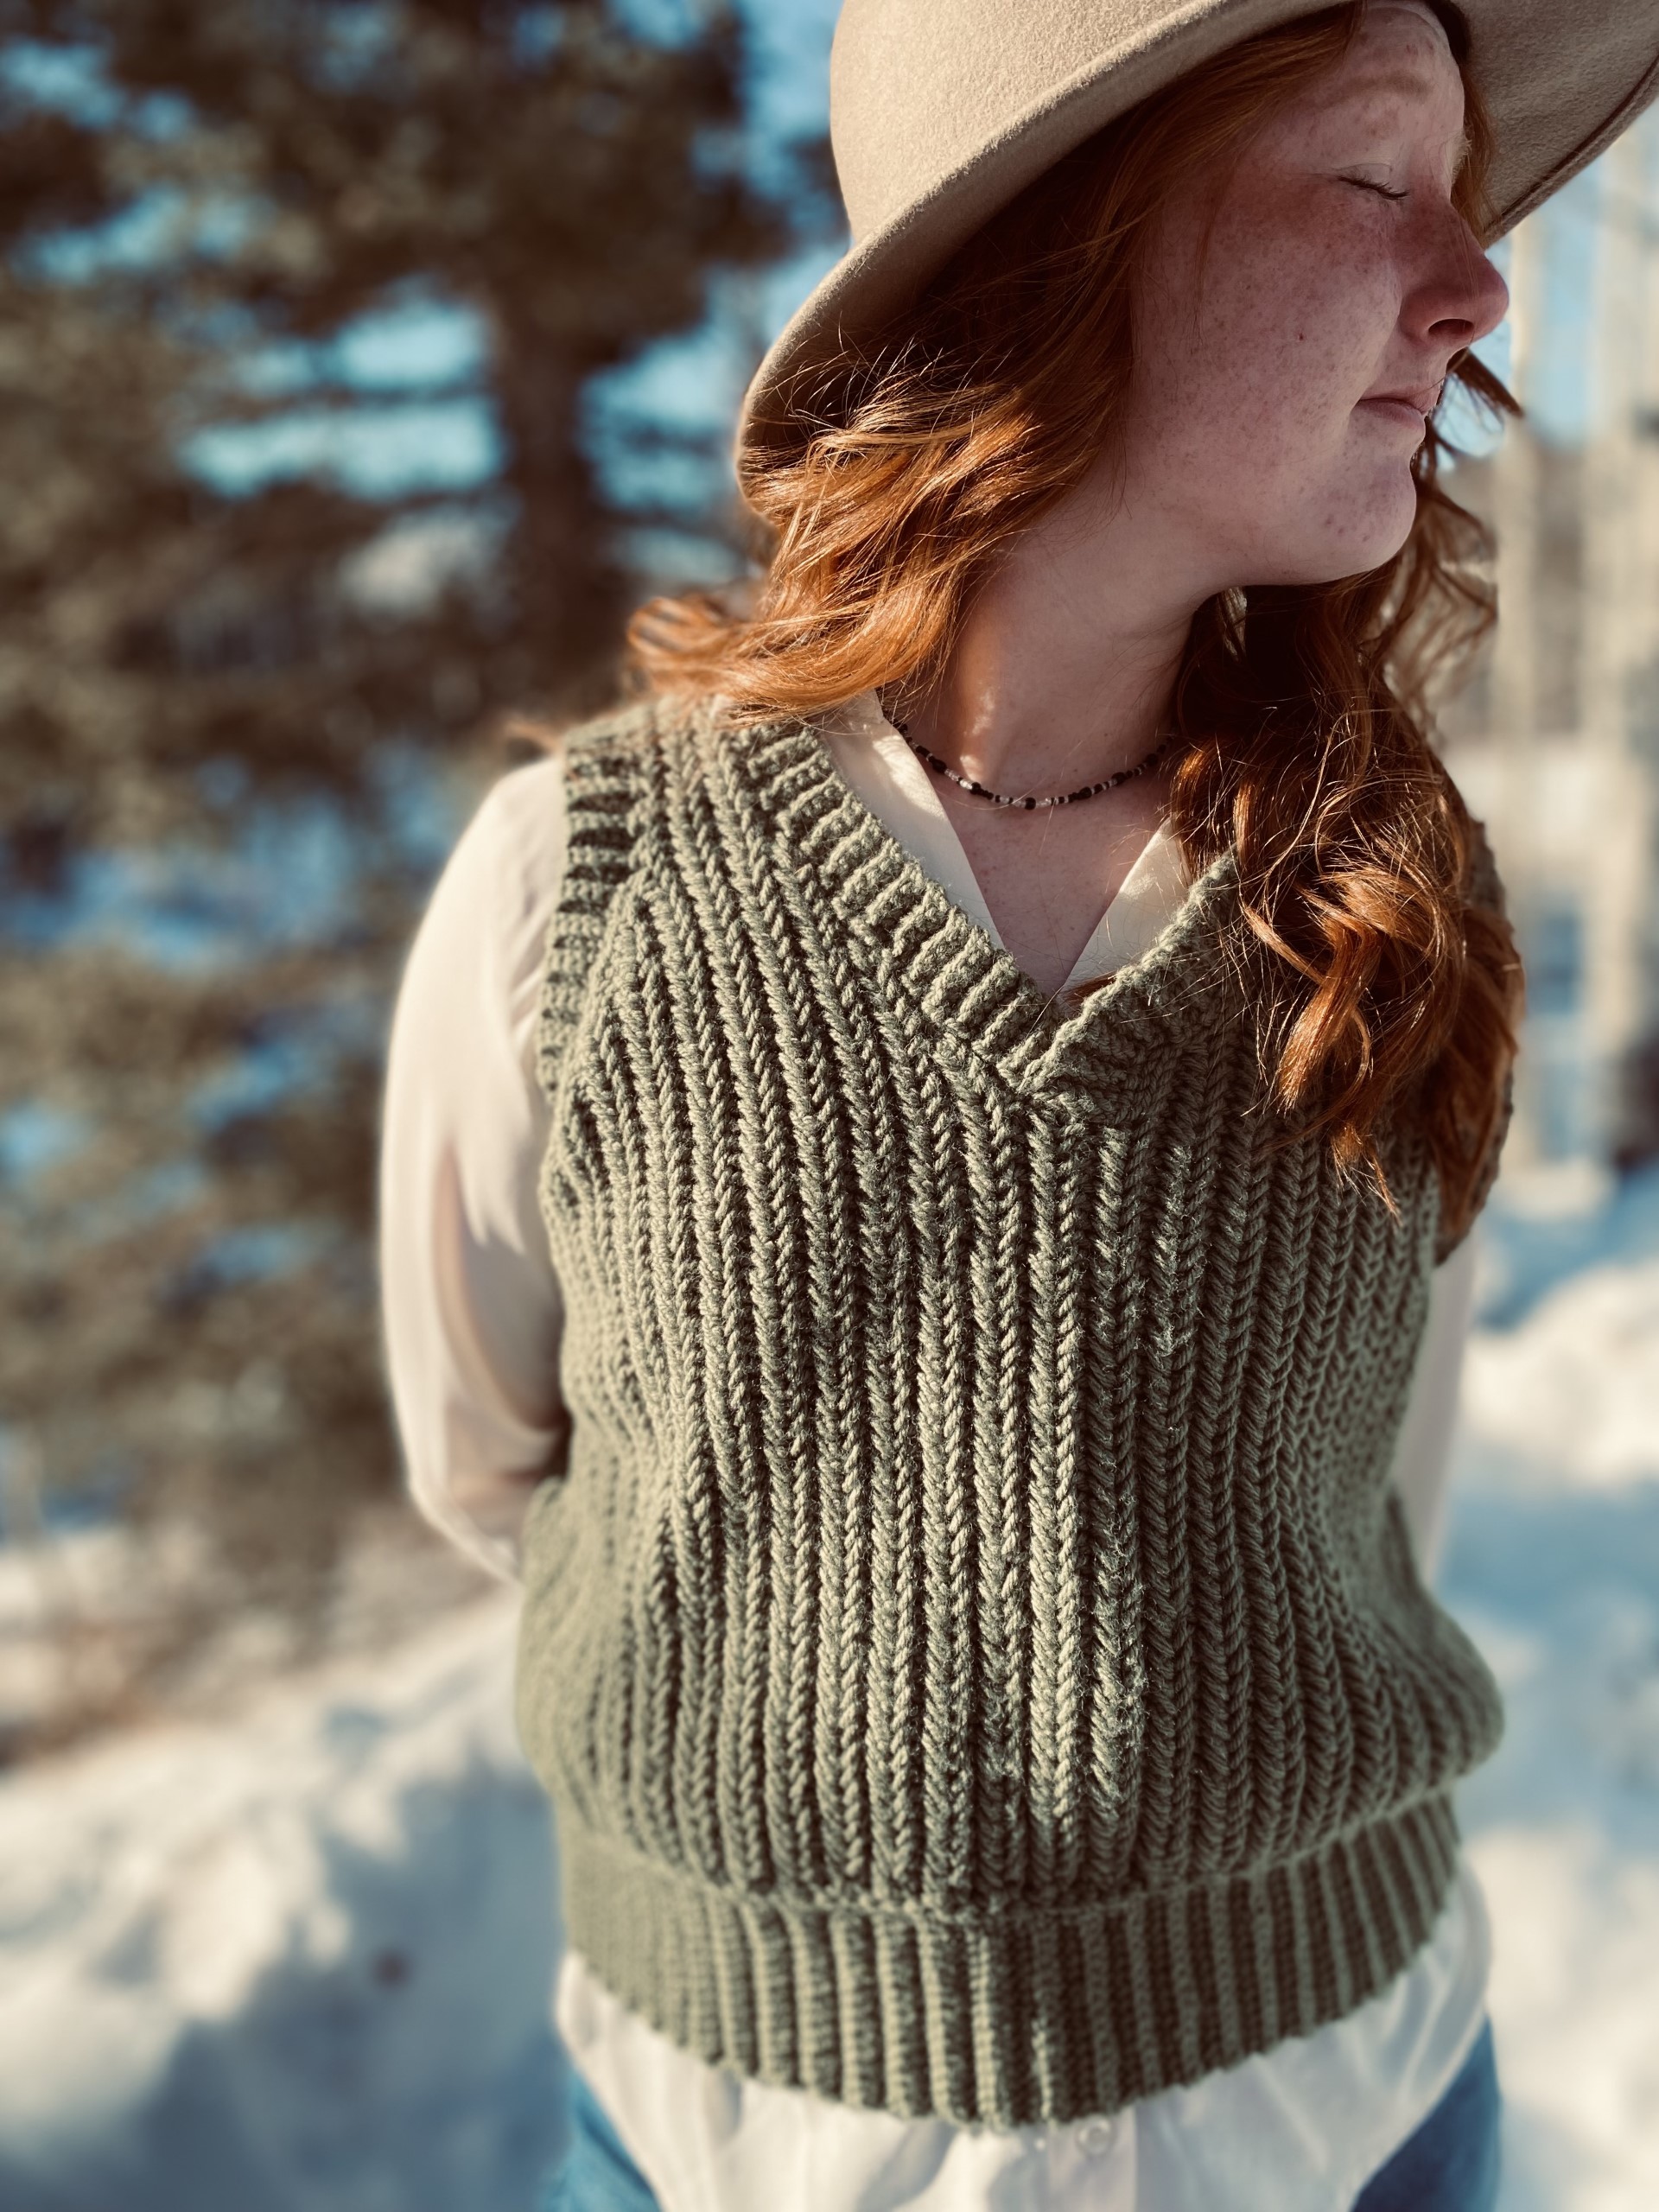
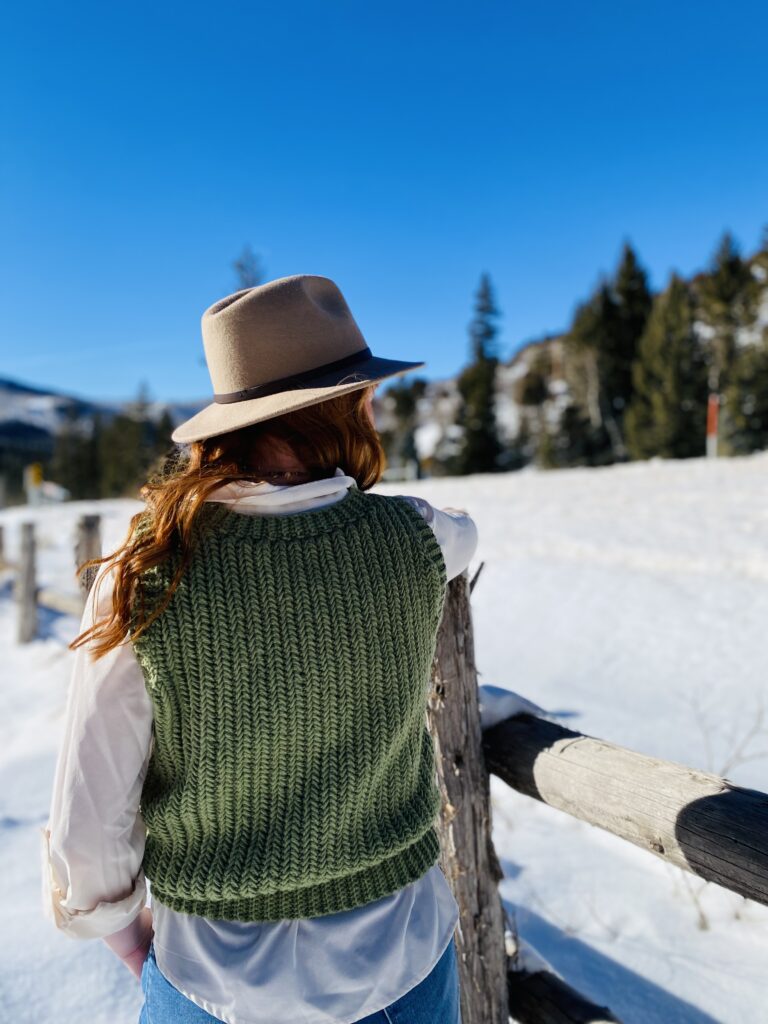
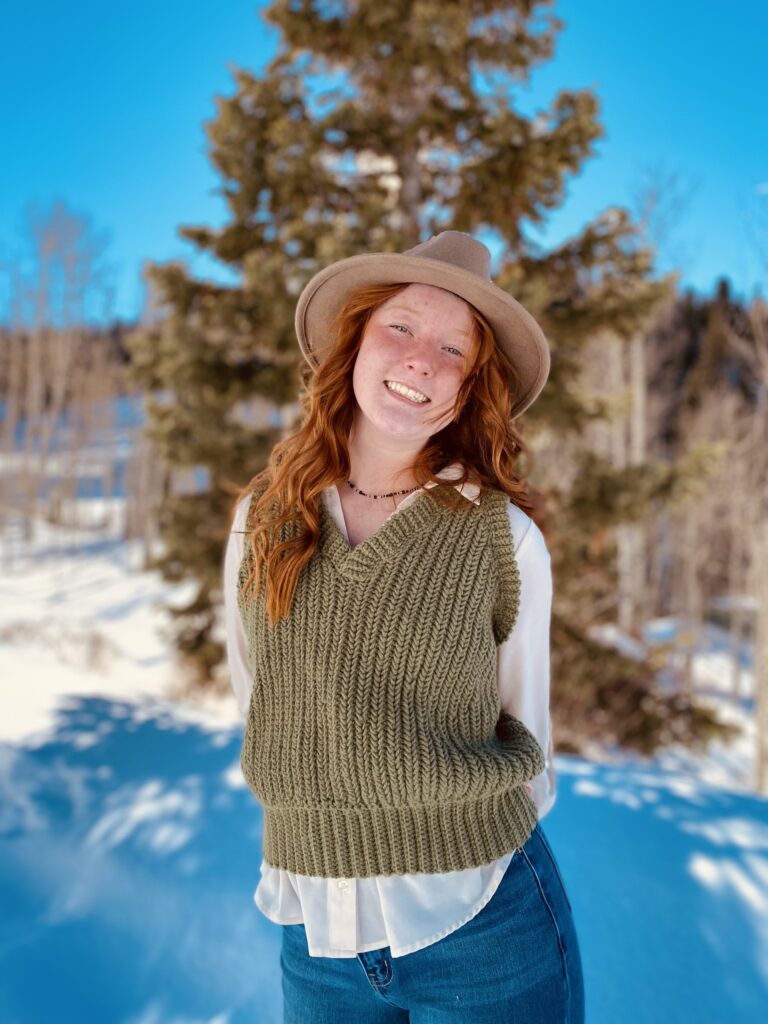
Pine tree views vest
Have you ever created something for one of your kids that took waaaay longer than expected and you overthought it from step one, pulled it out, reworked it a thousand times and still had no idea what you were thinking the whole time making it? This was that project for me.
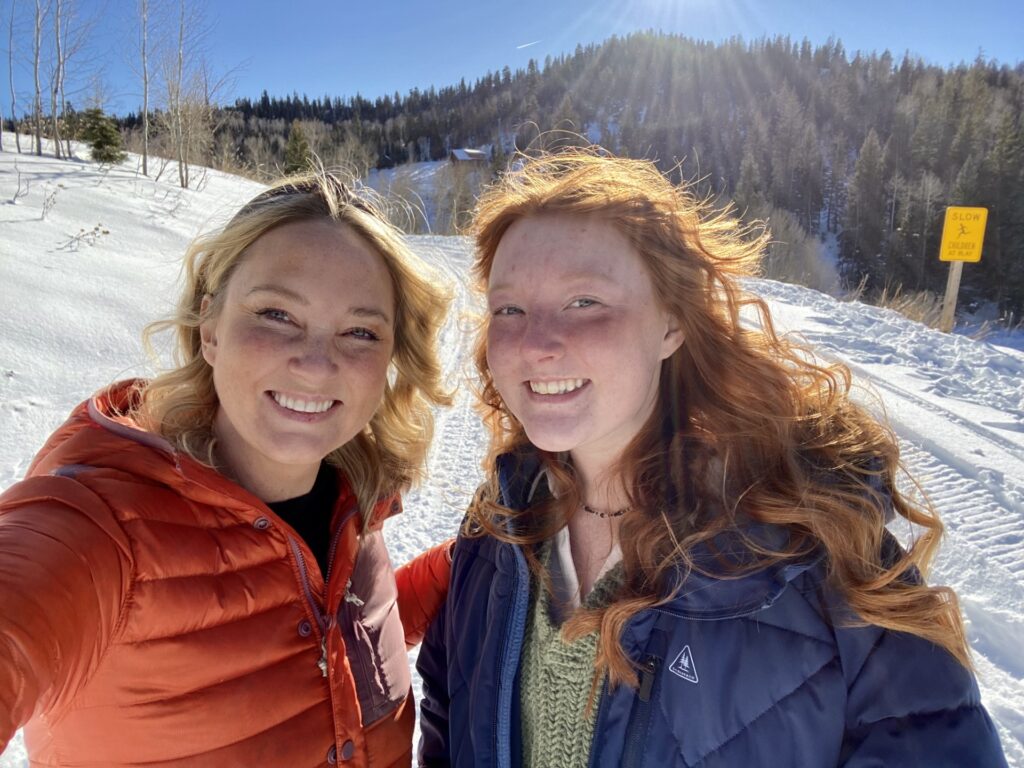
Right up until my beautiful little girl, who… is actually not so little anymore, put it on to get some pictures today. She’s a little bit of perfection in my eyes. Seeing her in this silly vest took my breath away and made me realize…”no one is going to pay any attention to the vest.” And that’s ok. But just in case you’d like to make one, the pattern is below.
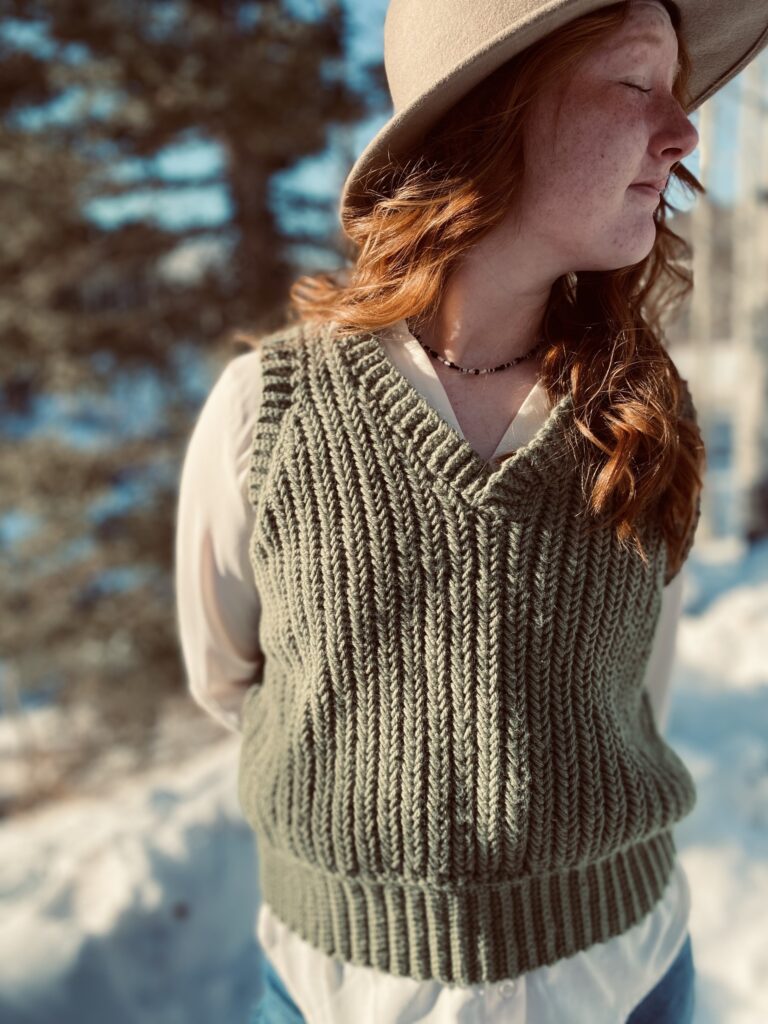
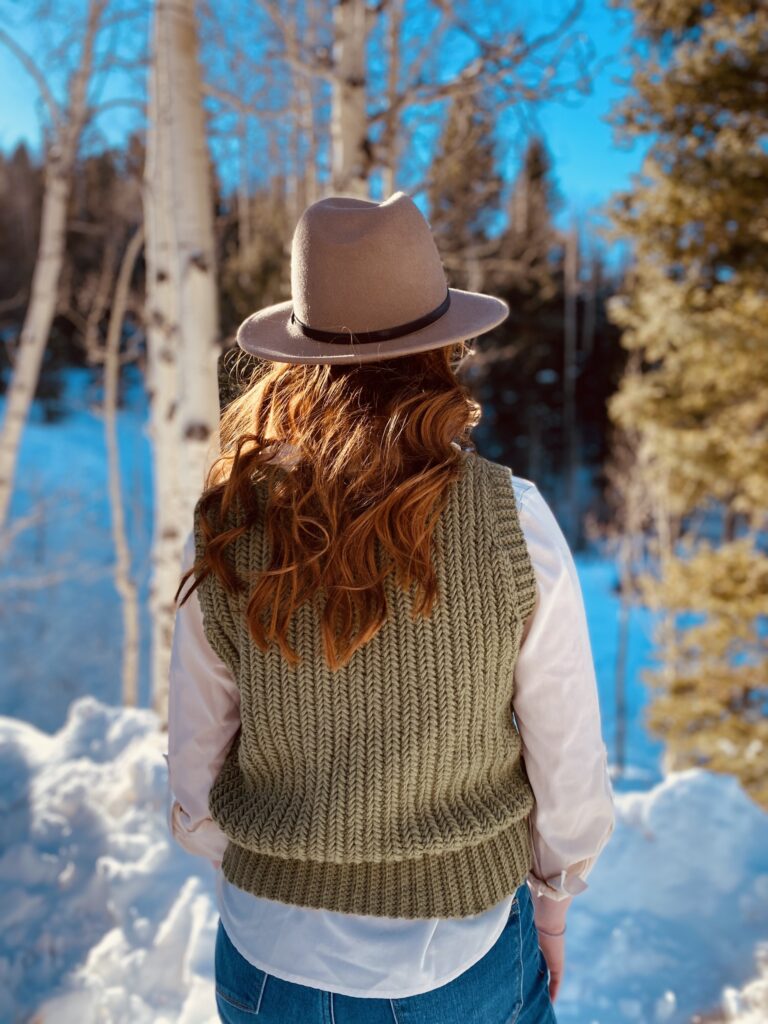
I thought of this vest just after learning the Herringbone Single crochet stitch. I loved how it looked a little bit like pine trees in the sample I was learning with. To take pictures with my daughter wearing the vest, we decided to drive up in the mountains to find some pretty pine trees. The drive and the talk we enjoyed together were just about as great as the pictures, maybe even better. The vest turned out lovely, but not nearly as lovely as the person wearing it, which will undoubtedly be true for whoever you make it for also.
Make this vest:)

Pattern Instructions:
Materials:
- 1 Skein of Pound of Love yarn in Olive, or number 4 weight yarn of choice.
- US size H8 Crochet Hook
- US Size E4 crochet hook
- Yarn needle
Gauge:
17 Stitches X 12 rows =4″ X 4″ Square.
Stitch used for Gauge measurement: Herringbone Single Crochet.
Sizes:
Pattern is for Women’s size Medium. Adjustment can be made for smaller and larger sizes.
18,5″ across X 19.25 inch length.
Abbreviations:
SC – Single Crochet
FSC – Foundation Single Crochet
HDC – Half-double Crochet
HSC- Herringbone Single Crochet
DC – Double Crochet
SLST – Slip Stitch
ST(S) – Stitch(es)
SK – Skip
Notes:
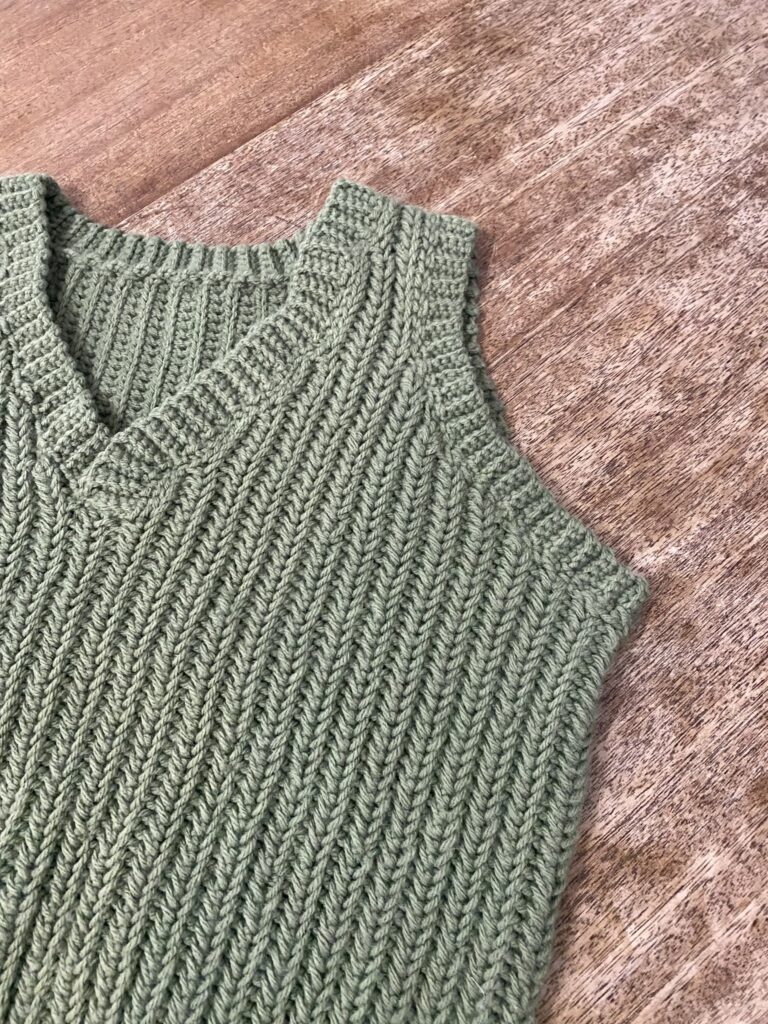
This sweater vest is an excellent transition piece for fall to winter wearing and gives us an opportunity to learn and practice the Herringbone Single Crochet Stitch. See Tutorials. The vest is made in front and back panels, stitched together at the sides and then a ribbing stitch will be worked around unfinished edges.
Herringbone Stitch is a directional stitch which means that we will be doing one form of the stitch for the front of the work (A) and another form of the stitch for the back of the work (B). This forms the interesting Herringbone pattern.
Special Stitches: Herringbone Single Crochet (A) and Herringbone Single Crochet B. If you are new to Herringbone stitch or need a refresher, visit my Helpful tutorials page here.
Pattern:
Part 1: Front Panel:
Rnd 1: Using size H hook, Ch 41, Turn.
Rnd 2:Herringbone Single Crochet Stitch (A) in the second chain from the hook and in each remaining ST across. (40) Ch 1, turn.
Rnd 3: Herringbone Single crochet Stitch (B) in each ST across. (40)CH 2, Turn.
Rnd 4: Herringbone SC Stitch (A) in the second chain from the hook and in each ST across. (41) Ch 1, turn.
Rnd 5: Herringbone SC Stitch (B) in each ST across. (41) CH 2, turn.
Rnd 6: Herringbone SC Stitch (A) in the second CH from the hook and in each remaining ST across. (42) CH 1, turn.
Rnd 7: Herringbone SC Stitch (B) in each ST across. (42) CH 2, turn.
Rnd 8: Herringbone SC ST (A) in the second CH from the hook and in each ST across. (43) Ch 1, turn.
Rnd 9: Herringbone SC Crochet (B) in each ST across. (43) Ch 3 , turn.
Rnd 10: Herringbone SC (A) in second chain from hook and in each St across.(43) Ch 1, turn.
Rnd 11: Herringbone SC (B) in each ST across. (46) Ch 3, turn.
Rnd 12: Herringbone SC (A) in each ST across. (49) Ch 1, turn.
Rnd 13: Herringbone SC (B) in each ST across. (49) Ch 3, turn.
Rnd 14: Herringbone SC (A) in each ST across (52) Ch 1, turn.
Rnd 15: Herringbone SC (B) in each ST across. (52) Ch 3, turn.
Rnd 16: Herringbone SC (A) in each ST across. (55) Ch 1, turn.
Rnd 17: Herringbone SC (B) in each ST across (55) Ch 3, turn.
Rnd 18: Herringbone SC (A) in each ST across (58) Ch 1, turn.
Rnd 19: Herringbone SC (B) in each ST across. (58) Ch 18, turn.
Rnd 20: Herringbone SC (A) in second chain from hook and in each remaining ST across. (75) Ch 1, turn.
Rnd 21: Herringbone SC (B) in each ST across(75) Ch 1, turn.
Rnd 22: Herringbone SC (A) in each ST across. (75) Ch 1, turn.
Rnd 23: Herringbone SC (B) in next 67 ST. Ch 1, turn, leaving the rest of the round unworked. (67)
Rnd 24: Herringbone SC (A) in each ST across. (67) Ch 1, turn.
Rnd 25: Herringbone SC (B) in next 57 ST. (57) Ch 1, turn.
Rnd 26: Herringbone SC (A) in each ST across. (57) Ch 1, turn.
Rnd 27: Herringbone SC (B) in next 52 ST. (52) Ch 1, turn.
Rnd 28: Herringbone SC (A) in each ST across.(52) Ch 1, turn.
Rnd 29: Herringbone SC (B) in the next 47 ST. (47) Ch 1, turn.
Rnd 30: Herringbone SC (A) in each ST across. (47) Ch 1, turn.
Rnd 31: Herringbone SC (B) in the next 42 ST. (42) Ch 1, turn.
Rnd 32: Herringbone SC (A) in each ST across. (42) Ch 1, turn.
This marks the front center point of the front panel of the vest.
Rnd 33: Herringbone SC (B) in each ST across. (42) Ch 6, turn.
Rnd 34: Herringbone SC (A) in second chain from hook and in each remaining ST across. (47) Ch 1, turn.
Rnd 35: Herringbone SC (B) in each ST across. (47) Ch 6, turn.
Rnd 36: Herringbone SC (A) in second chain from hook and in each remaining ST across. (52) Ch 1, turn.
Rnd 37: Herringbone SC (B) in each ST across. (52) Ch 6, turn.
Rnd 38: Herringbone SC (A) in second CH from hook and in each remaining ST across. (57) Ch 1, turn.
Rnd 39: Herringbone SC (B) in each ST across. (57) Ch 11, turn.
Rnd 40: Herringbone SC (A) in second chain from hook and in each ST across. (67) Ch 1, turn.
Rnd 41: Herringbone SC (B) in each ST across. (67) Ch 9, turn.
Rnd 42: Herringbone SC (A) in second CH from hook and in each remaining ST across. (75) Ch 1, turn.
Rnd 43: Herringbone SC (B) in each ST across. (75) Ch 1, turn.
Rnd 44: Herringbone SC (A) in each ST across. (75) Ch 1, turn.
Rnd 45: Herringbone SC (B) in next 58 ST. (58) Ch 1, turn.
Rnd 46: Herringbone SC (A) in each ST across. (58) Ch 1, turn.
Rnd 47: Herringbone SC (B) in next 55 ST. (55) Ch 1, turn.
Rnd 48: Herringbone SC (A) in each ST across. (55) Ch 1, turn.
Rnd 49: Herringbone SC (B) in next 52 ST. (52) Ch 1, turn.
Rnd 50: Herringbone SC (A) in each ST across. (52) Ch 1, turn.
Rnd 51: Herringbone SC (B) in the next 49 ST. (49) Ch 1, turn.
Rnd 52: Herringbone SC (A) in each ST across. (49) Ch 1, turn.
Rnd 53: Herringbone SC (B) in next 46 ST. (46) Ch 1, turn.
Rnd 54: Herringbone SC (A) in each ST across. (46) Ch 1, turn.
Rnd 55: Herringbone SC (B) in next 43 ST. (43) Ch 1, turn.
Rnd 56: Herringbone SC (A) in each ST across. (43) Ch 1, turn.
Rnd 57: Herringbone SC (B) in the next 42 ST. (42) Ch 1, turn.
Rnd 58: Herringbone SC (A) in each ST across. (42) Ch 1, turn.
Rnd 59: Herringbone SC (B) in next 41 ST. (41) Ch 1, turn.
Rnd 60: Herringbone SC (A) in each ST across. (41) Ch 1, turn.
Rnd 61: Herringbone SC (B) in each ST across. (41) Fasten off.
Part 2: Back Panel:
Rnd 1: Ch 41, turn.
Rnd 2:Herrinbone SC (A) in second chain from the hook and in each remaining ST across. (41) Ch 3, turn.
Rnd 3: Herringbone SC (B) in second chain from the hook and in each remaining ST across. (43) Ch 1, turn.
Rnd 4: Herringbone SC (A) in each ST across. (43) Ch 10, turn.
Rnd 5:Herringbone SC (B) in second chain from the hook and in each remaining St across. (52) Ch 1, turn.
Rnd 6: Herringbone SC (A) in each ST across. (52) Ch 11, turn.
Rnd 7: Herringbone SC (B) in second chain from hook and in each remaining St across. (62) Ch 1, turn.
Rnd 8: Herringbone SC (A) in each ST across. (62) Ch 14, turn.
Rnd 9: Herringbone SC (B) in second chain from hook and in each ST across. (75) Ch 1, turn.
Rnd 10: Herringbone SC (A) in each ST across. (75) Ch 1, turn.
Rnd 11: Herringbone SC (B) in each ST across. (75) Ch 1, turn.
Rnd 12: Herringbone SC (A) in each ST across. (75) Ch 1, turn.
Rnd 13: Herringbone SC (B) in each ST across. (75) Ch 1, turn.
Rnd 14: Herringbone SC (A) in each ST across. (75) Ch 1, turn.
Rnd 15: Herringbone SC (B) in each ST across. (75) Ch 1, turn.
Rnd 16: Herringbone SC (A) in next 73 ST. (73) Ch 1, turn.
Rnd 17: Herringbone SC (B) in each ST across. (73) Ch 1, turn.
Rnd 18: Repeat Rnd 16.
Rnd 19: Repeat Rnd 17.
Rnd 20: Repeat Rnd 16.
Rnd 21: Repeat Rnd 17.
Rnd 22: Repeat Rnd 16.
This marks the center of back panel.
Rnd 23: Repeat Rnd 17.
Rnd 24: Repeat Rnd 16.
Rnd 25: Repeat Rnd 17.
Rnd 26: Repeat Rnd 16.
Rnd 27: Repeat Rnd 17.
Rnd 28: Repeat Rnd 16.
Rn 29: Repeat Rnd 17.
Rnd 30: Repeat Rnd 16.
Rnd 31: Repeat Rnd 17.
Rnd 32: Repeat Rnd 16.
Rnd 33: Repeat Rnd 17.
Rnd 34: Repeat Rnd 16.
Rnd 35: Repeat Rnd 17.
Rnd 36: Herringbone SC (A) in each ST across. Ch 3, turn.
Rnd 37: Herringbone SC (B) in second CH from hook and in each remaining ST across. (75) Ch 1, turn.
Rnd 38: Herringbone SC (A) in each ST across. (75) Ch 1, turn.
Rnd 39: Herringbone SC (B) in each ST across. (75) Ch 1, turn.
Rnd 40: Herringbone SC (A) in each ST across. (75) Ch 1, turn.
Rnd 41: Herringbone SC (B) in each ST across. (75) Ch 1, turn.
Rnd 42: Herringbone SC (A) in each ST across. (75) Ch 1, turn.
Rnd 43: Herringbone SC (B) in each ST across. (75) Ch 1, turn.
Rnd 44: Herringbone SC (A) in next 62 ST. (62) Ch 1, turn.
Rnd 45: Herringbone SC (B) in each ST across. (62) Ch 1, turn.
Rnd 46: Herringbone SC (A) in next 52 ST. (52) Ch 1, turn.
Rnd 47: Herringbone SC (B) in each ST across. (52) Ch 1, turn.
Rnd 48: Herringbone SC (A) in the next 43 ST. (43) Ch 1, turn.
Rnd 49: Herringbone SC (B) in each ST across. (43) Ch 1, turn.
Rnd 50: Herringbone SC (A) in each ST across. (43) Ch 1, turn.
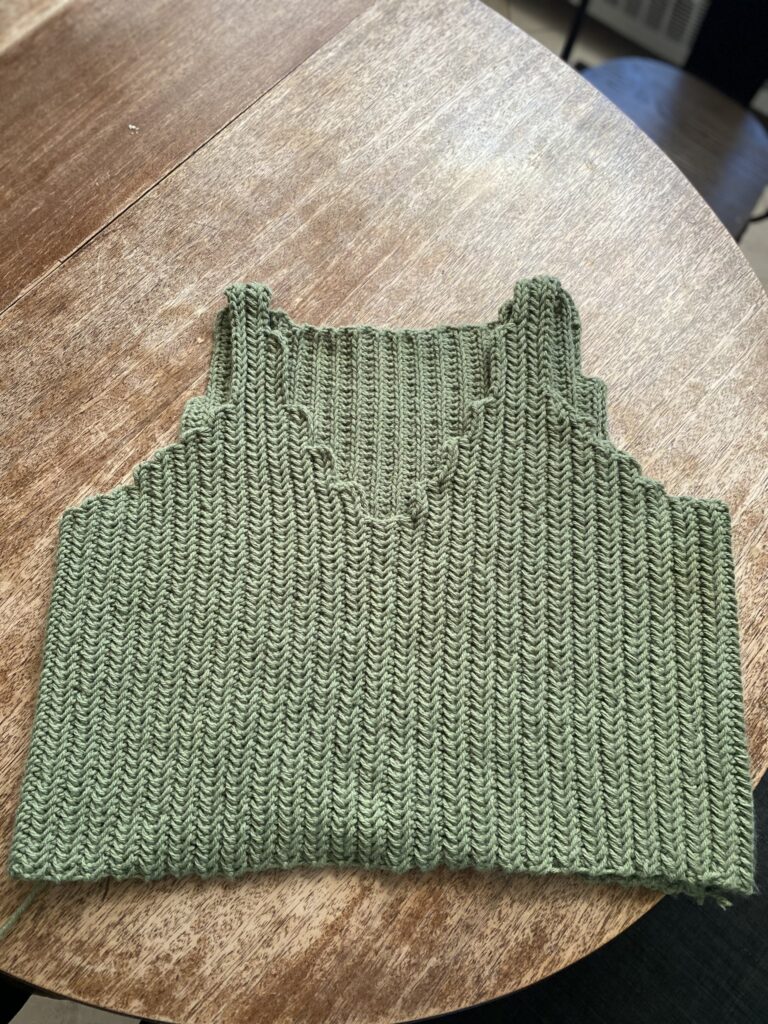
Fasten off, leaving a long tail for stitching the garment together. Using a yarn needle, whipstitch the front panel to back panel at side edges. Align the front panel over the top of the back panel and stitch together at the shoulder seams. Fasten off and weave in ends.
Now we will work a ribbing stitch around each of the unfinished edges of the vest. (Neck edge, Arm holes and waist hem.)
Edgings and Finishing:
Armhole Ribbing:
Rnd 1: Attach yarn at left shoulder at the bottom of the armhole. Using matching yarn and size 3.5 hook, SL ST in each ST around the edging of the armhole.
Rnd 2: CH 6, turn.
Rnd 3: SC in the second CH from the hook and in each of the remaining 4 ST. (5) Now, SL ST in the next 2 SL ST of the armhole. Turn.
Rnd 4: Skip the two Slip STitches from the previous rnd and SC in BLO of the 5 SC from the last Rnd. (5) Ch 1, turn.
Rnd 5: In BLO, SC in the next 5 SC. The SL ST in the next two SL ST of the armhole. Turn.
Continue working your way around the armhole, alternating rows 4 and 5 and always working in BLO.
Once you have worked your ribbing all the way around the armhole, fasten off leaving a long tail for stitching edges together.
Repeat for both armholes and finish by Stitching edges of the ribbing together where they meet at the bottom of the armhole.
Ribbed Lower Edge:
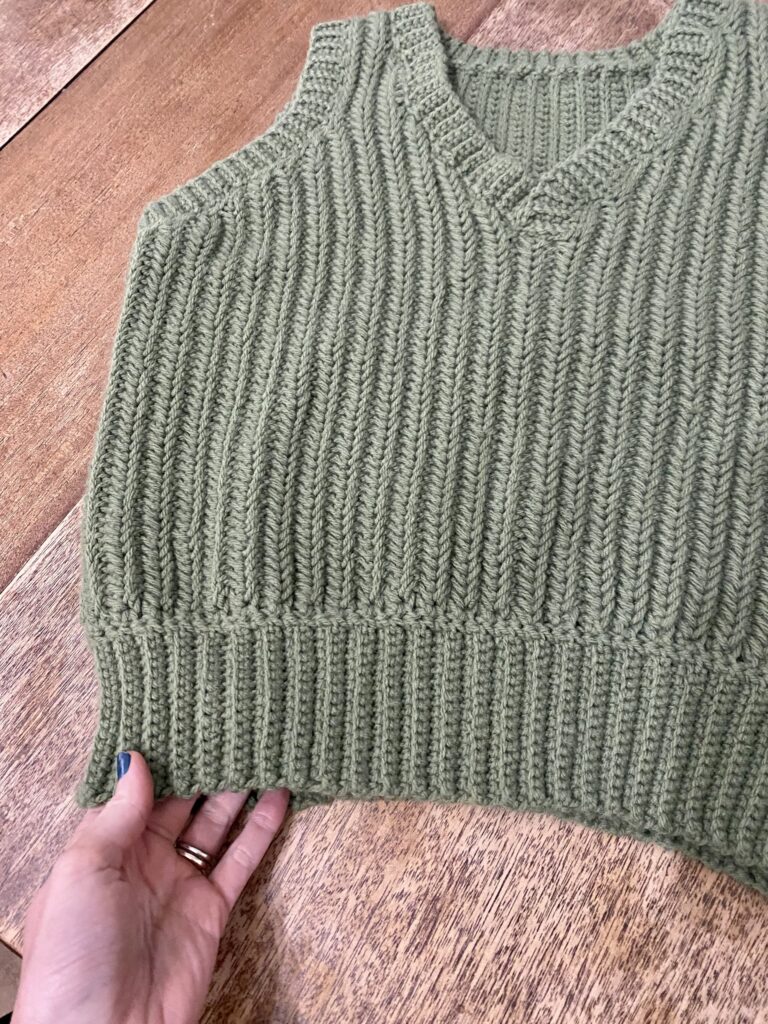
Rnd 1: Attach yarn at the bottom right side of the lower hem of the garment. SL ST in each ST around the hem edge.
Ribbing Rnd 1: Ch 16, turn.
Rnd 2: SC in second ST from hook and in each of the remaining 14 CH. Now anchor the strand to the work by Slip stitching in the next 2 SL ST of the lower hem of the garment. (15) Turn.
Rnd 3: Move running yarn to the back of the work, Skip the two Slip stitches previously worked in the last rnd. SC in BLO of each of the 15 SC of the ribbing Strand. (15) Ch 1, turn.
Rnd 4: SC in BLO of each of the 15 SC. Anchor the row by slip stitching in the next 2 SL ST of the garment hem. (15) Turn.
Continue working ribbing around the bottom of the hem alternating Rnds 3 and 4. Remember to always work in BLO. Once you have worked the ribbing all the way around the hem, fasten off, leaving a long tail for stitching the ribbing edges together where they meet. Finish by whip stitching ribbing edges together using a yarn needle and the long tail. Weave in ends.
Neckline Ribbing:
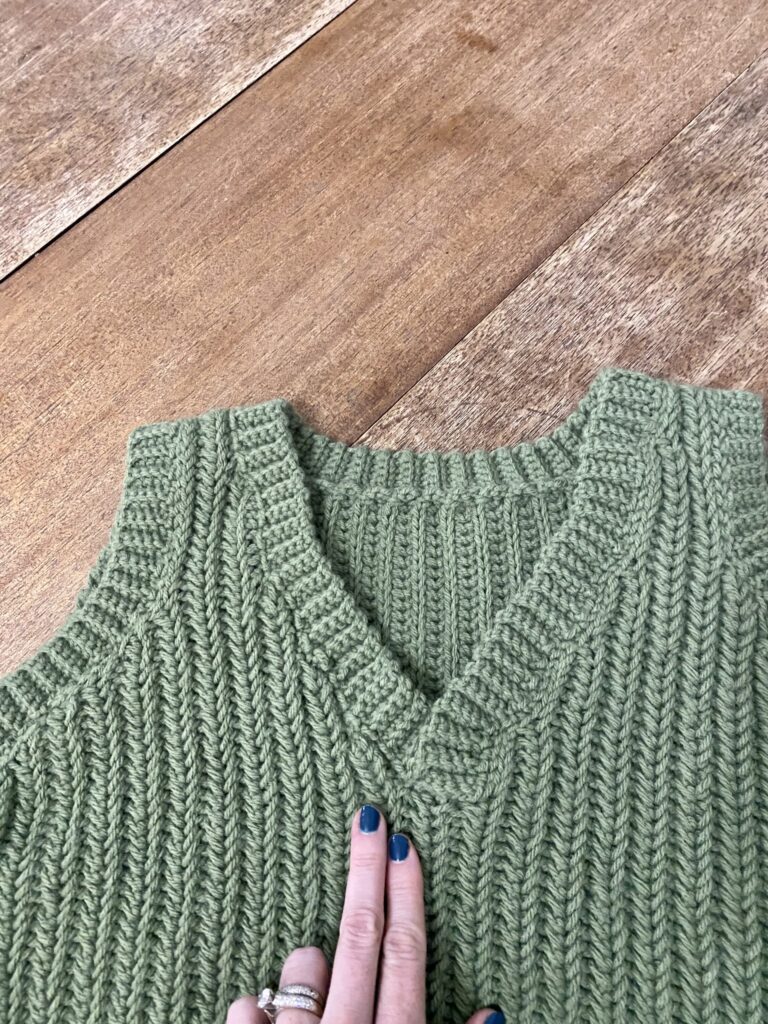
Attach yarn at center front stitch of neckline. Slip stitch in each Stitch around the neckline.
Ribbing Rnd 1: Ch 6, turn.
Rnd 2: SC in second ch from hook and in each of the 4 remaining stitches of the chain. (5) Anchor this row of ribbing to the work by sl st in the next two SL ST of the neckline. Turn.
Rnd 3: Skip the two SL ST from Rnd 2. In BLO SC in the next 5 SC of the ribbing row. (5) Ch 1, turn.
Rnd 4: In BLO, SC in next 5 SC of the ribbing. (5) Anchor this ribbing row in place by Slip stitching in the next 2 SL ST of the neckline. Turn.
Continue working ribbing around the neckline alternating rnds 3 and 4, remembering to always work in BLO, until you have worked all the way around.
Fasten off leaving a long tail for stitching the neckline ribbing edges together where they meet at the front. The edges will overlap at the front V of the neckline. Stitch in place with one ribbing edge layered over the top of the other to form a clean V.
Weave in any additional ends. Way to go! You did it!

Briarberry
My name is Abby Holmgren and I love to create and share ideas through crochet, sewing, fashion, cooking, and visual arts. Briarberry Farmhouse is where I share inspiration.