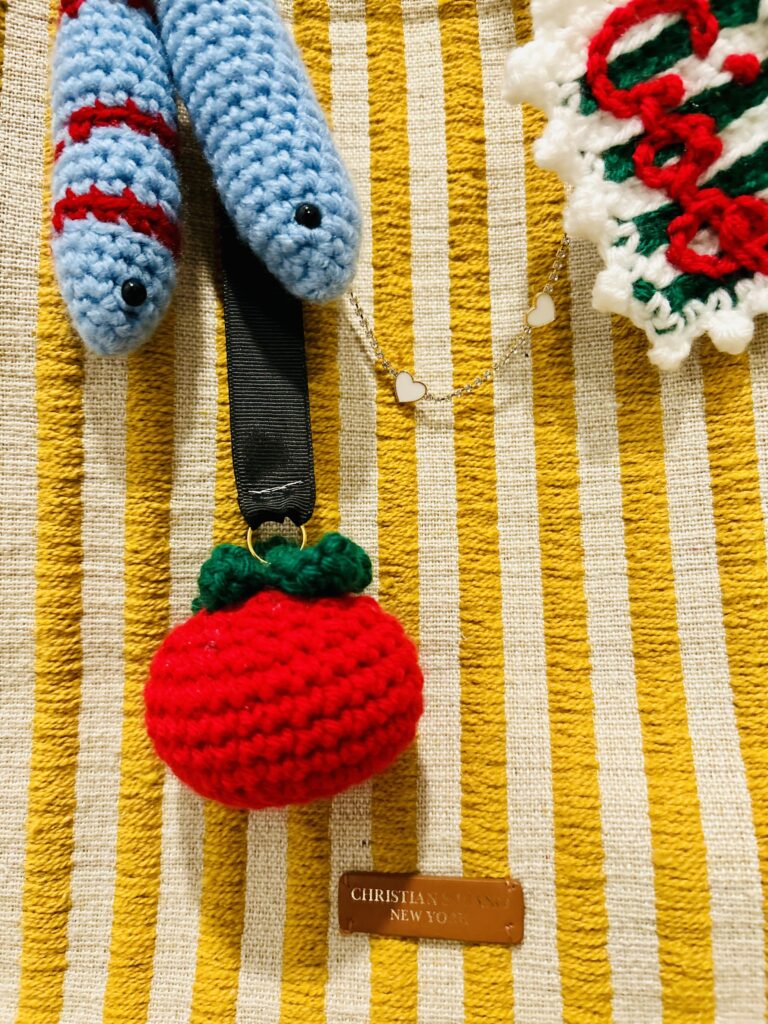
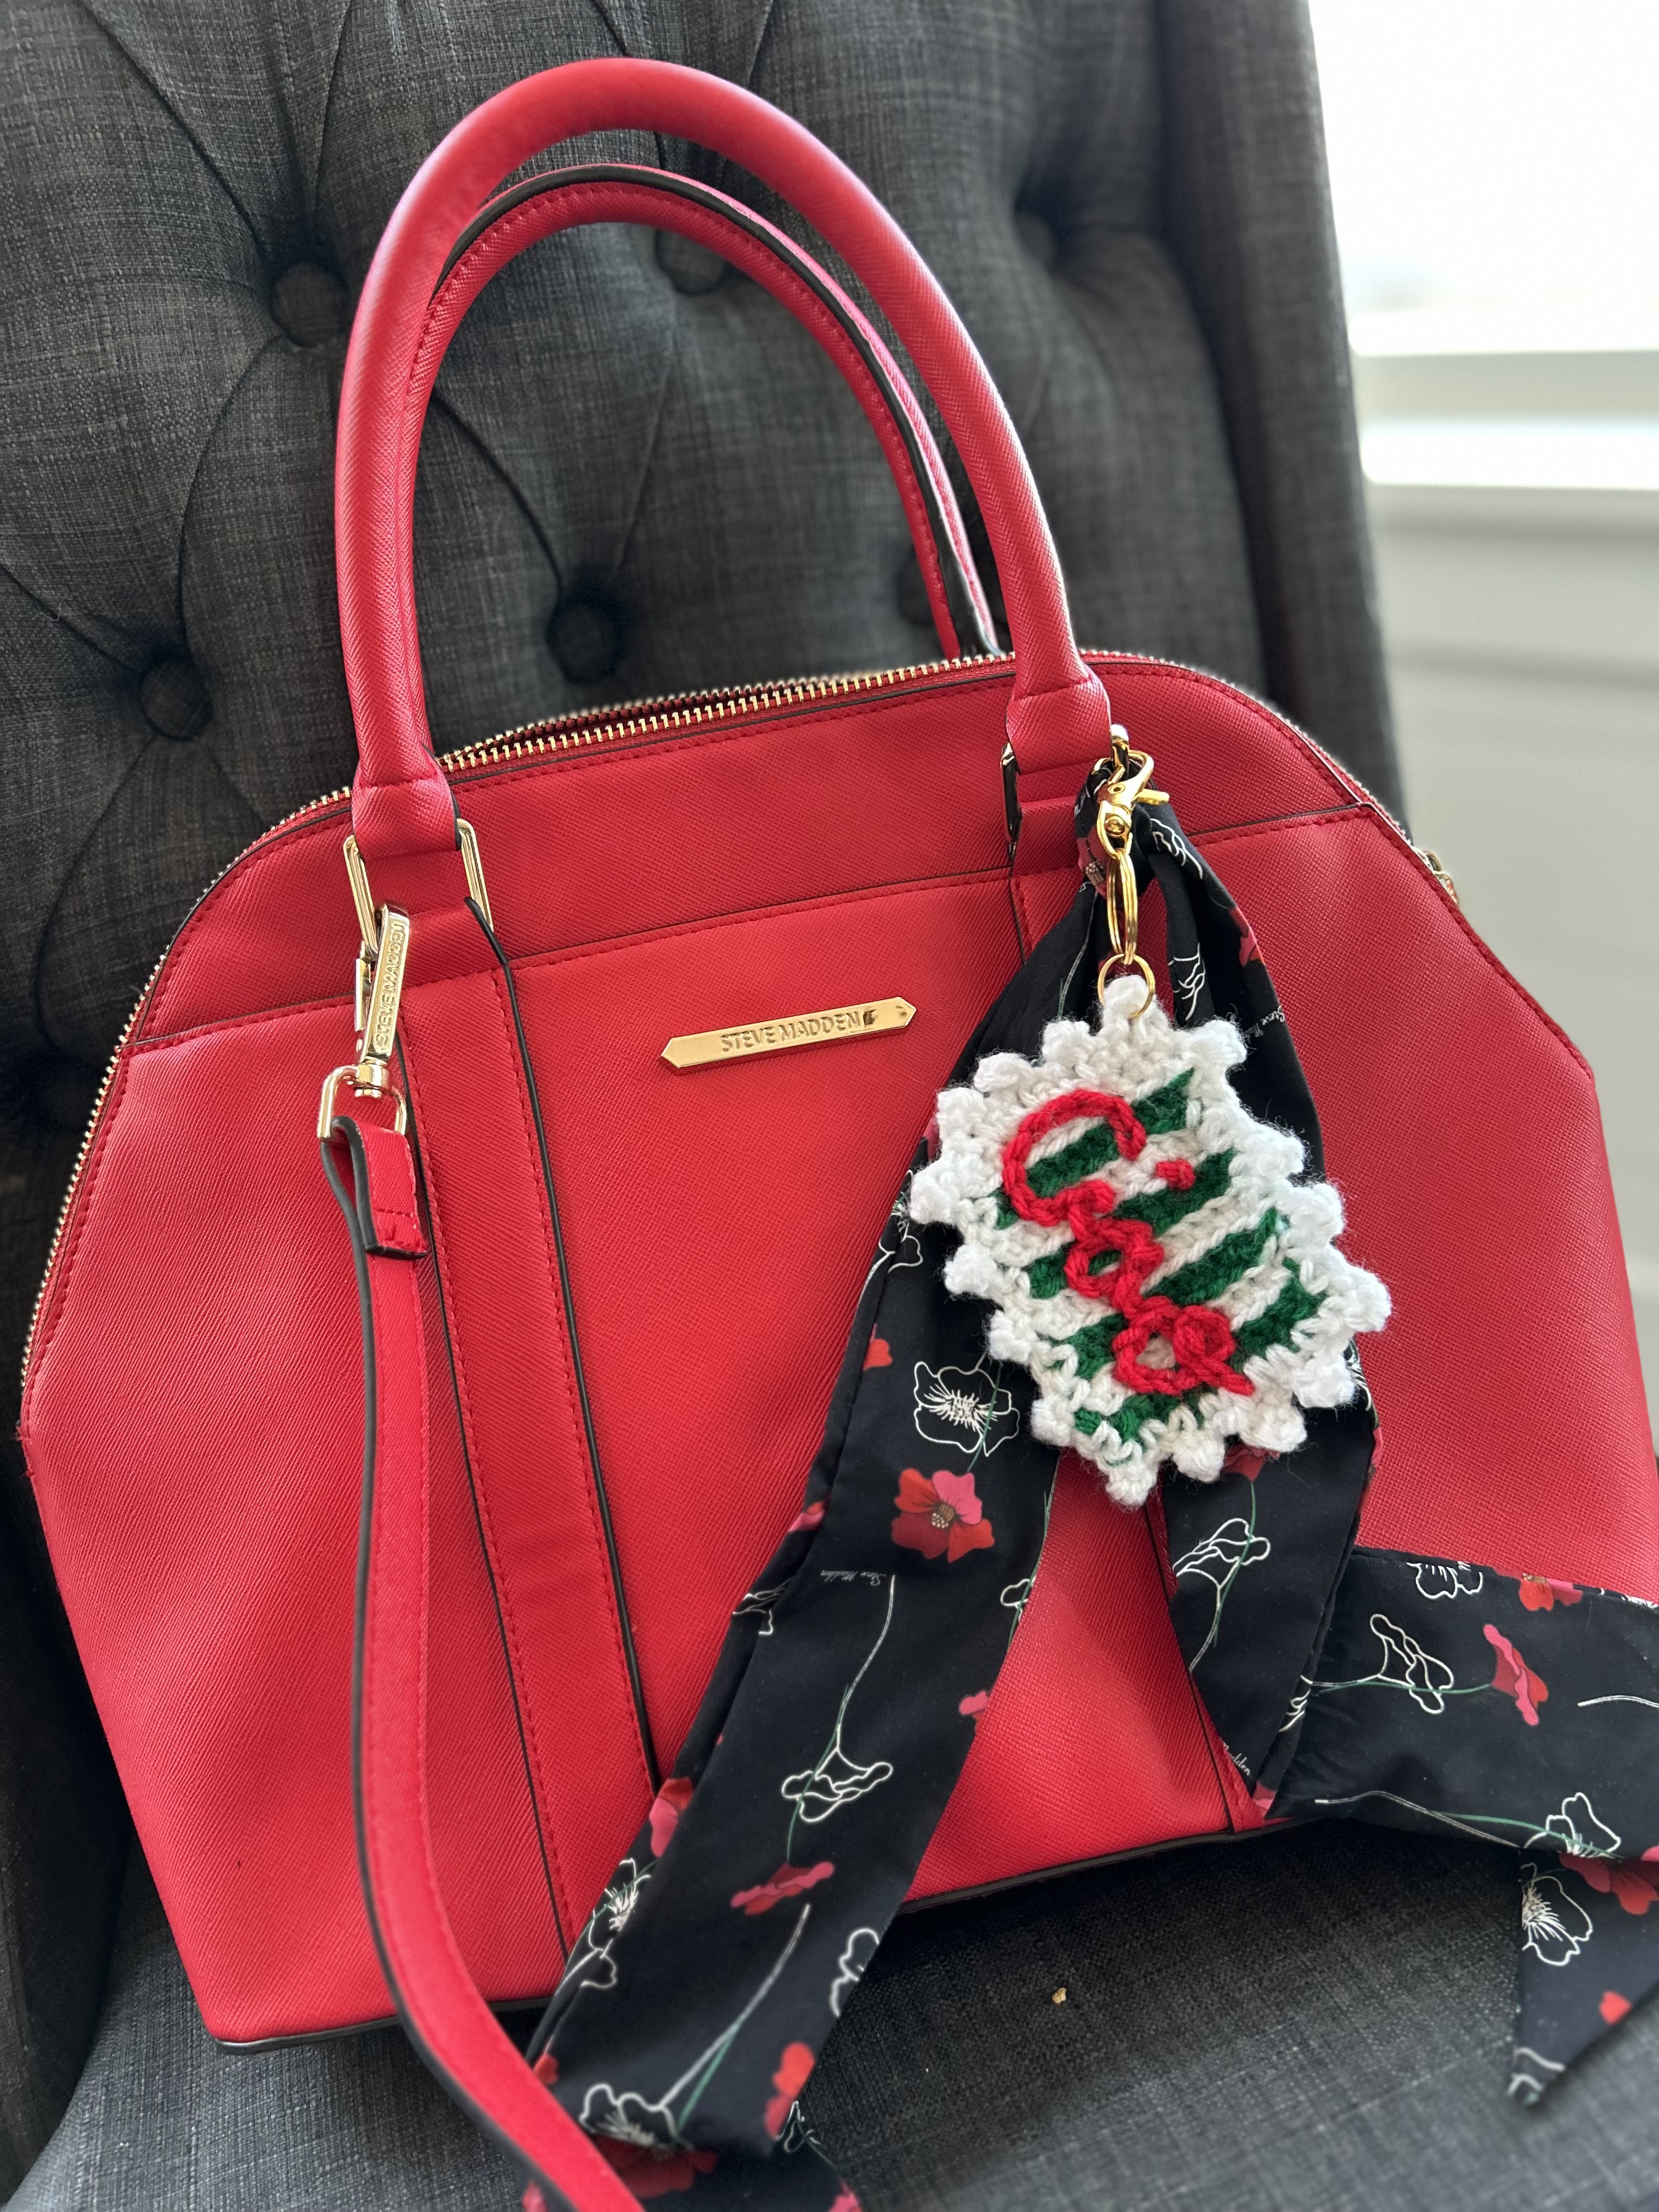
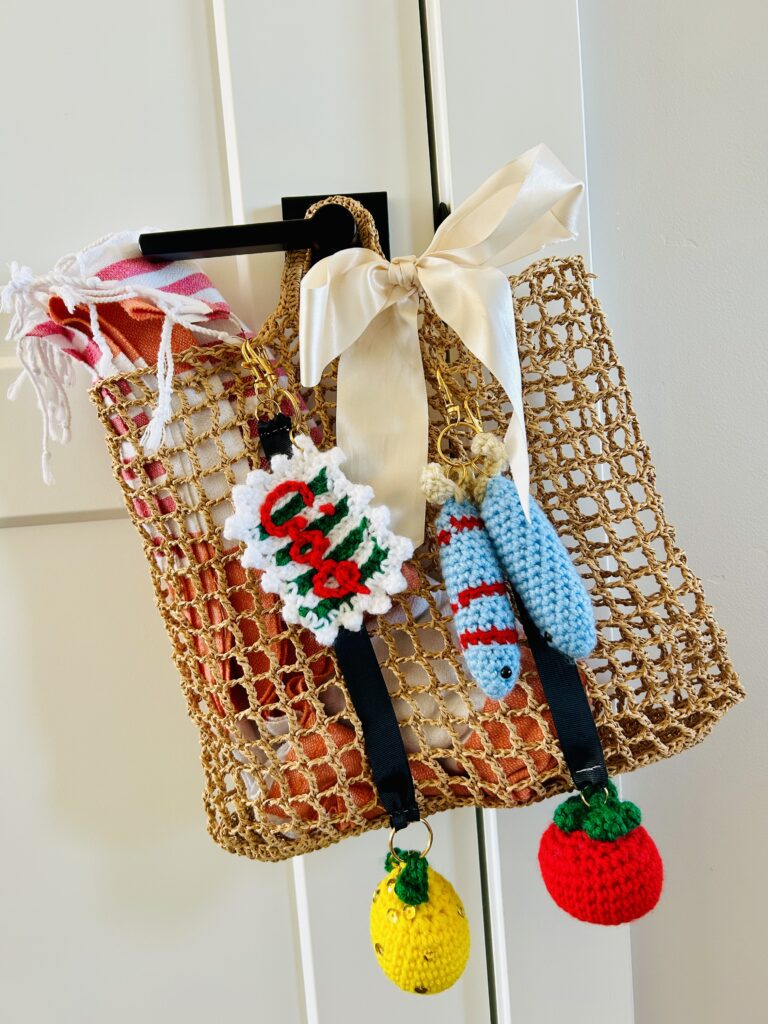
Amalfi Coast Bag Charms
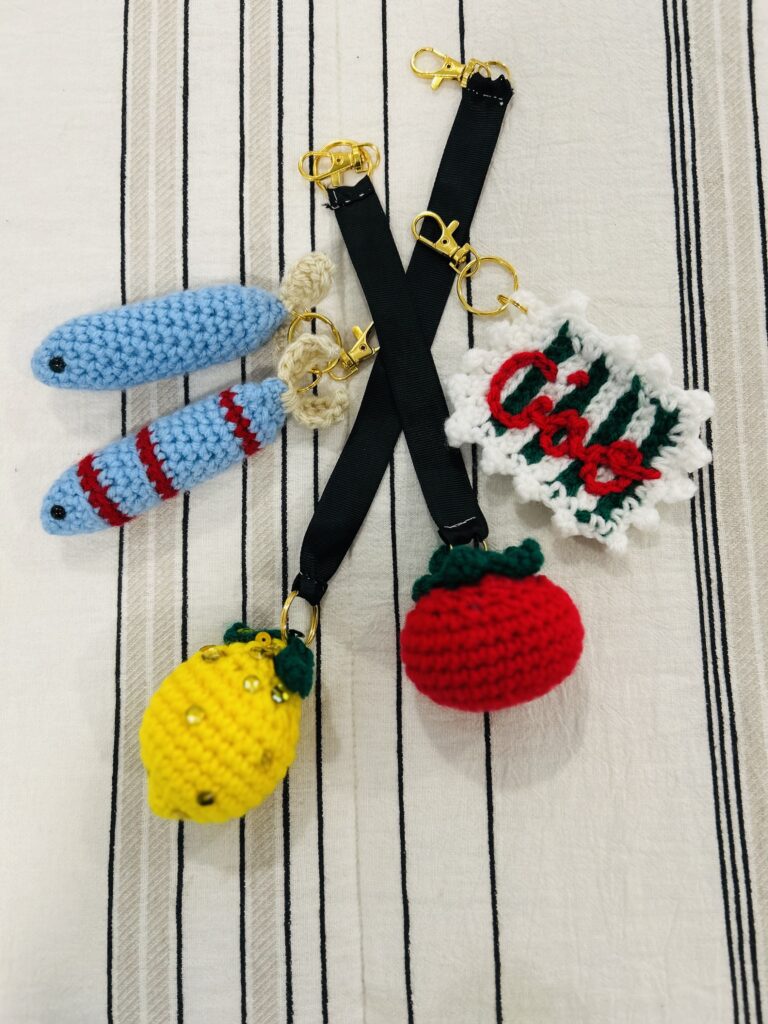
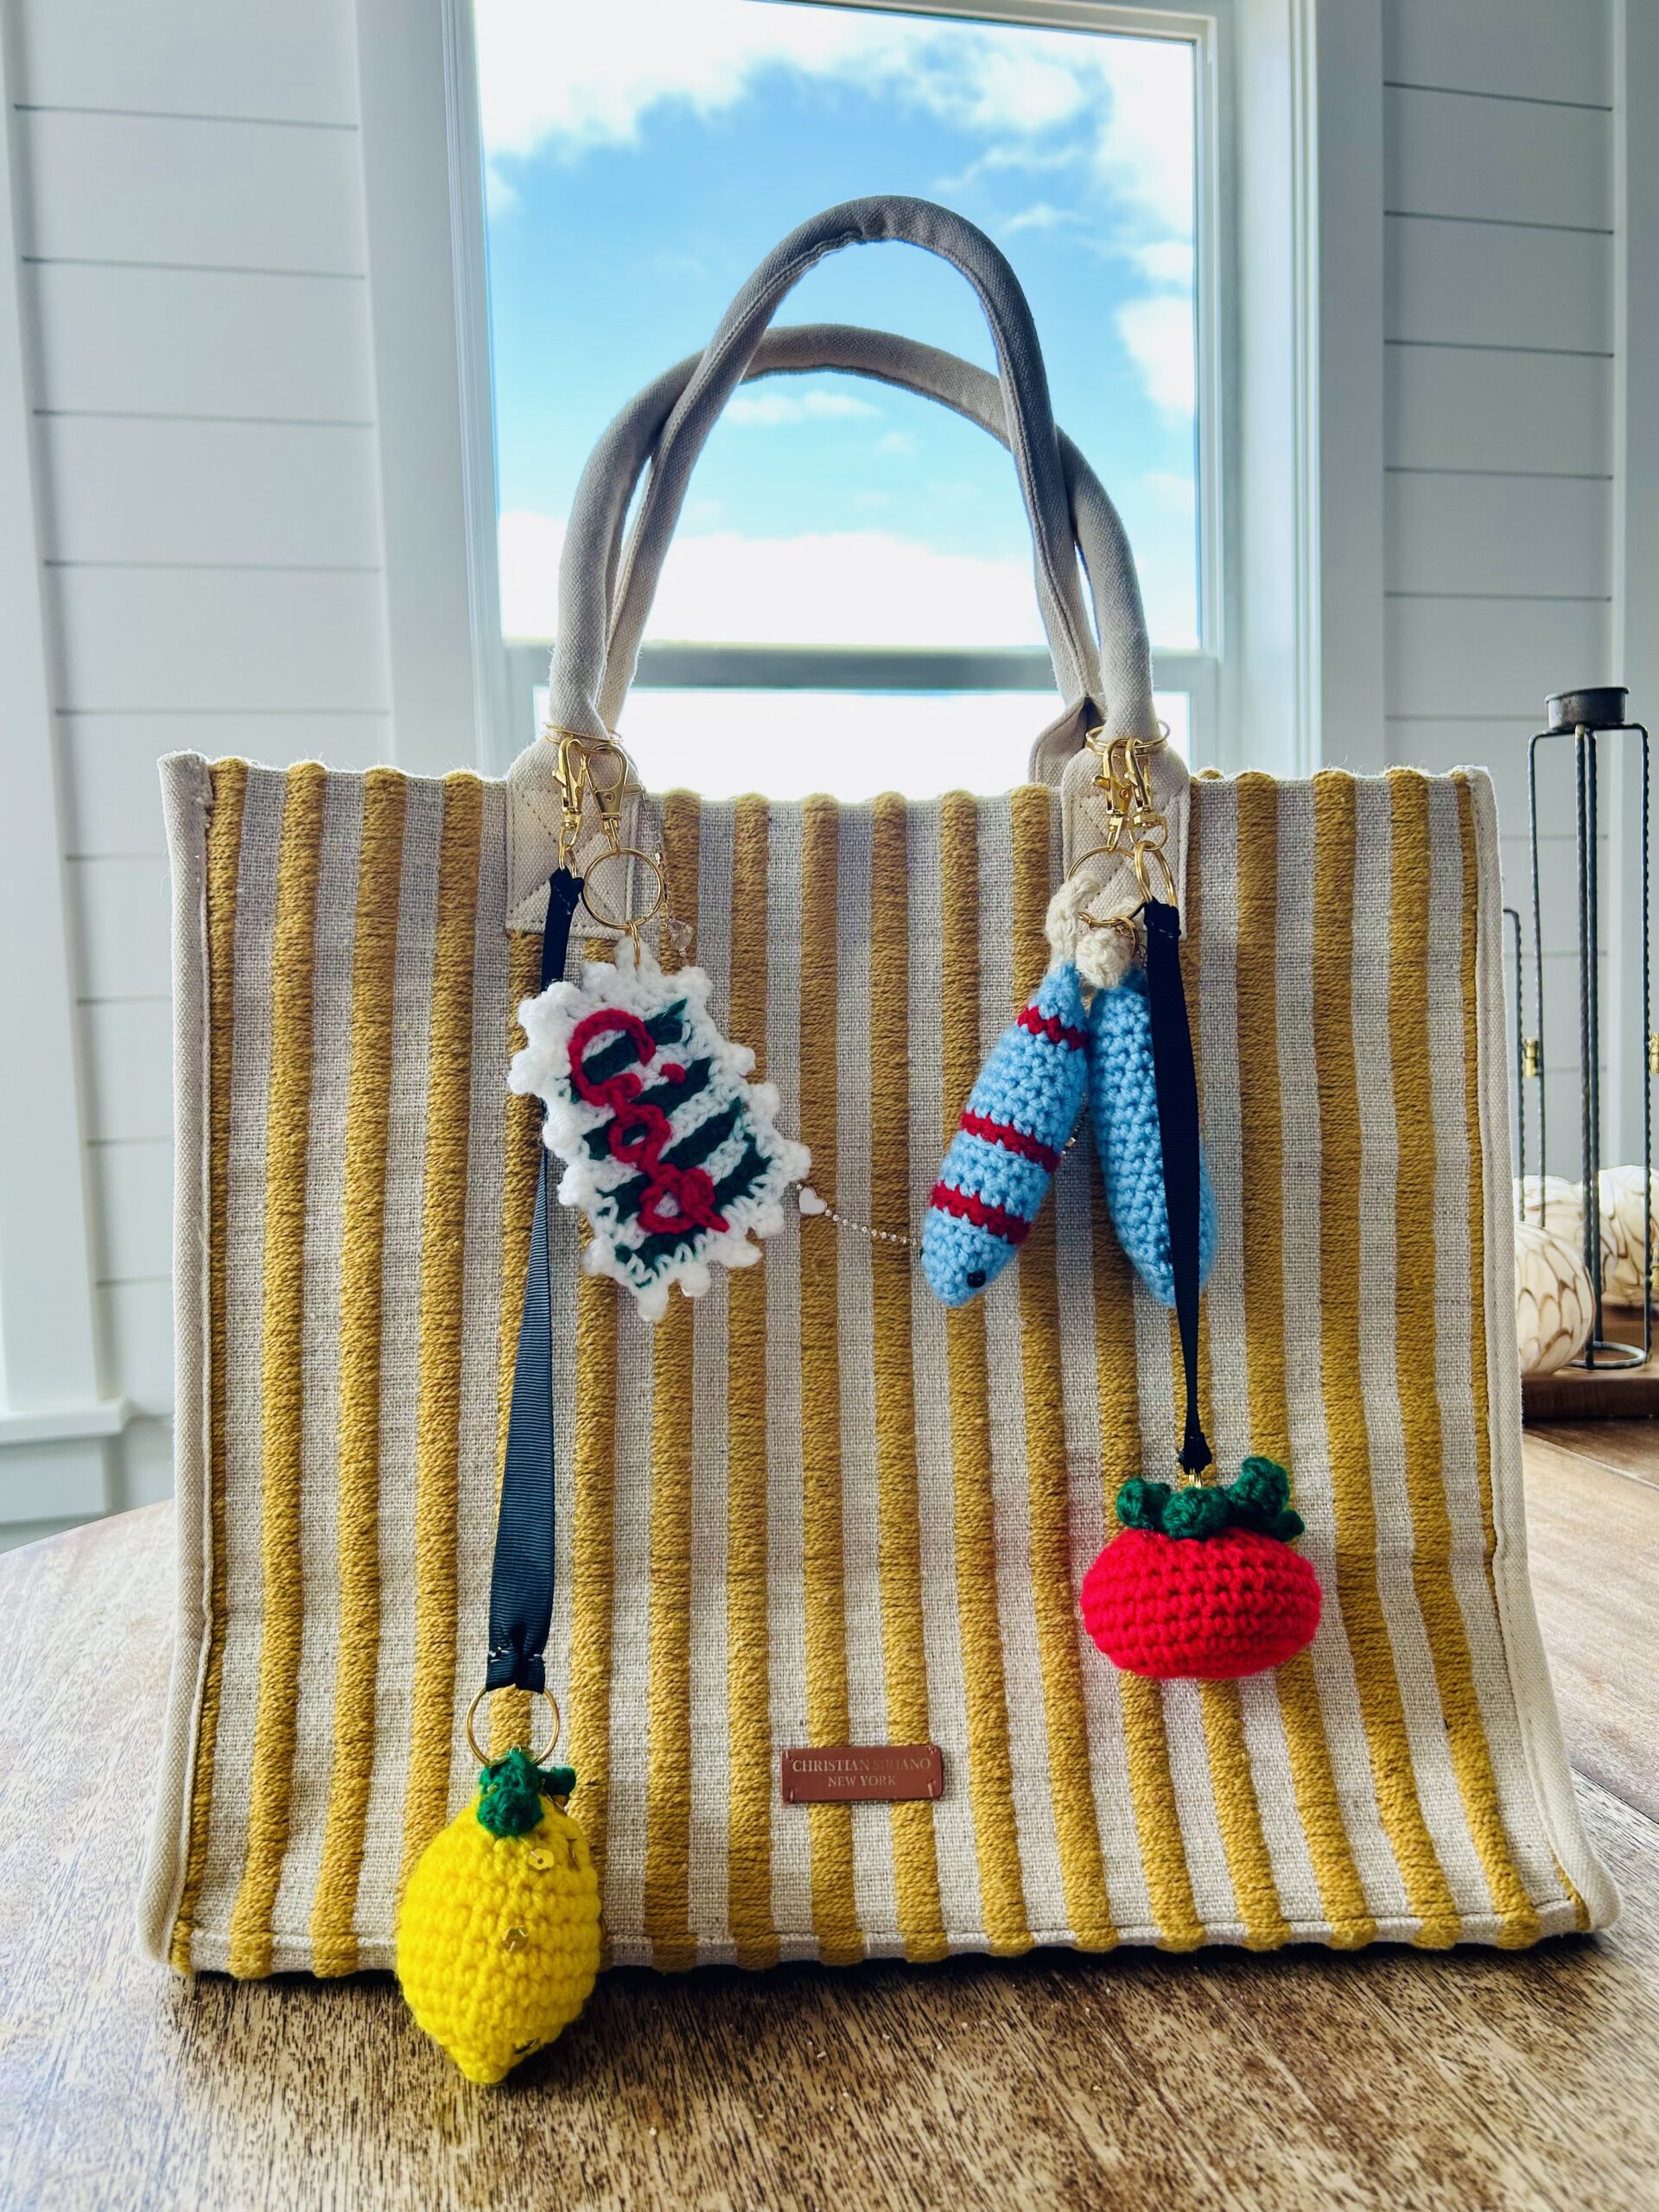
Do you have a bag that could be a bit more charming? Are you dreaming of a lovely Italian vacation on the Amalfi coast? Me too! I have loved the cute bag charms and Positano styling of everything from clothing to food that I’ve seen popping up through spring and summer this year. I loved the idea of making my own version of Amalfi coast bag charms and wanted to share them with you so that you can make some too. These charms will spice up a handbag, beach tote, backpack, or key chain and are so fun to make. Beginners and intermediate crochet artists alike will be able to enjoy making these adorable little charms. This set of bag charms includes a Sparkling Lemon, a couple of Sardines, a Tomato, and a Ciao Postage Stamp. I can imagine the fresh colors and creative touches that each of you will add in to make them unique to your style. Enjoy crocheting these and looking molta chic as you tote them around.
If you prefer a printable version of this pattern, please visit my Etsy shop Here. The small fee goes to supporting my work, however the same pattern is shared here for free.
Sparkling Lemon:
Materials:
- Red Heart Yarn in Bright Yellow
- Red Heart Yarn in Dark Green
- Crochet Hook Size E4
- Sequins (optional)
- Yarn Needle
- Fiberfill
- Swivel snap hooks and key rings to make them a charm that can hang on a bag. You can find them on Amazon here. If the link fails to work, try looking up Keychain making supplies.
Instructions:
Rnd 1: 6 SC in a magic loop. Pull the free end snugly to close the loop. If you’re new to Magic Loop or if you’d just like a quick refresher, visit my helpful tutorials page, here.
Rnd 2: SC in each ST around. (6)
Rnd 3: 2 SC in each ST around. (12)
Rnd 4: 2 SC in each ST around. (24)
Rnd 5-10: SC in each ST around. (24)

Rnd 11: *Decrease over the next 2 ST to make 1 Decrease ST.** Repeat from * to ** around. (12)
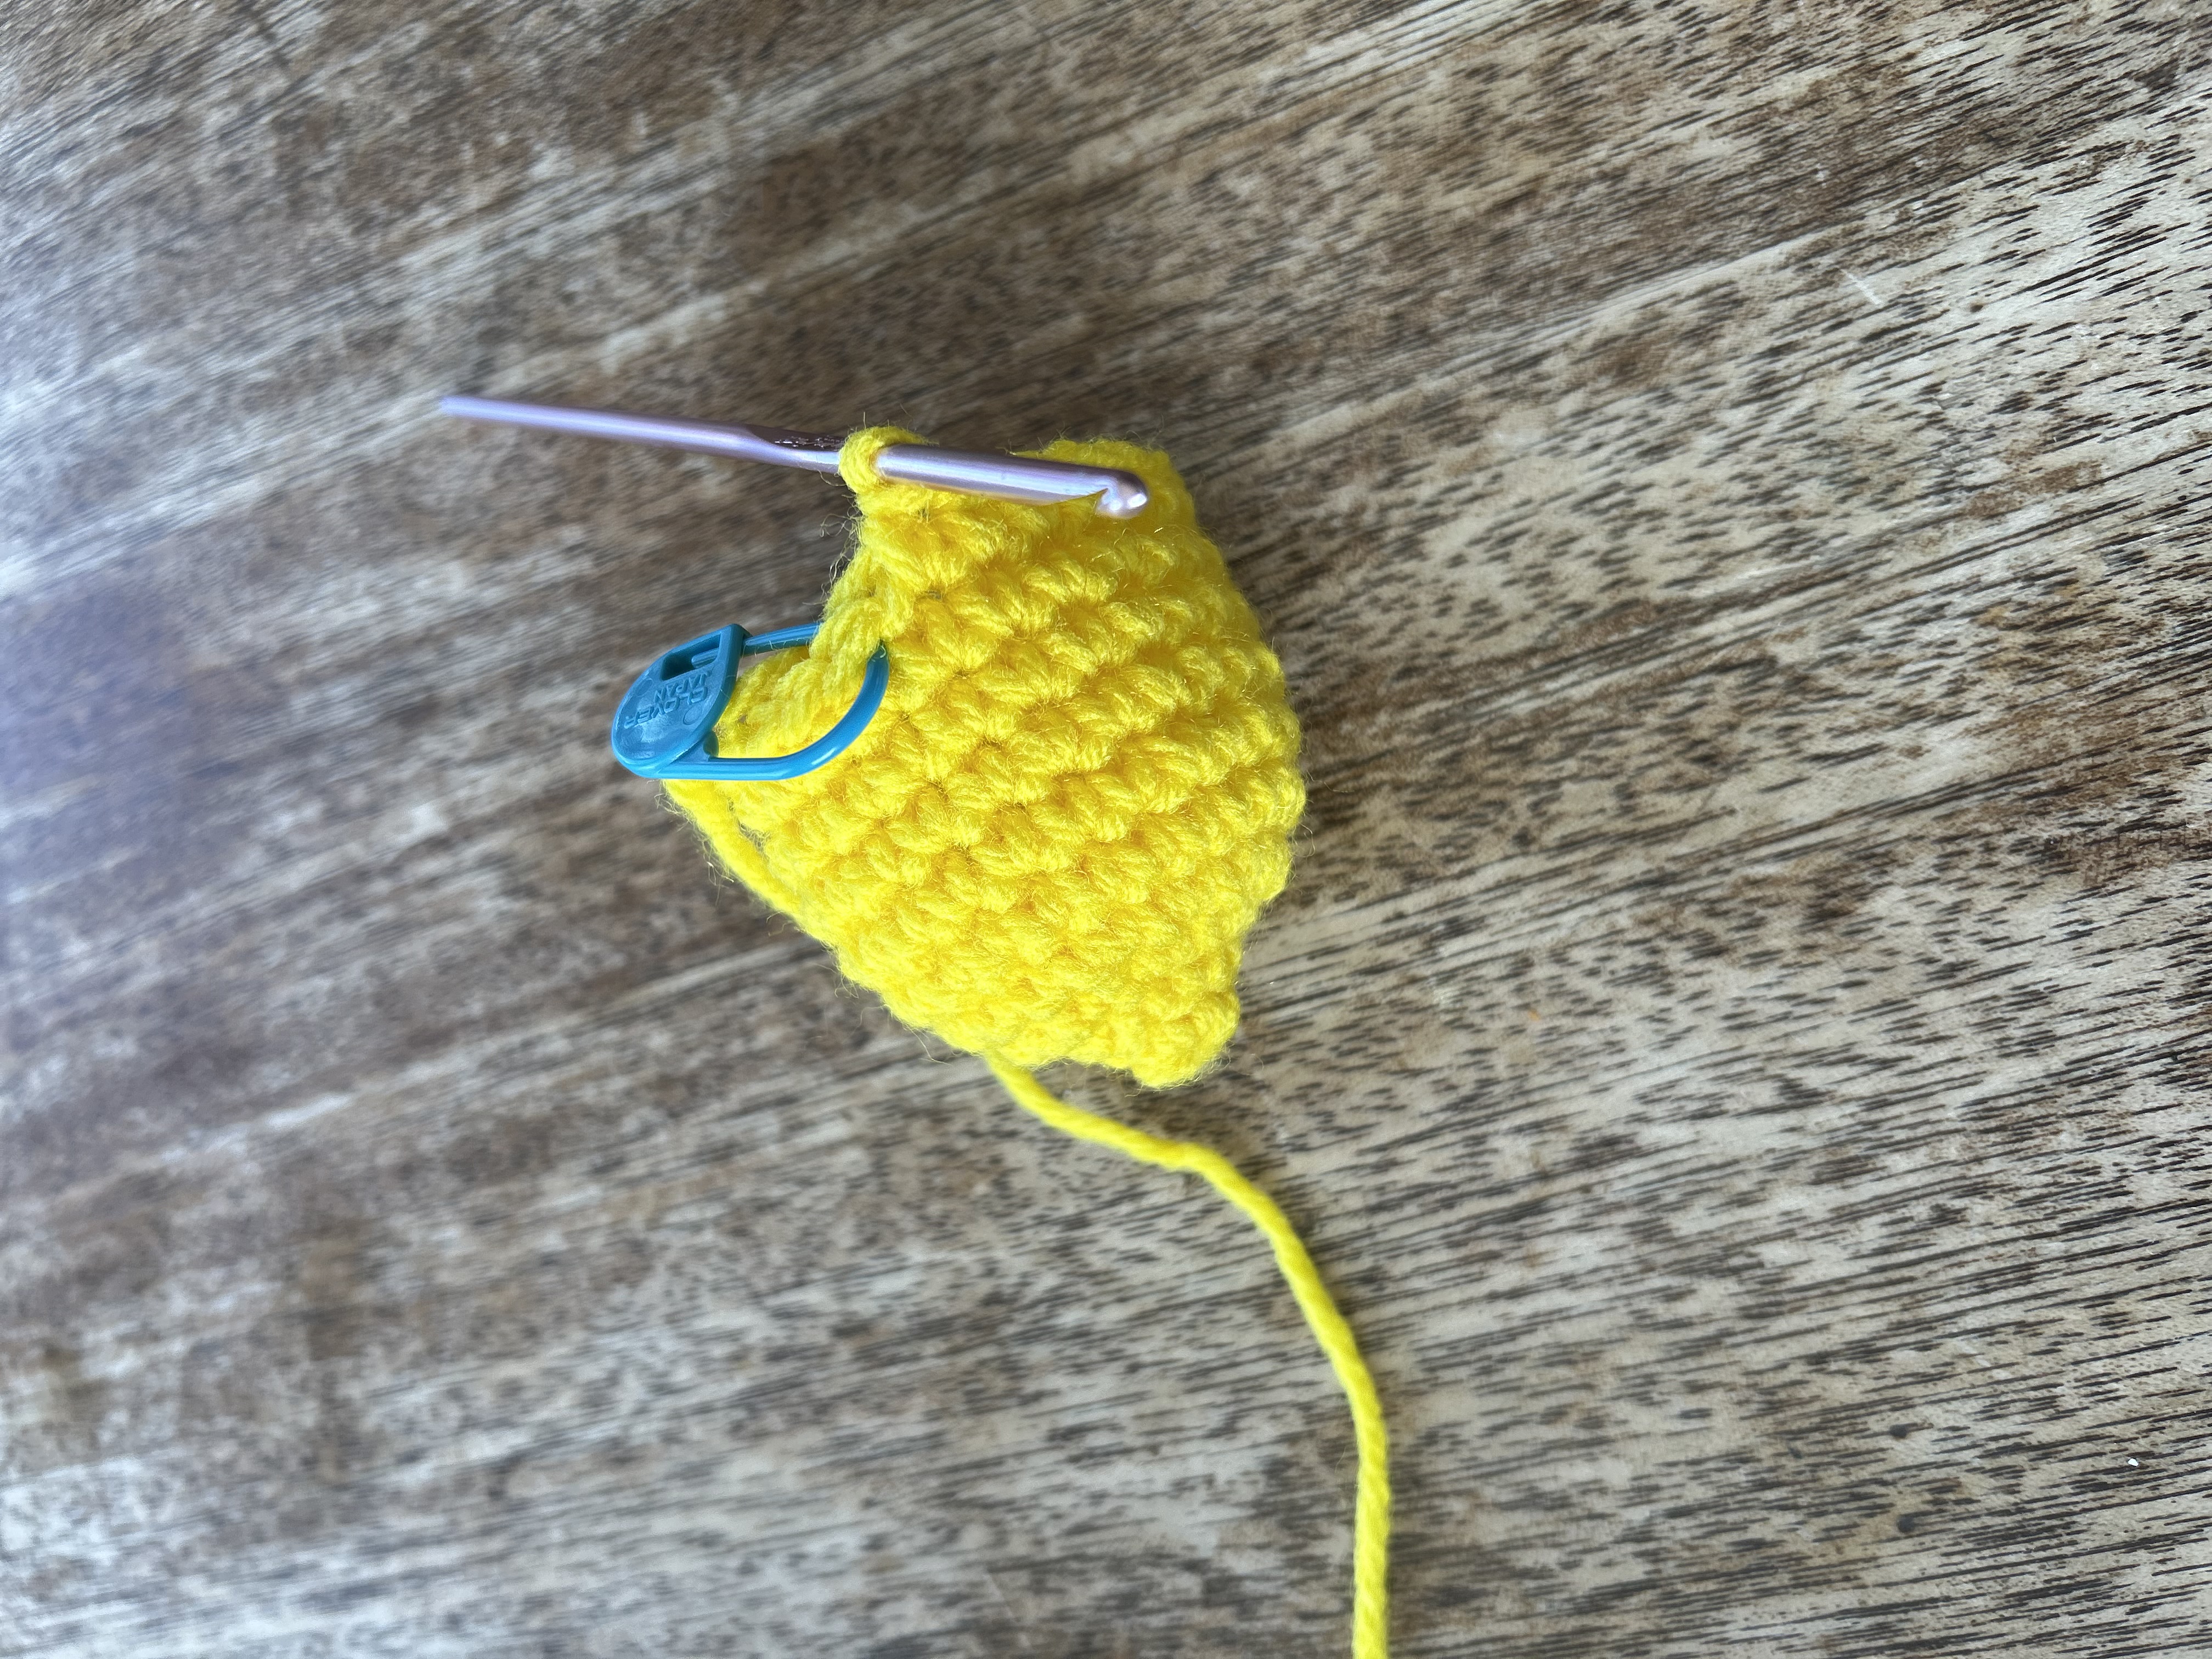
Rnd 12: SC in each ST around. (12)
Stuff lemon lightly with fiberfill.
Rnd 13: *Decrease ST across the next 2 ST to make 1 Decrease ST.** Repeat from * to ** around. (6)
Rnd 14: SC in each ST around. (6)
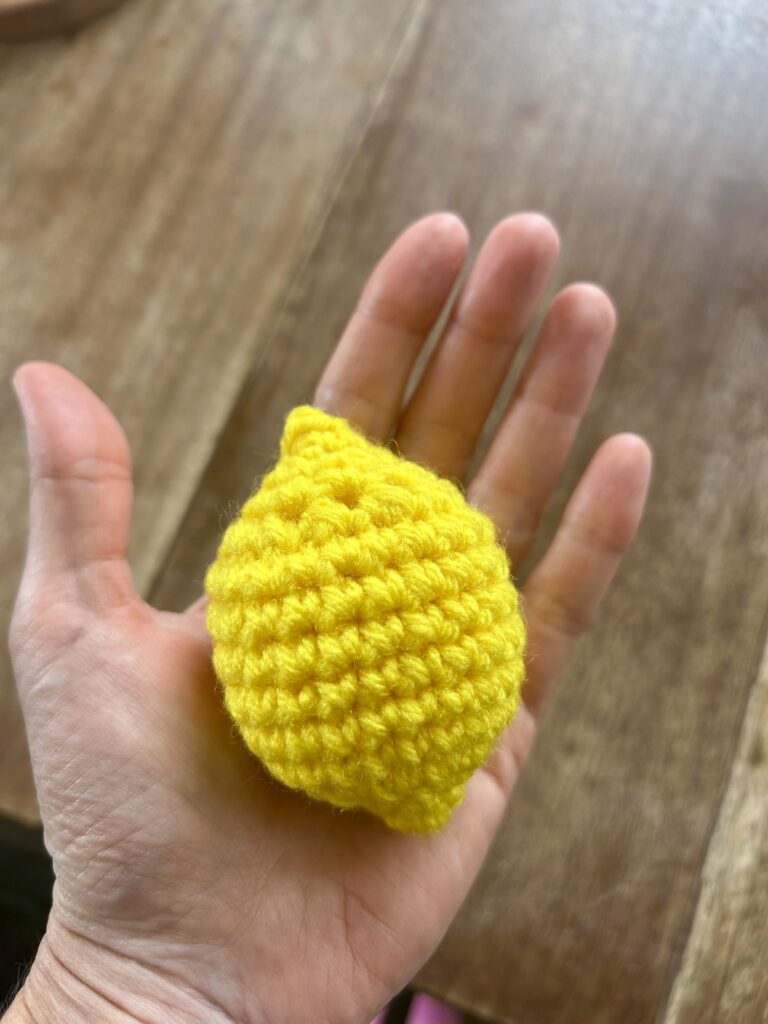
Fasten off, leaving a 4 inch tail. Using a yarn needle, weave the 4 inch tail through the BLO of each stitch of Rnd 14. Pull the end of the tail snugly to close the loop. Fasten in place with a secure knot and clip the tail.
Lemon Leaves:
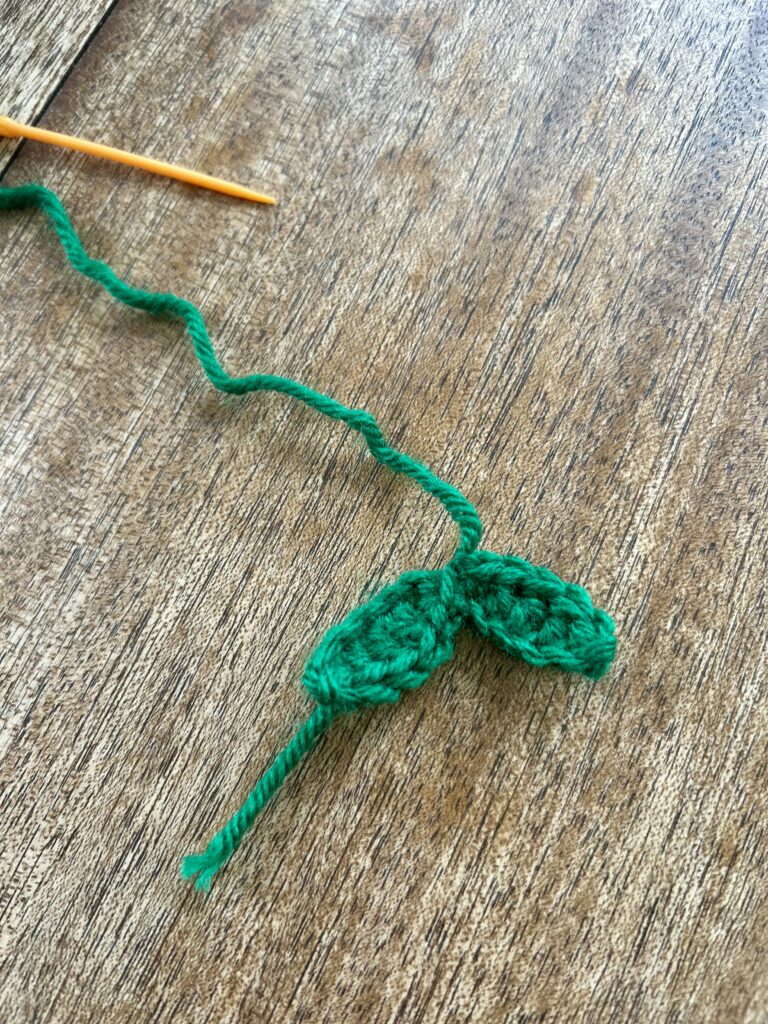
Using Green yarn, and size E hook.
Row 1: CH 6, turn.
Row 2: SC in the second CH from the hook. DC in the next 3 ST. SC in the next ST. SL ST in the beginning ST.
Don’t fasten off. Repeat Rows 1 and 2 to create a second leaf. Fasten off, leaving a 10 inch tail for Stitching. Stitch the leaves to the top of the lemon.
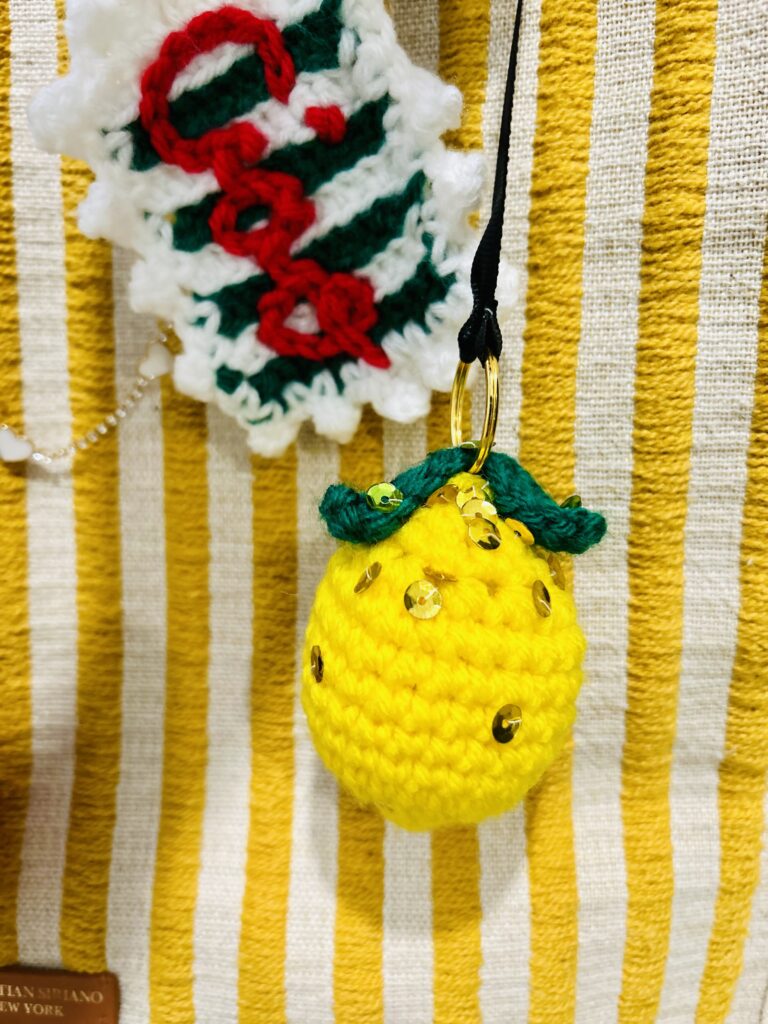
Next, comes the fun part. Decorate your Lemon with sequins or beads to add a little extra sparkle.
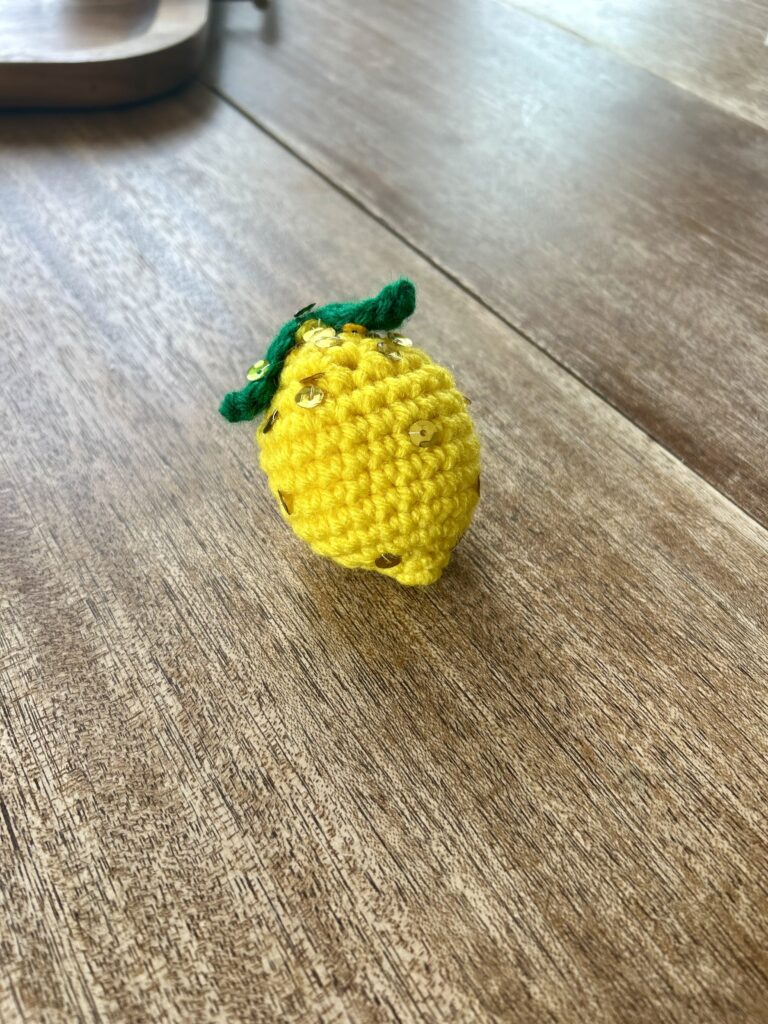
Way to go!! You completed the Lemon! Let’s keep going by making the Sardine next!
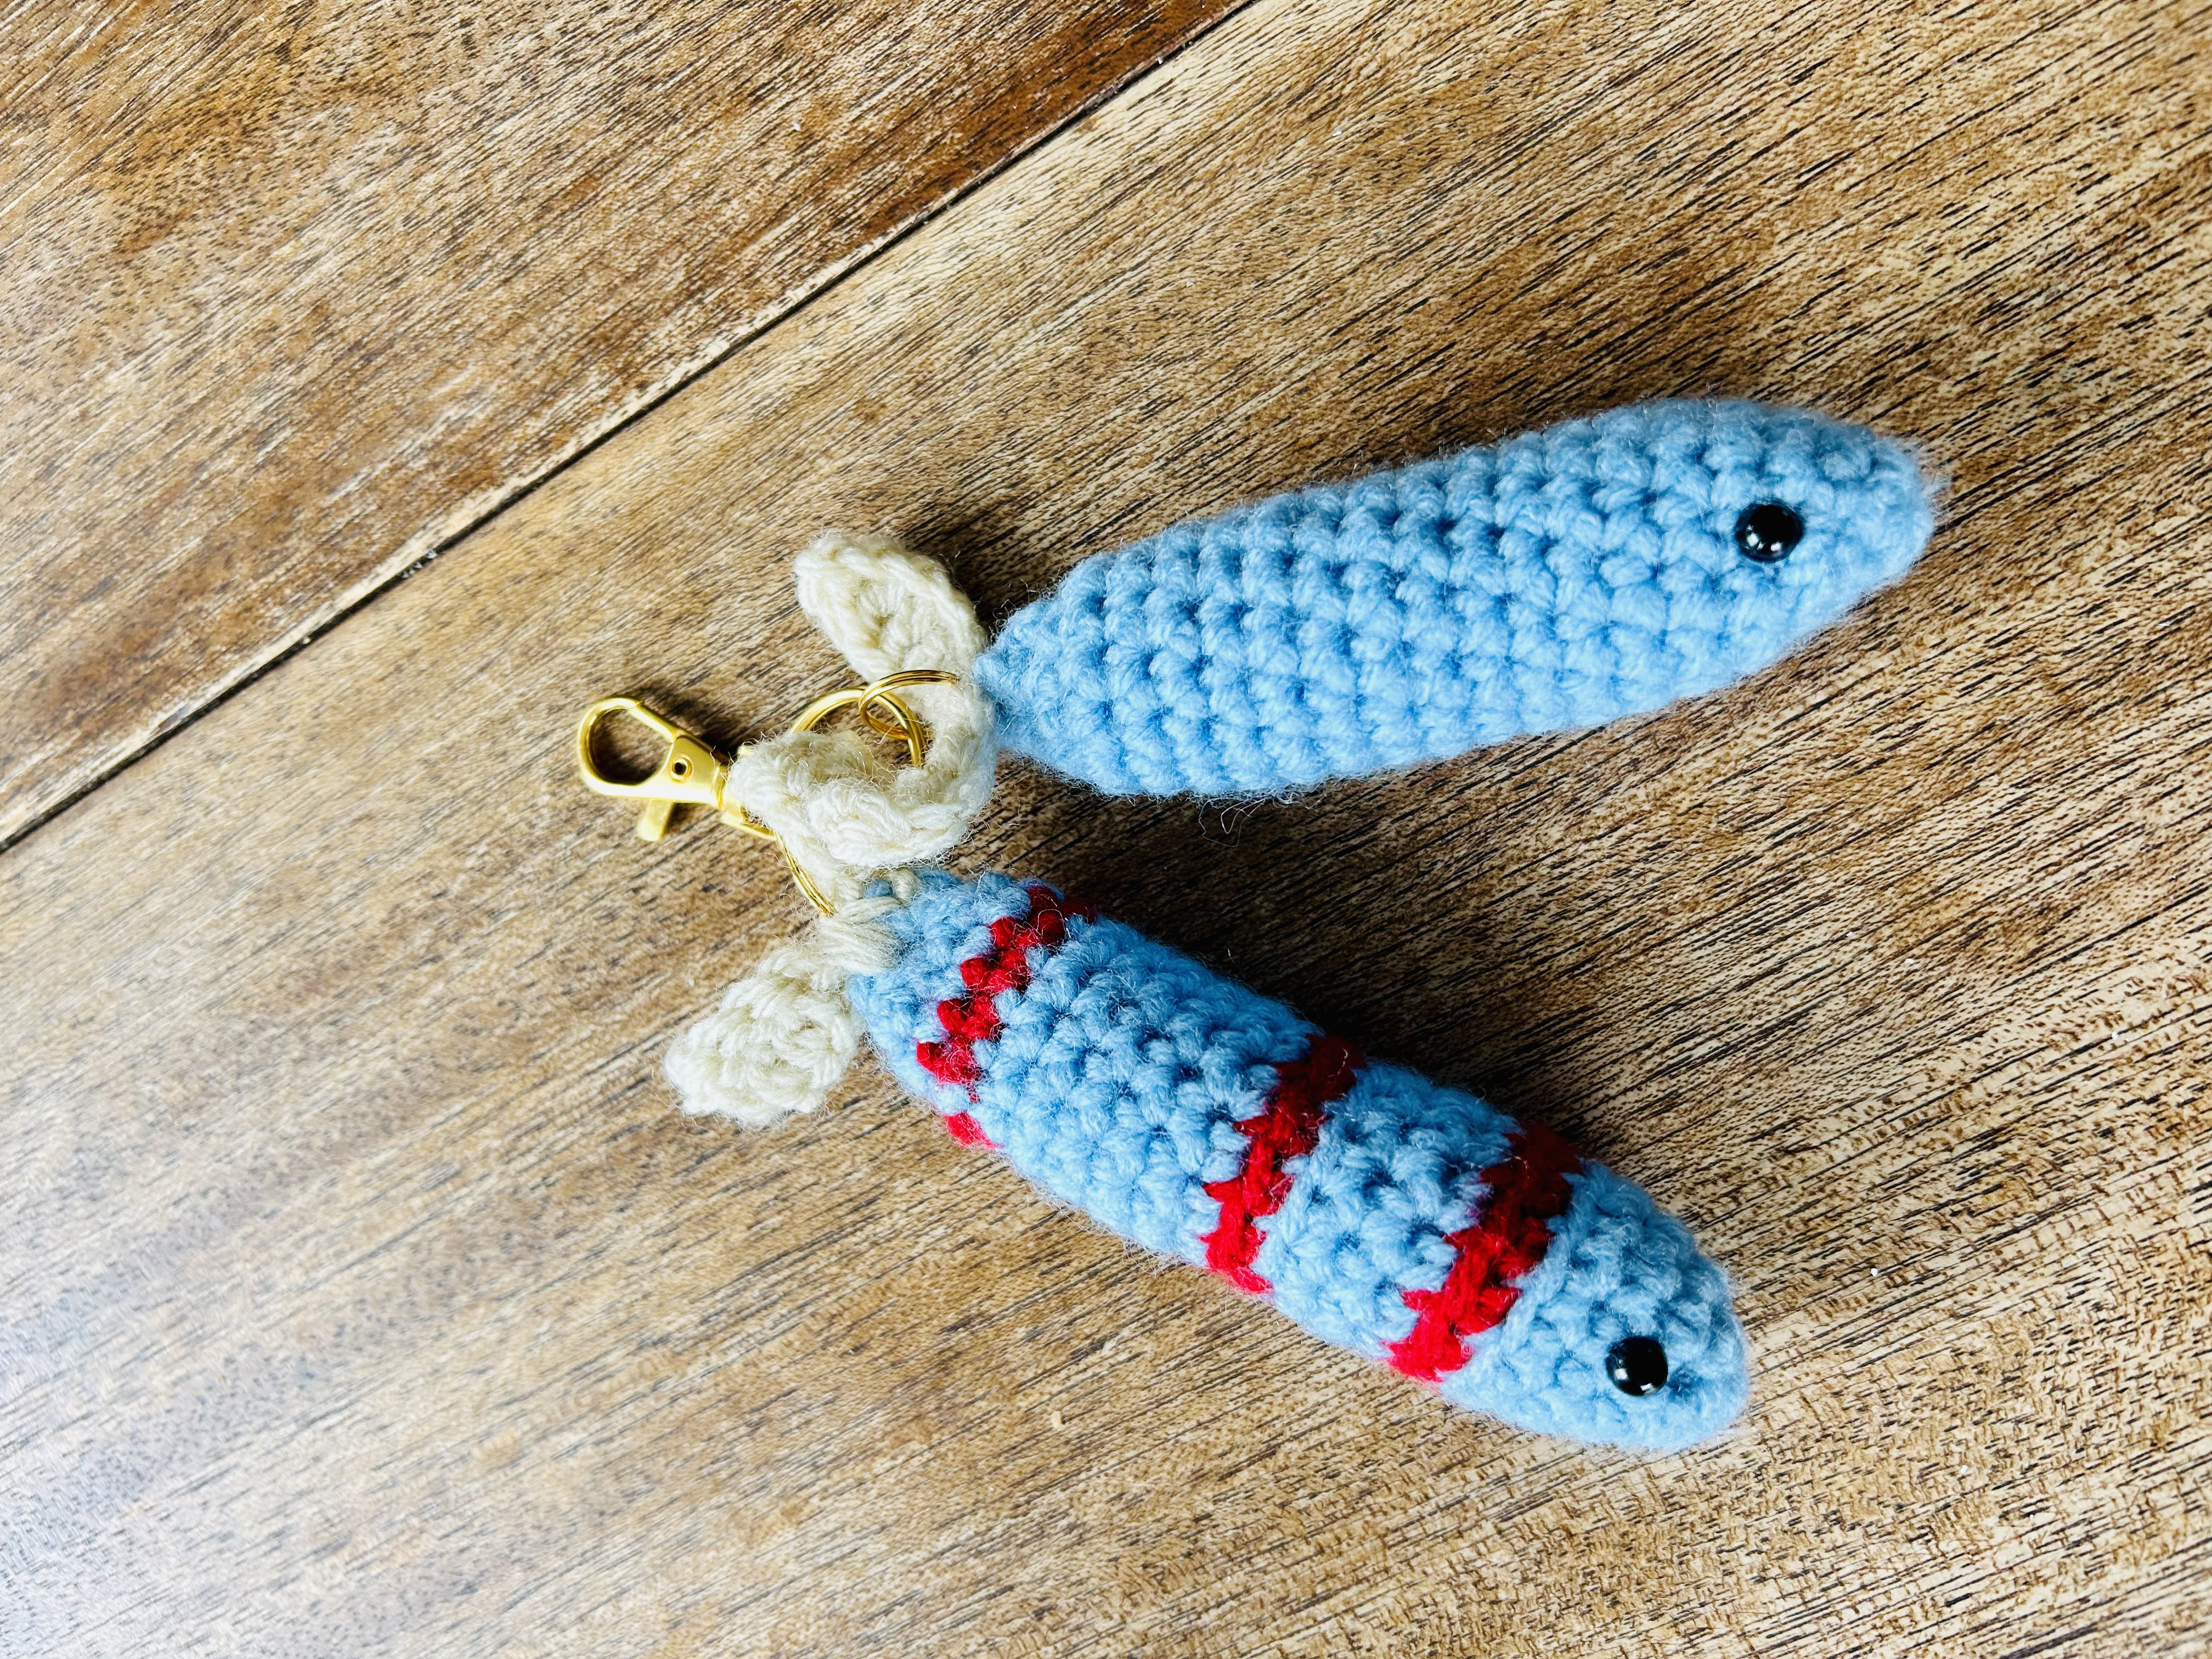
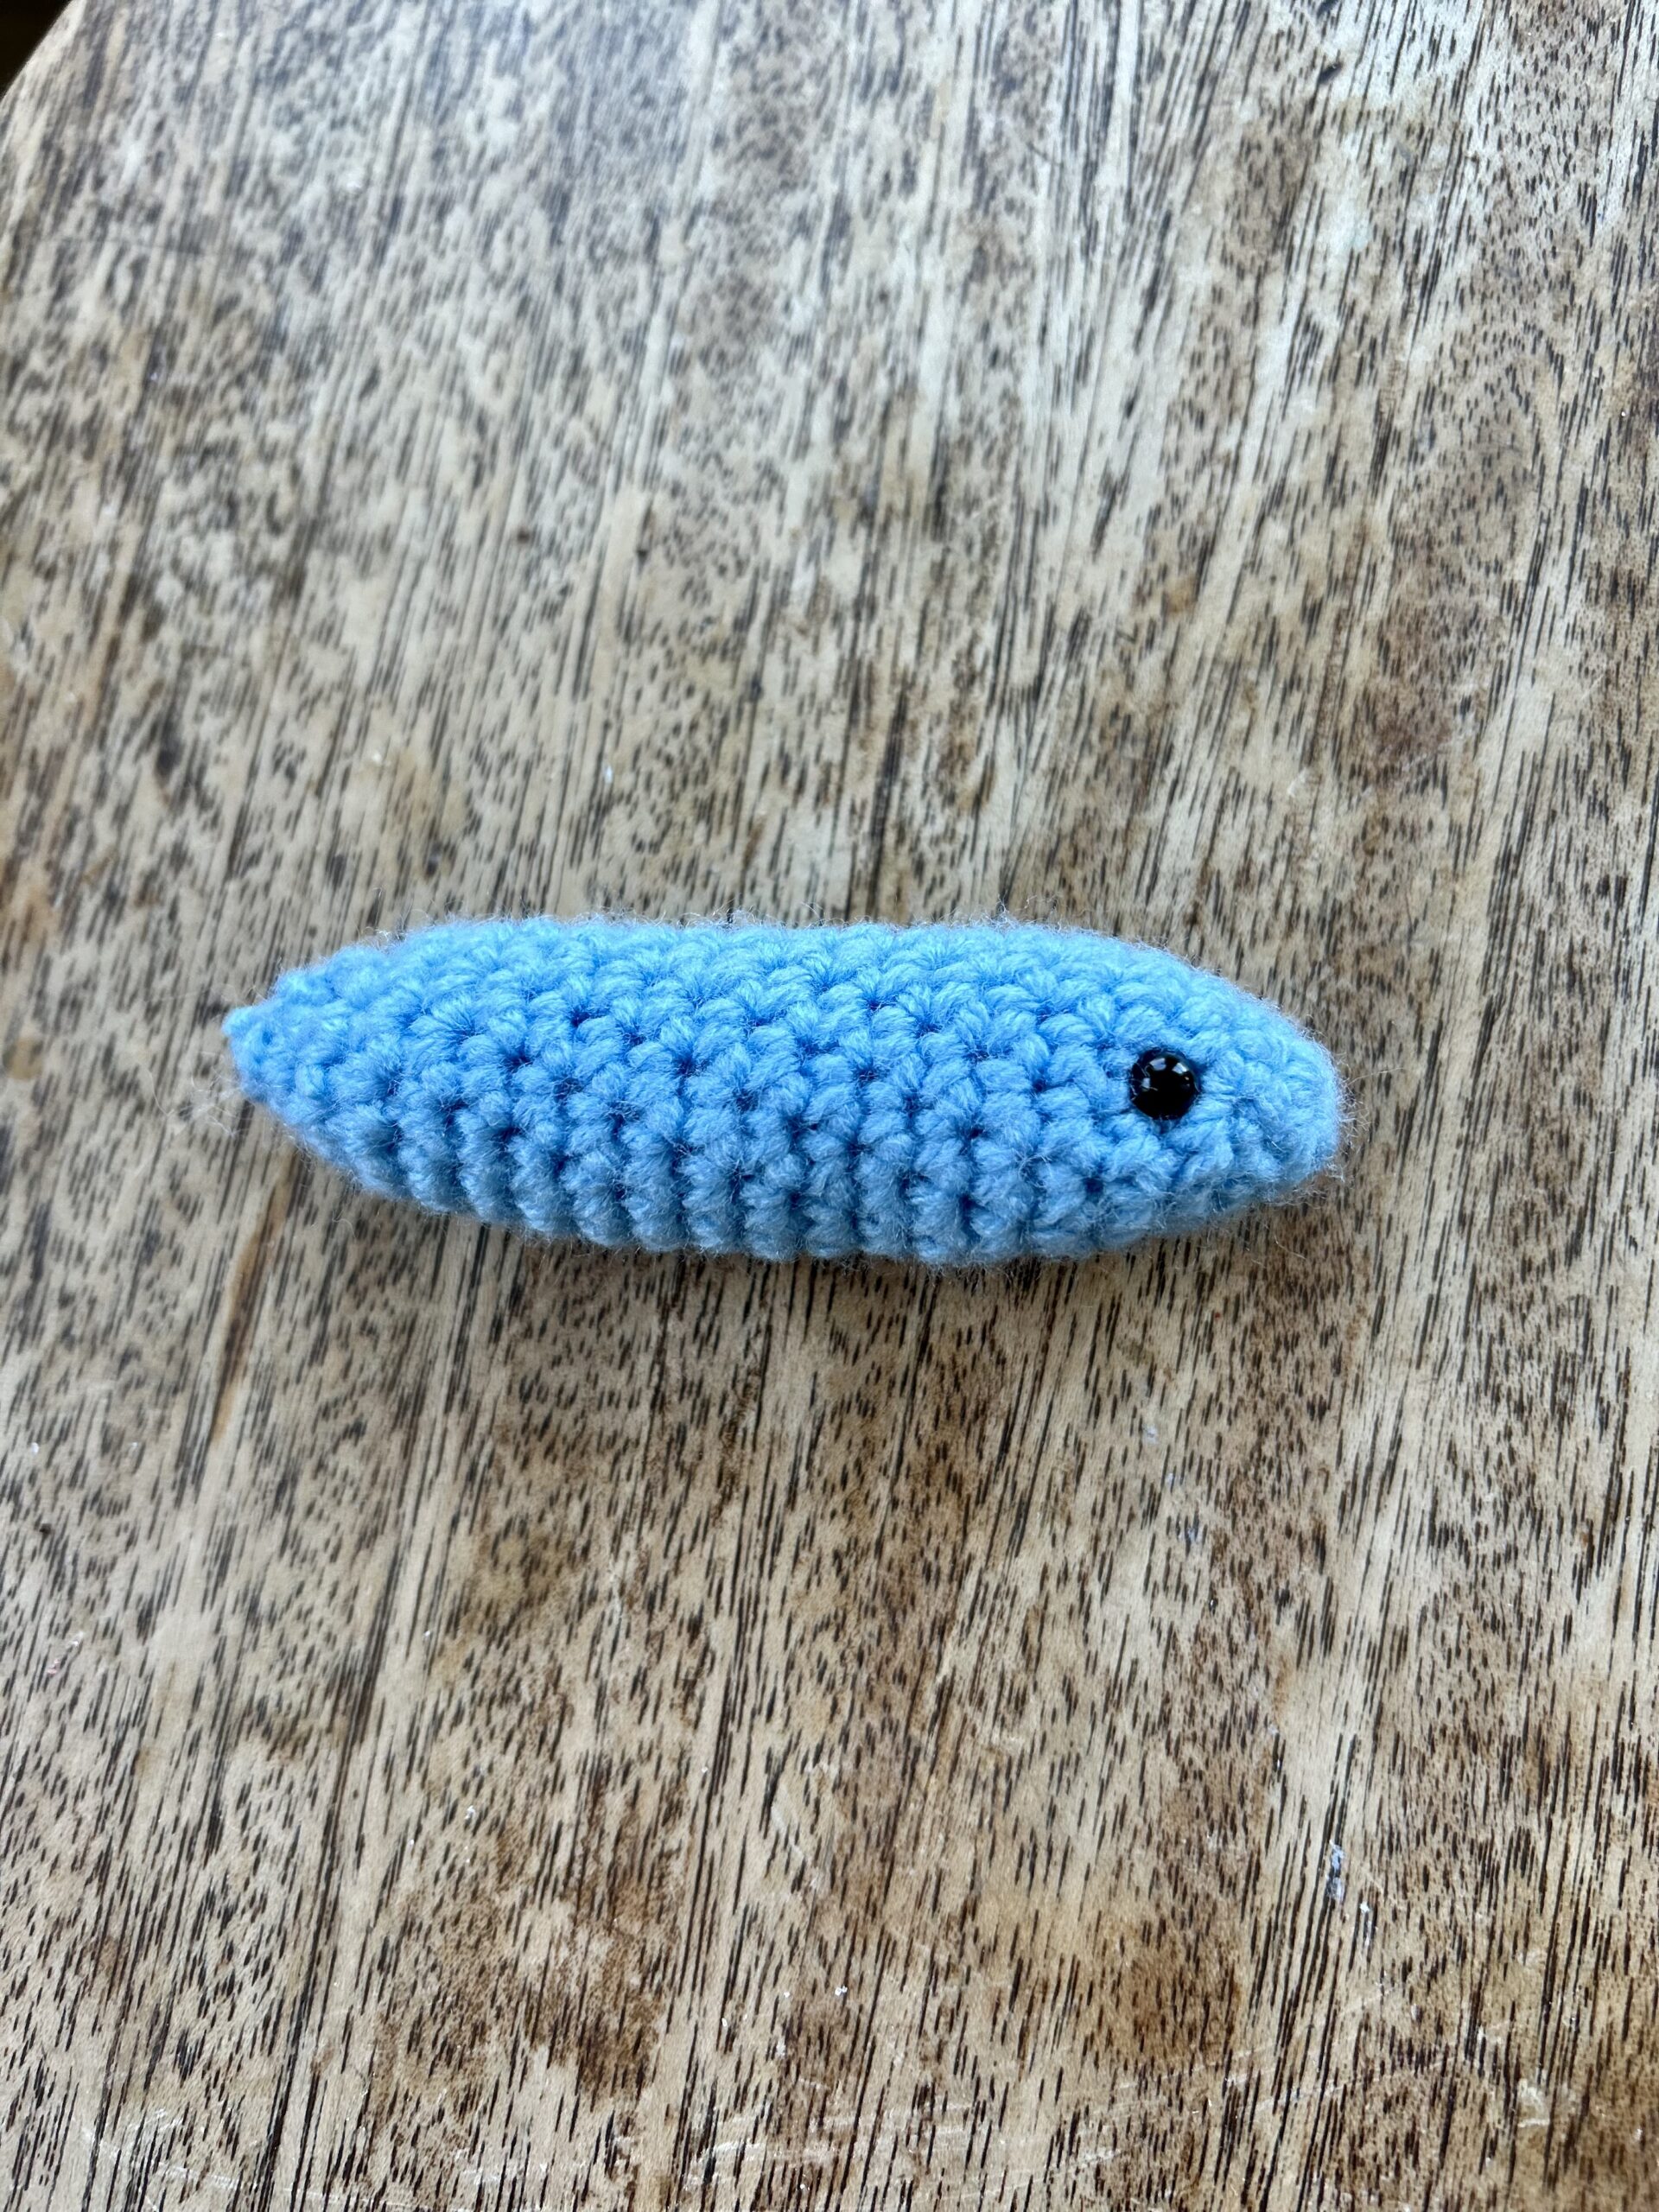
Sardines:
Sardine Materials:
- Size E4 Hook
- Big Twist Yarn in Cornflower Blue
- Red Heart Yarn in Beige or Aran
- Fiberfill
- Yarn Needle
- Amigurumi Safety Eyes or Black Yarn
- Swivel snap hooks and key rings to make them a charm that can hang on a bag. You can find them on Amazon here or look for keychain making supplies.
Gauge: 9 stitches x 8 Rows = 2 inch x 2 inch square.
Pattern used for gauge: SC
Size: Finished size measures 4.75 inches X 1.5 inches.
Sardine Instructions:
Fish Body A: Single color body
Rnd 1: 6 SC in a Magic Loop. Pull the free end snugly to close the loop.(6) If you need some help with the Magic Loop, visit my Helpful Tutorials Page here.
Rnd 2: SC in each ST around. (6)
Rnd 3: 2 SC in each ST around. (12)
Rnd 4-16: SC in each ST around. (12)
Place Amigurumi Safety eyes on each side of the fish in Rnd 3. Stuff fish lightly with fiberfill.
Rnd 17-19: SC in each ST around. (12)
Rnd 20: *Decrease over the next 2 ST to make 1 Decrease ST.** Repeat from * to ** around. (6)
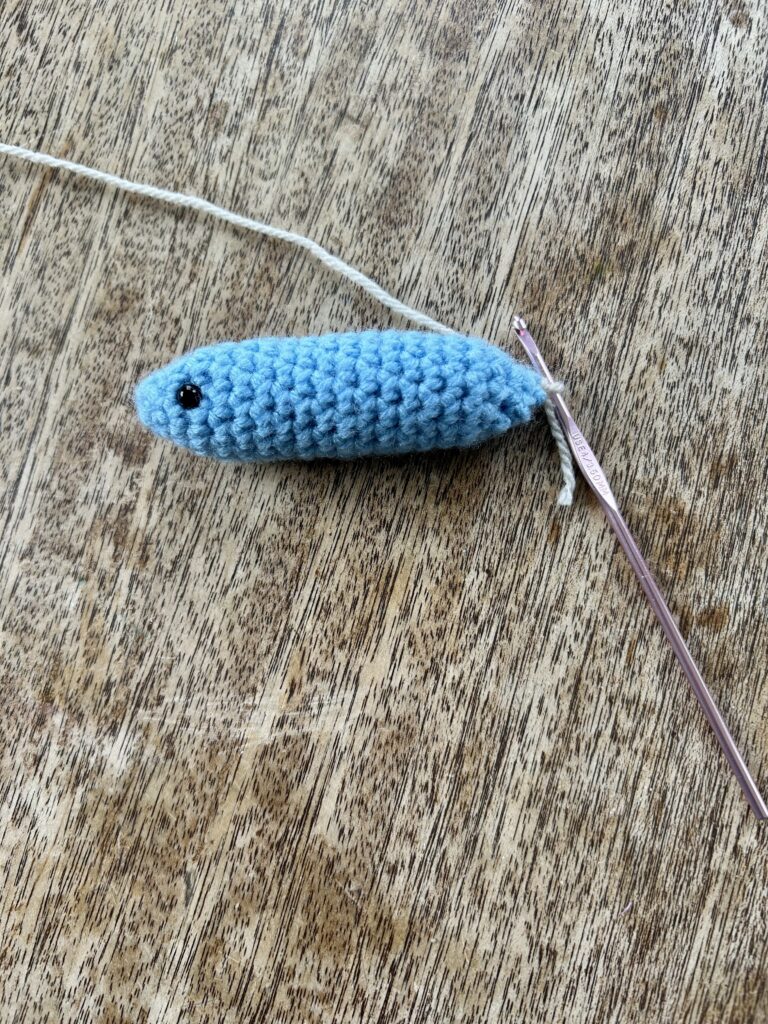
Rnd 21: SC in each ST around. (6)
Fasten off, leaving a 4 inch tail. Using a yarn needle, weave the 4 inch tail through the BLO of each ST from RND 21. Pull the tail snugly to close the loop. Secure with a knot and weave in end.
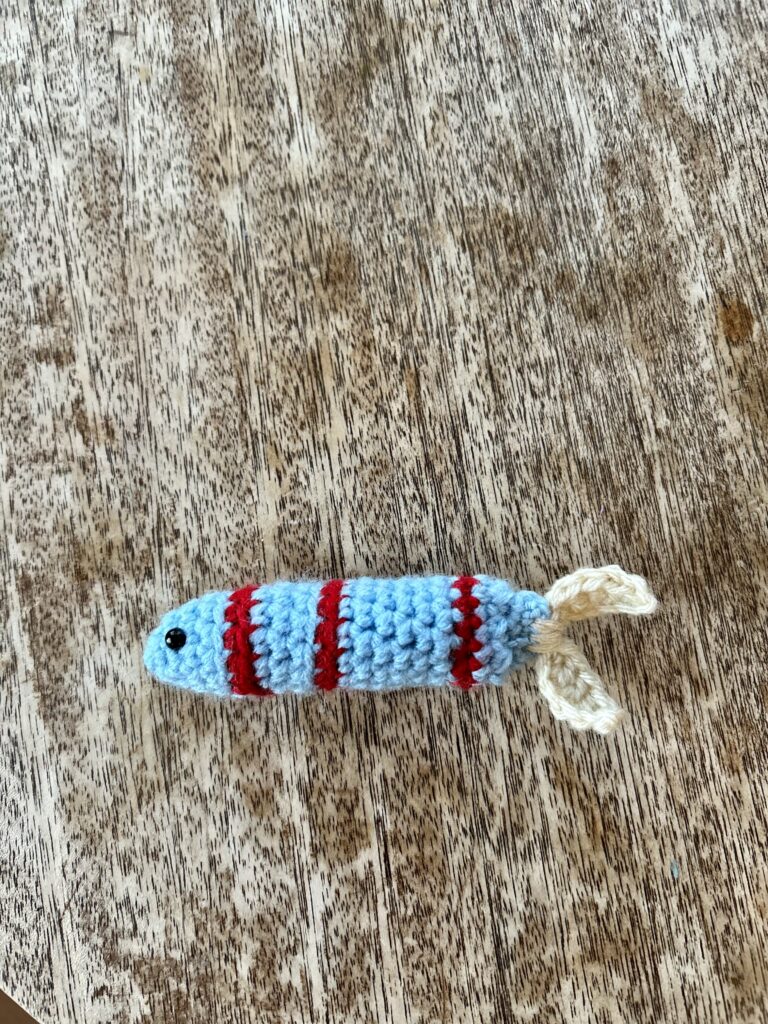
Striped Sardine:
Rnd 1: 6 SC in a Magic Loop. Pull the free end snugly to close the loop.(6) If you need some help with the Magic Loop, visit my Helpful Tutorials Page here.
Rnd 2: SC in each ST around. (6)
Rnd 3: 2 SC in each ST around. (12)
Rnd 4-5: SC in each ST around. (12) Color change to the Color B at the last pull through of the last ST of Rnd 5.
Rnd 6: With Color B, SC in each ST around. (12) Color change to Color A at the last pull through of the last ST of the rnd.
Rnd 7-9: With color A, SC in each ST around. (12)Color change to the Color B at the last pull through of the last ST of Rnd 9.
Rnd 10: With Color B, SC in each ST around. (12) Color Change to Color A at the last pull through of the last ST of Rnd 10.
Rnd 11-16: With Color A, SC in each ST around. (12)
Place Amigurumi Safety eyes on each side of the fish in Rnd 3. Stuff fish lightly with fiberfill.
Rnd 17: SC in each ST around. Color change to Color B at the last pull through of the last ST of the round.
Rnd 18: With color B, SC in each ST around. Color change back to Color A at the last pull through of the last ST of the Rnd. (12)Fasten off Color B.
Rnd 19: With Color A, SC in each ST around. (12)
Rnd 20: *Decrease over the next 2 ST to make 1 Decrease ST.** Repeat from * to ** around. (6)
Rnd 21: SC in each ST around. (6)
Fasten off, leaving a 4 inch tail. Using a yarn needle, weave the 4 inch tail through the BLO of each ST from RND 21. Pull the tail snugly to close the loop. Secure with a knot and weave in end.
Fins:
Row 1: With beige yarn, CH 6, turn. (6)
Row 2: SC in the second CH from the hook. DC in the next 3 ST. SC in the next ST. SL ST in the beginning ST.
Don’t fasten off. Repeat Rows 1 and 2 to create a second leaf. Fasten off, leaving a 10 inch tail for Stitching. Stitch the fins to the bottom of the fish. Weave in ends.
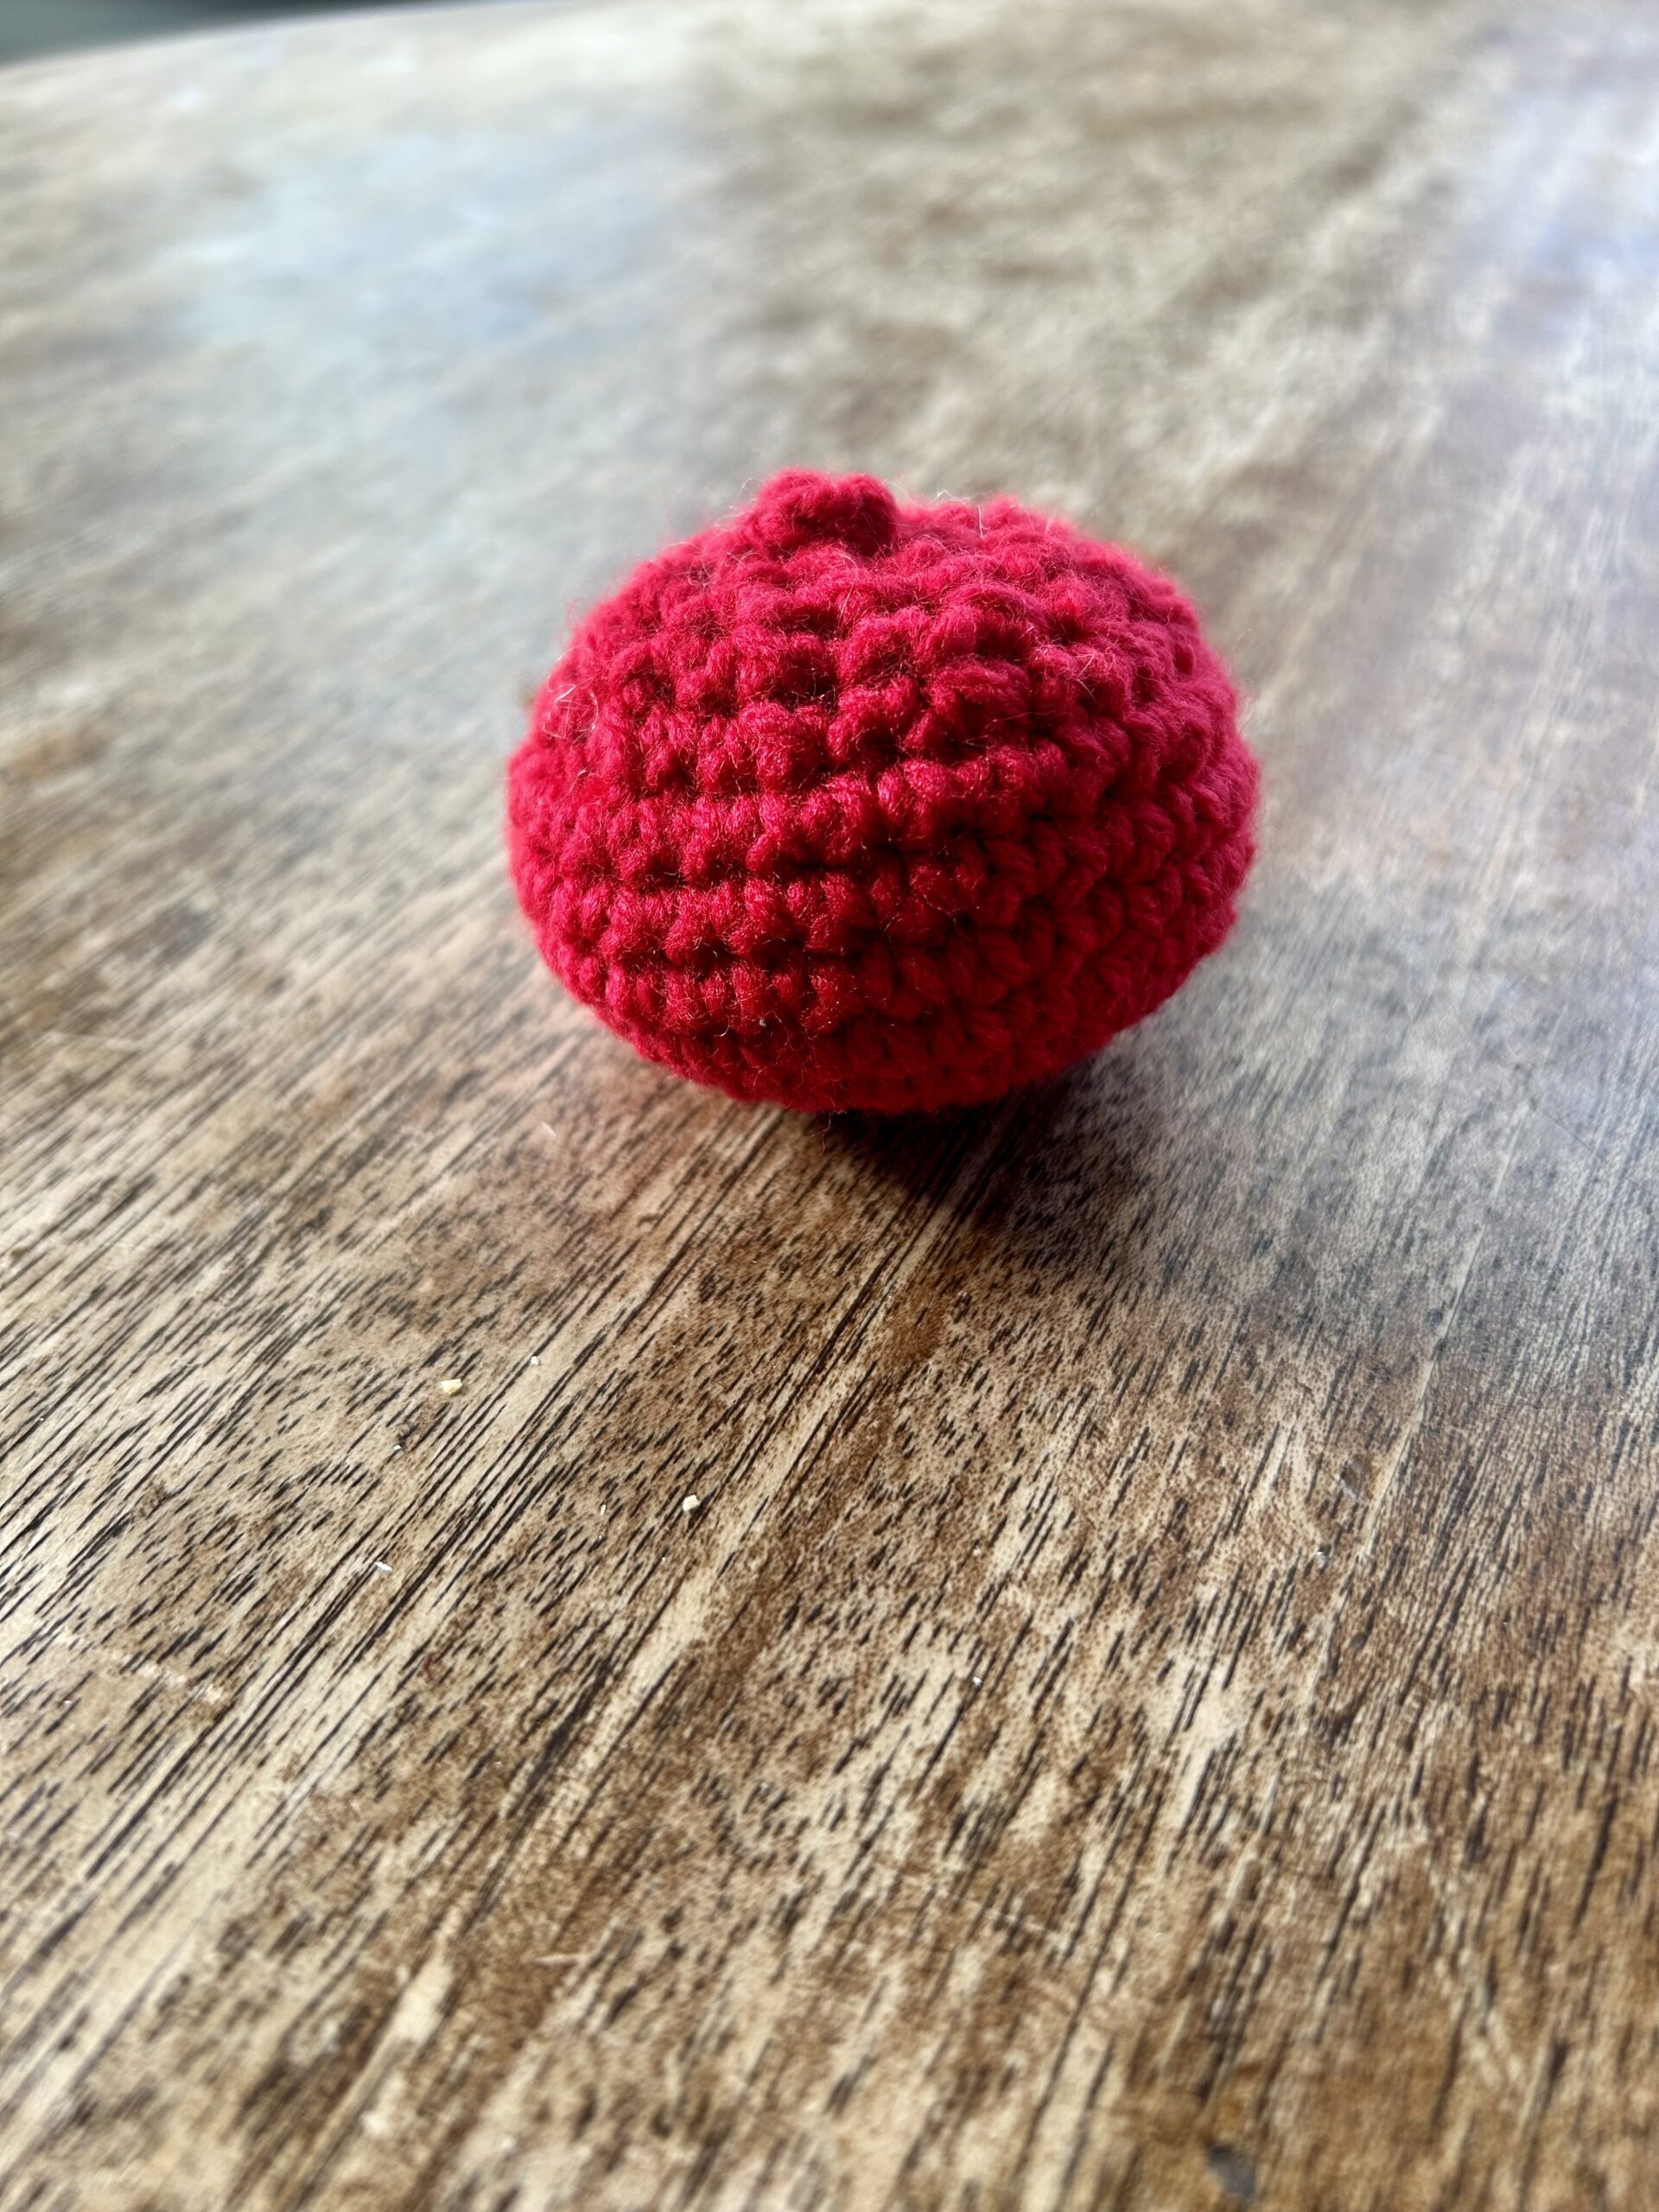
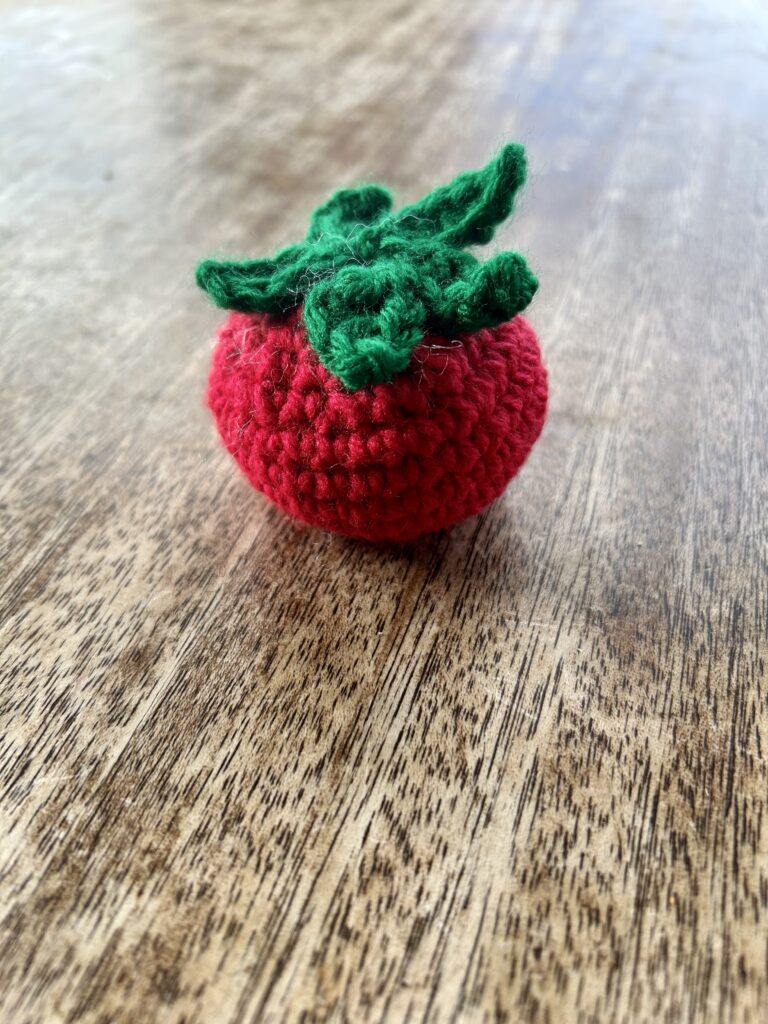
Tomato:
Materials:
- Big Twist Yarn Red
- Red Heart Super Saver Yarn in Paddy Green
- Size E4 Crochet Hook
- Fiberfill
- Yarn Needle
- Keychain making supplies to make it into a bag charm
Gauge: 9 stitches x 8 Rows = 2 inch x 2 inch square.
Pattern used for gauge: SC
Size: Finished size is 2.5 inches X 2 inches.
Instructions:
Rnd 1: With Red yarn and Size E4 crochet hook, 6 SC in a Magic loop. If you’d like a quick review of Magic Loop, visit my helpful tutorials page here.
Rnd 2: 2 SC in each ST around. (12)
Rnd 3: *SC in the next ST, 2 SC in the next ST** Repeat from * to ** around. (18)
Rnd 4: *SC in the next 2 ST, 2 SC in the next ST.** Repeat from * to ** around. (24)
Rnd 5: *SC in the next 3 ST, 2 SC in the next ST.** (30)
Rnd 6-9: SC in each ST around. (30)
Rnd 10: *Decrease over the next 2 ST to make 1 Decrease ST, SC in the next ST.** Repeat from * to ** around. (20)
Rnd 11: *Decrease over the next 2 ST to make 1 decrease ST, SC in the next ST.** Repeat from * to ** around. (13)
Rnd 12: *Decrease over the next 2 ST to make 1 decrease ST, SC in the next ST.** Repeat from * to ** around. (8)
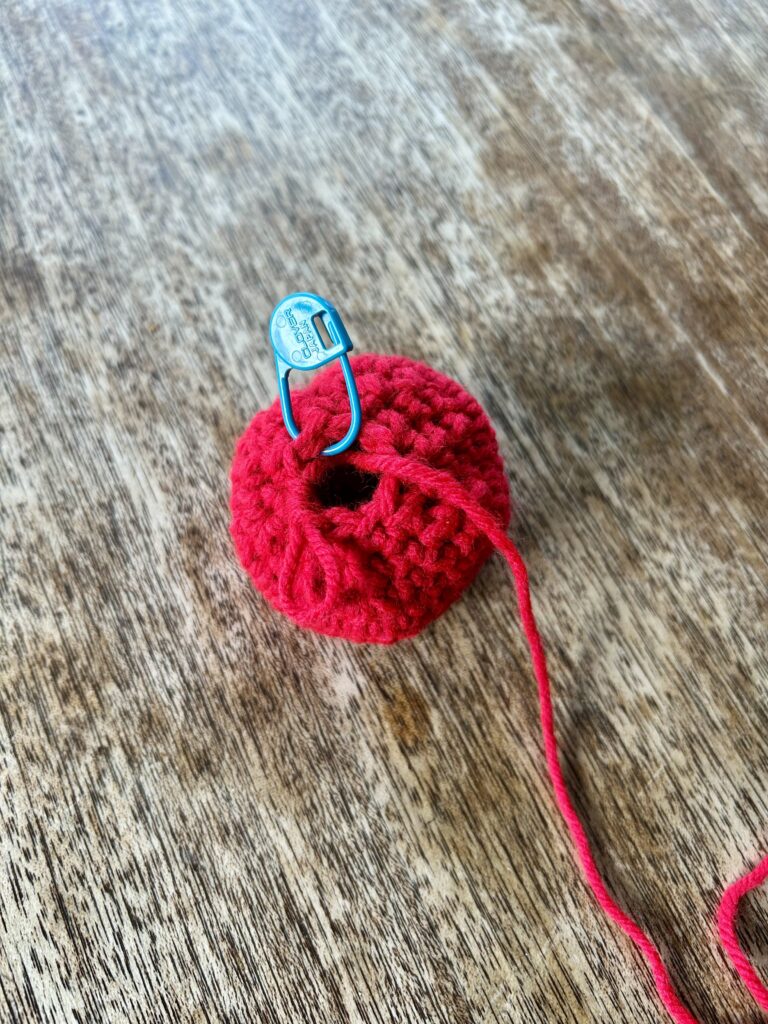
Stuff tomato firmly with fiberfill.
Rnd 13:* Decrease over the next 2 ST to make 1 Decrease ST.** Repeat from * to ** around. (4) Fasten off leaving a tail for Stitching.
Using a yarn needle and the tail for stitching, weave the tail through BLO of each ST of Rnd 13. Pull the end snugly to close the opening. Secure with a knot and weave in end.
Tomato Leaves:
Row 1: CH 6, turn. (6)
Row 2: SC in the second CH from the hook. DC in the next 3 ST. SC in the next ST. SL ST in the beginning ST.
Don’t fasten off. Repeat Rows 1 and 2 to create 4 more leaves. Fasten off, leaving a tail for stitching. Using a yarn needle and the tail for stitching, stitch the leaves to the top of the Tomato.
CIAO Postage Stamp:
Materials:
- Red Heart Yarn in Paddy Green
- Red Heart Yarn in White
- Red Heart Yarn in Red
- Size E4 Hook
- Keychain making supplies to make it into a bag charm
Gauge: 9 stitches x 8 Rows = 2 inch x 2 inch square.
Pattern used for gauge: SC
Size: Finished size is 4 inches X 3 inches.
Instructions:
Row 1: With Green yarn, CH 11, turn. (11)
Row 2: SC in the second CH from the hook and in each remaining ST across. Color change to White yarn on the last pull through of the last ST. Don’t fasten off Green. CH 1, turn (10)
Row 3: With White Yarn SLST in BLO of each ST across. CH 1, turn. (10)
Row 4: SC in each ST across. Color change to Green at the last pull through of the last ST. Don’t fasten off White. CH 1, turn. (10)
Row 5: with Green Yarn SLST in BLO of each ST across. CH 1, turn. (10)
Row 6: SC in each ST across. Color change to white at the last pull through of the last ST. Don’t fasten off Green. CH 1, turn. (10)
Repeat Rows 3-6 three more times. Fasten off Green, leaving White still attached. (10)
Stamp Border: * CH 3, SC in the second and third CH from hook.SC in the next 2 ST working around the perimeter of the stamp.** Repeat from * to ** working all around the edges of the stamp. SLST in the last ST of the round and fasten off. Weave in ends.
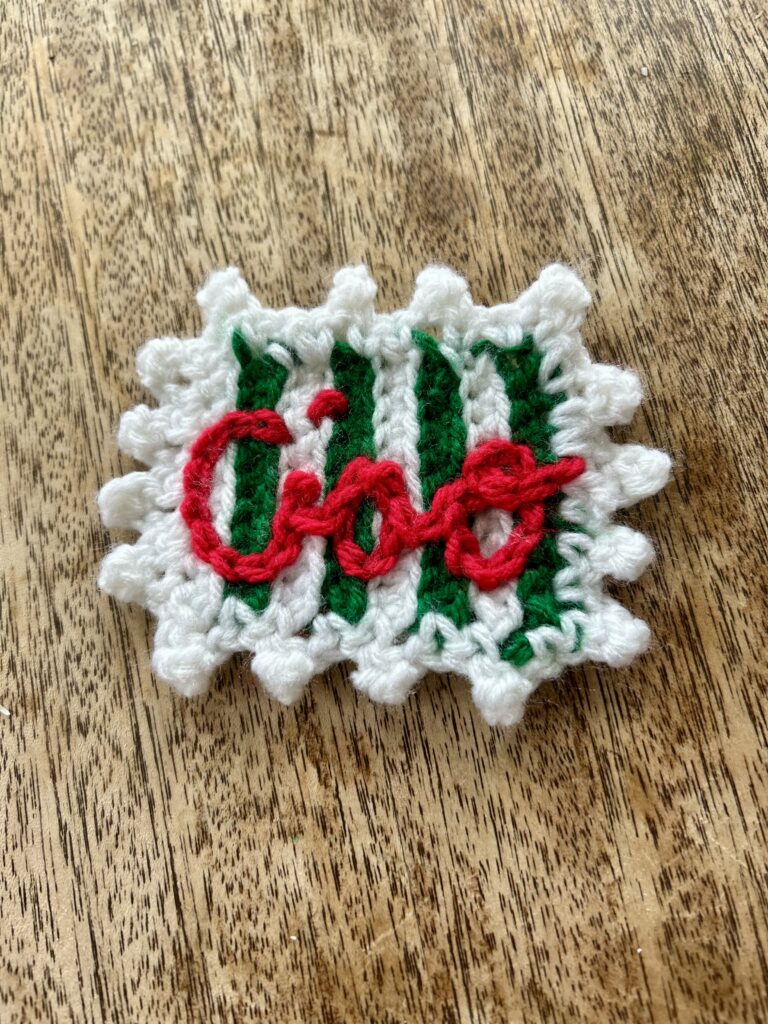
Embroidering Ciao on the Stamp:
Using Red yarn, pull up a loop at the left side, upper area of the stamp where you’d like the top of the C to be. Now we will SLST across the stamp to make the letters. This part took some practice for me and I did pull it out and change it a couple of times as I was getting the hang of it and deciding on the shape of the letters and spacing. You can do the letters individually or altogether in cursive. I did them in cursive to keep it simple. Keep practicing with it until you’re happy with how it looks. When you’re finished, fasten off and weave in the end.
Way to go! You did it! Now comes the fun part where you can style your bag charms to add a fun touch to outfits, bags, backpacks, and keychains. I’m so excited to see what you do with them.
Looking for your next project or more ideas to try? How about one of these?
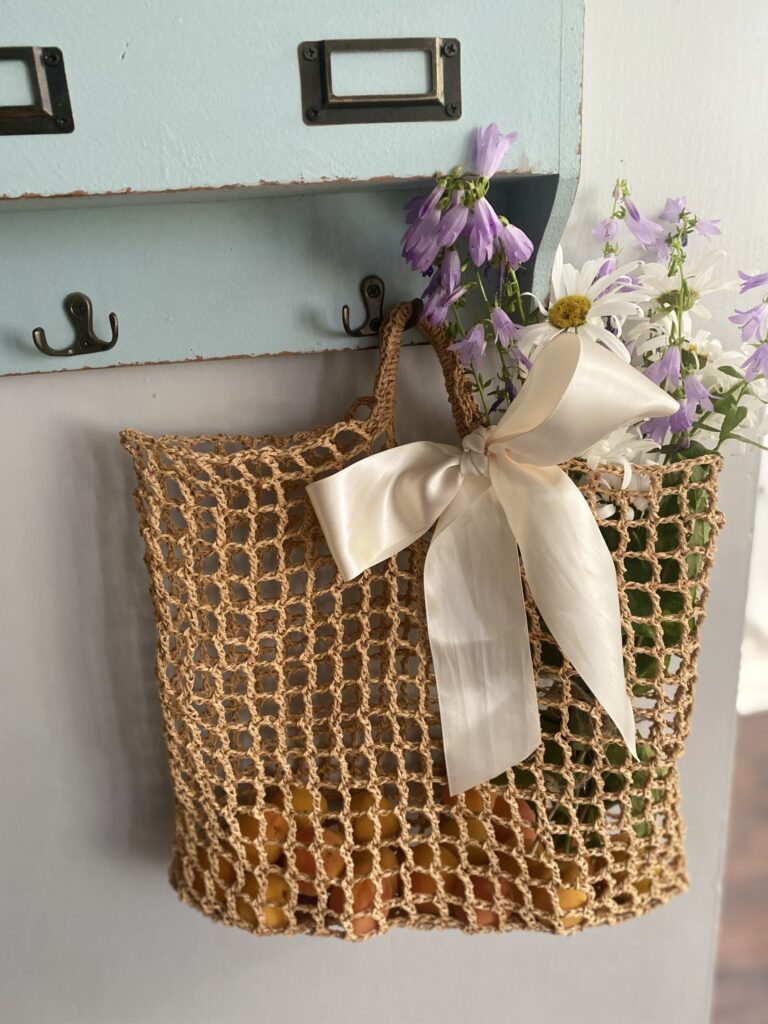
Fisherman’s Net Bag:
This beautiful and easy to make bag is the perfect beach or market bag and uses only two supplies. I love putting my new bag charms on it for a summery feel.
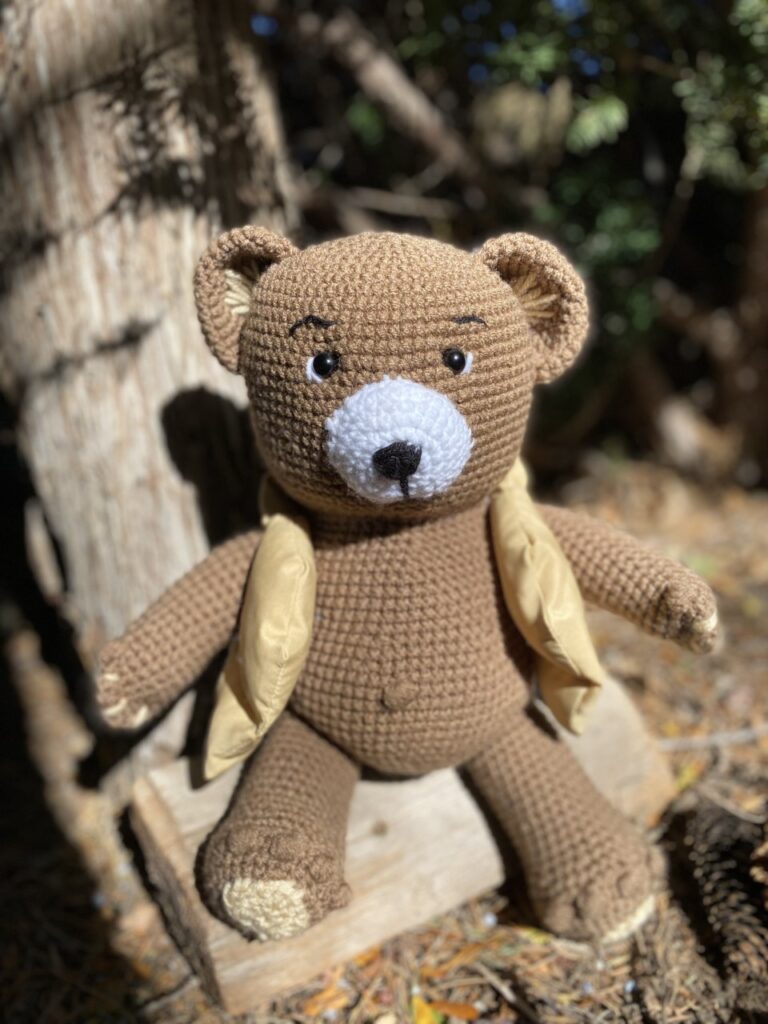
Hickory Bear:
Would you like to give Toy making a try? Hickory the Bear is a great project for building confidence in reading patterns.
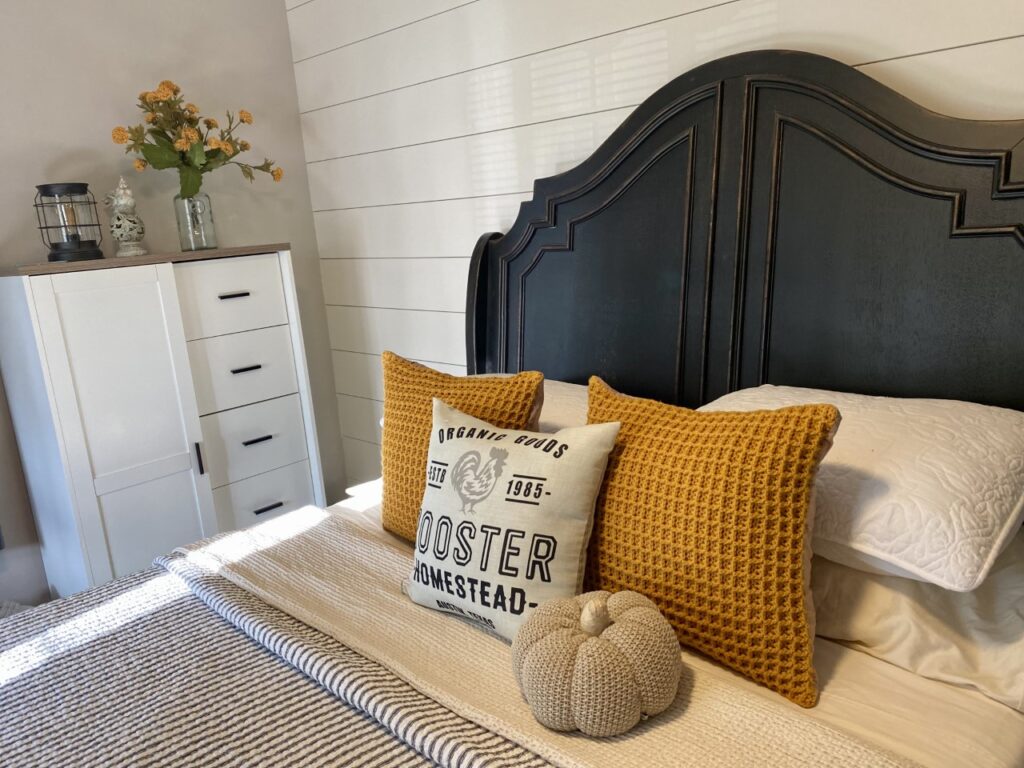
Waffle Stitch Throw Pillows:
Are you in the mood for a fun project where you can learn the Waffle Stitch and end up with beautiful throw pillows? This Waffle Stitch Pillow Pattern is a fusion of crochet and sewing and it’s the perfect way to cozy up a bed, couch, or accent chair.
Copyright
This pattern and its images are copyright protected and the sole property of Briarberryfarmhouse.com.
Please do not redistribute, transfer, or sell the pattern, or alter it to claim as your own. You may sell any products you create from this pattern. Please credit the designer by linking online listings to Briarberryfarmhouse.com or tagging @Briarberry. # Amalfi Summer Bag Charms.

Briarberry
My name is Abby Holmgren and I love to create and share ideas through crochet, sewing, fashion, cooking, and visual arts. Briarberry Farmhouse is where I share inspiration.